I was having a hard time configuring software RAID on one of my client’s servers. So, I decided to practice it and make a video so it would be helpful for me in the future, and I could also share my knowledge.
I am using a Proxmox VM for this knowledge base. I have added two hard disks to perform this action, and both of the disks have 40GB of capacity. In a real-world scenario, you might have two 256GB or even higher-capacity drives, but the method will remain the same.
I am specifically using Ubuntu 24.04 to perform this software RAID configuration.
Step 1: Start the Ubuntu Installation and Select Storage Layout
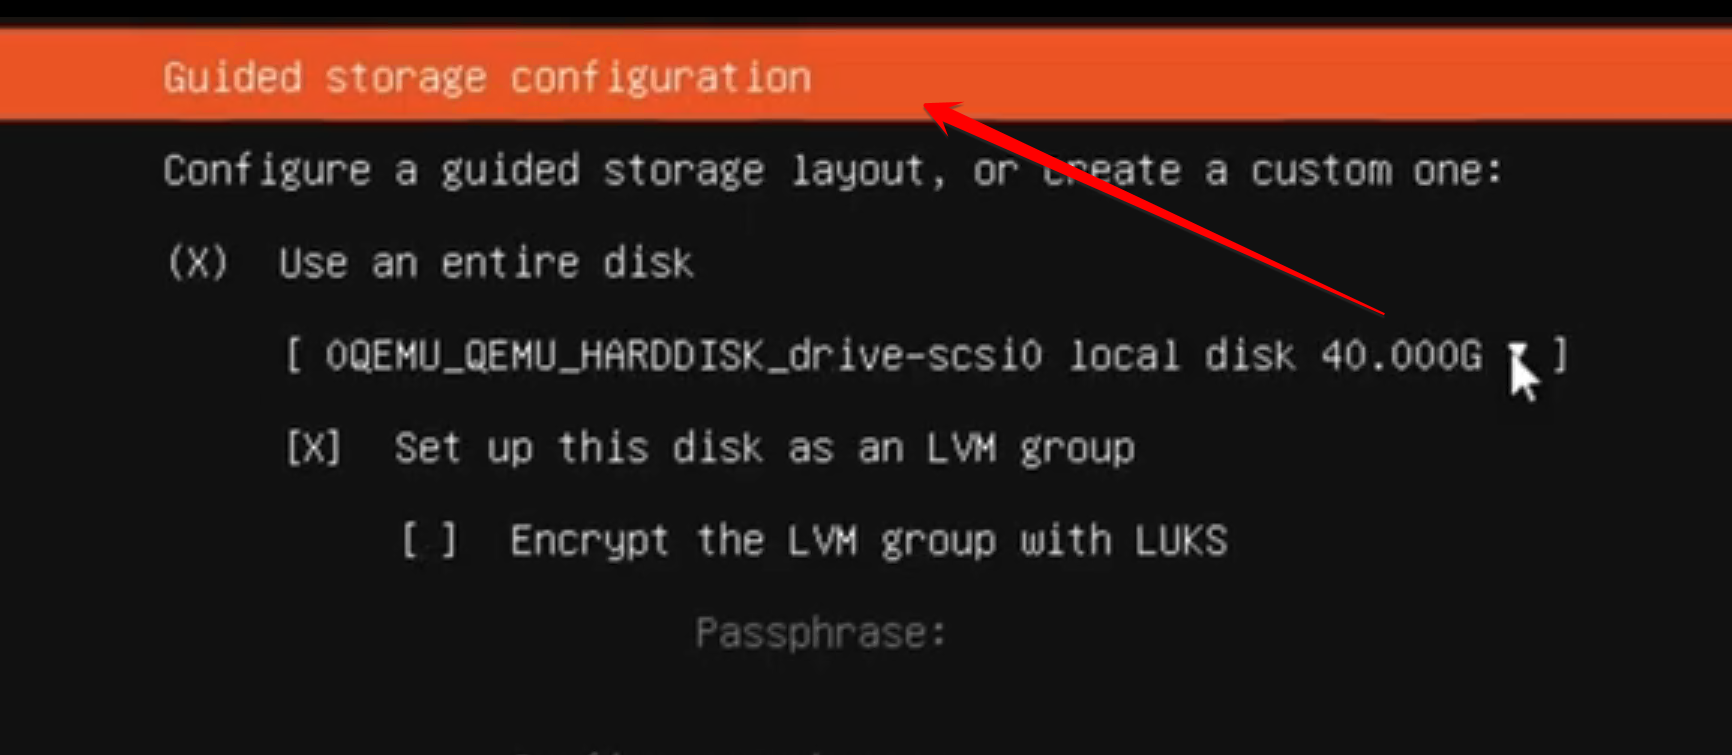
Perform the initial installation steps on the Ubuntu server.
When prompted for “Guided Storage Configuration”, select “Custom Storage Layout”.
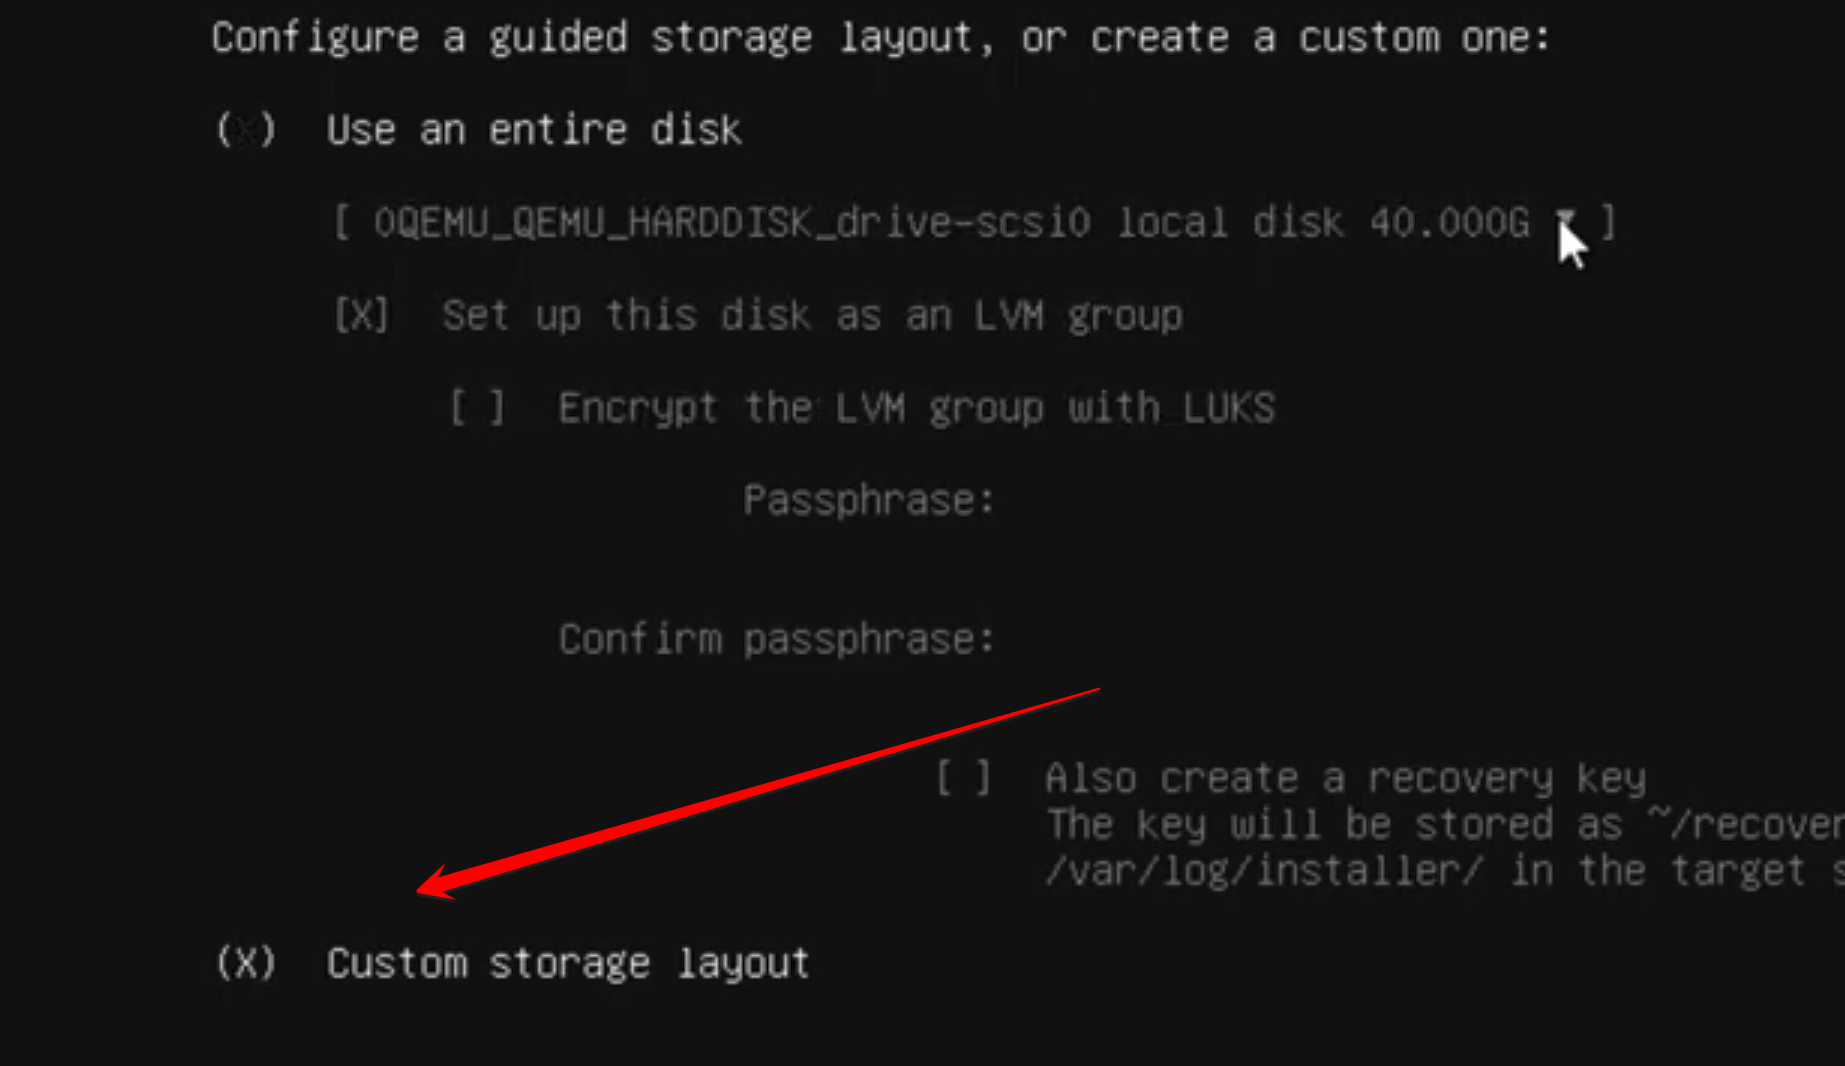
Step 2: Configure Boot Devices
Look for “Available Devices”—if you have two drives, they should appear in two different groups.

Hit Enter on the first disk (where it shows the disk brand name, usually the top one in the group) and select “Use as Boot”.

Repeat the same process for the second drive. It should say “Add as another Boot Device”.
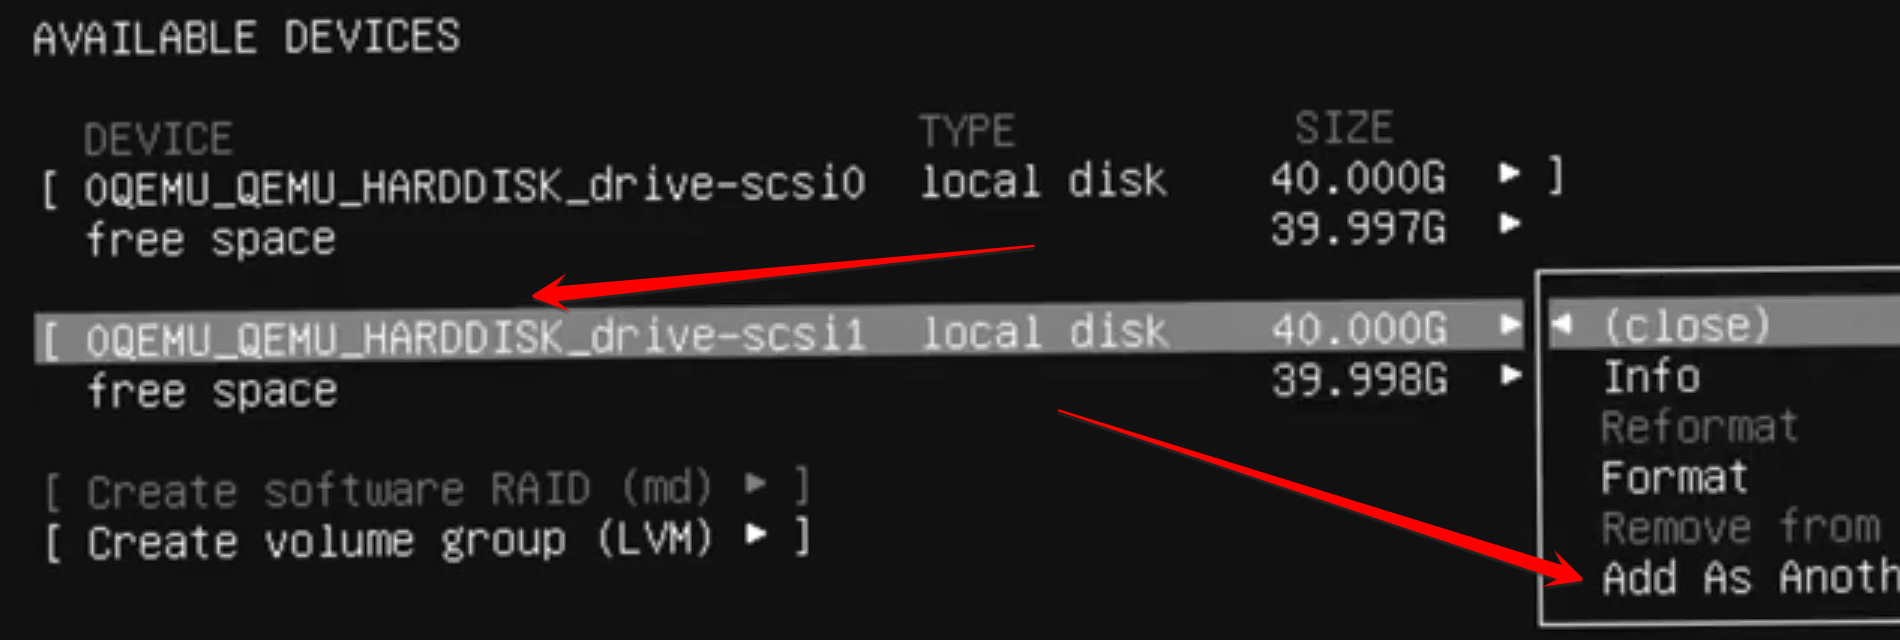
Now, both drives are configured to work as boot drives, meaning if one fails, the operating system can still boot.
Step 3: Create Partitions on Both Disks
Hit Enter on “free space” and select “Add GPT Partition”.

Size: Leave empty.
Format: Leave unformatted.
Hit Enter on “Create”.
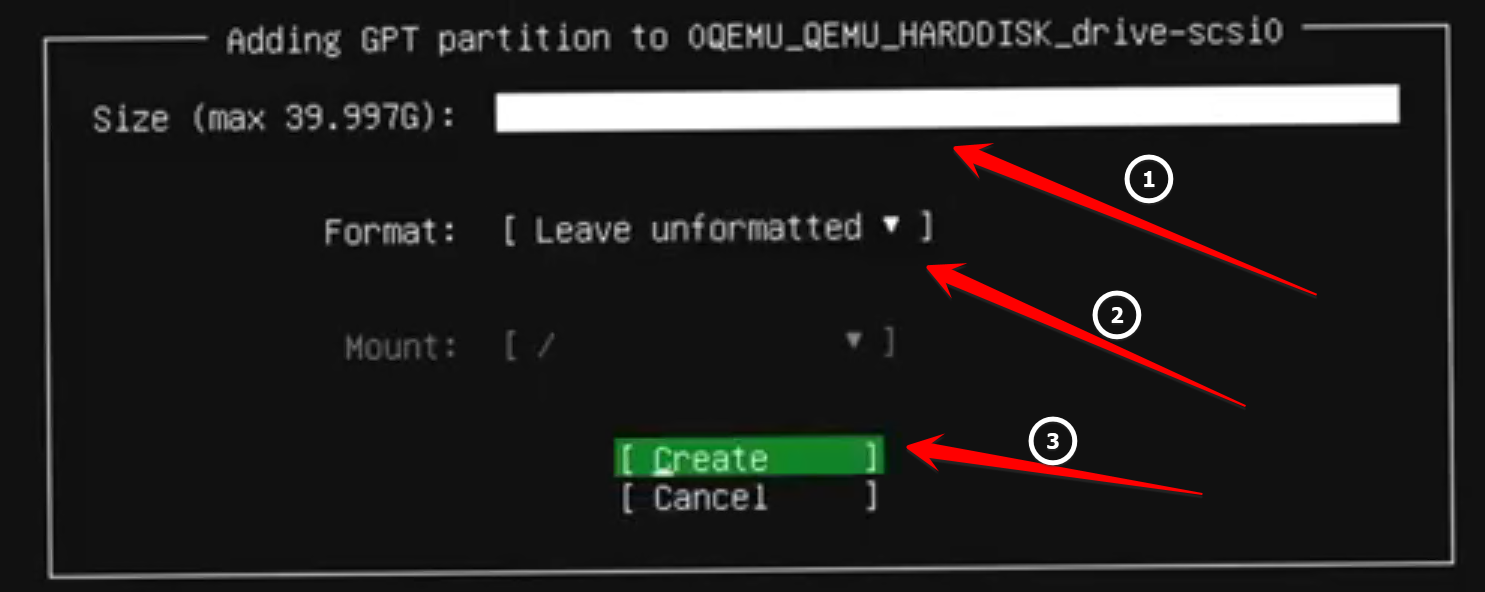
Repeat the process for the second drive’s “free space”.
After partitioning, it should display both drives correctly.
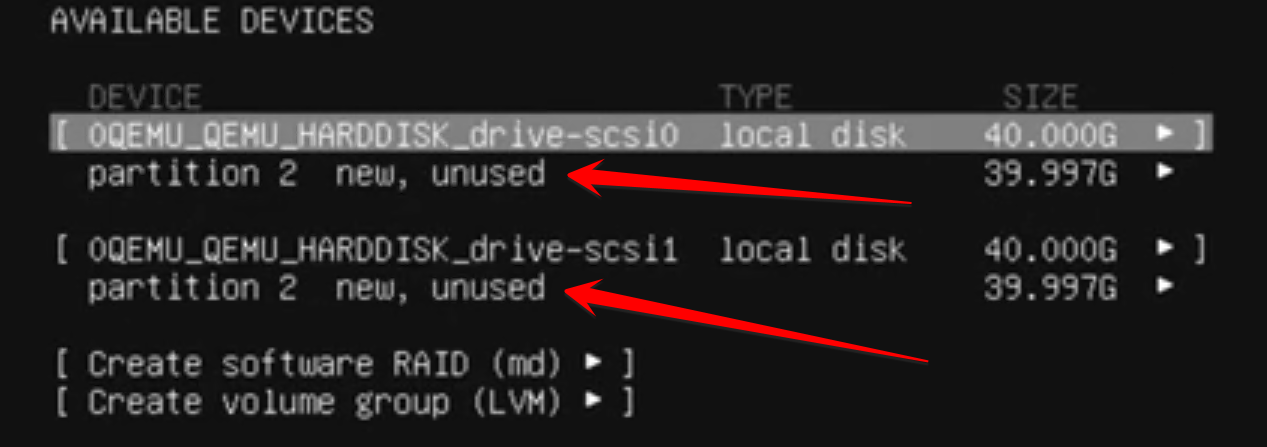
Step 4: Create Software RAID (md)
Select “Create software RAID (md)”.
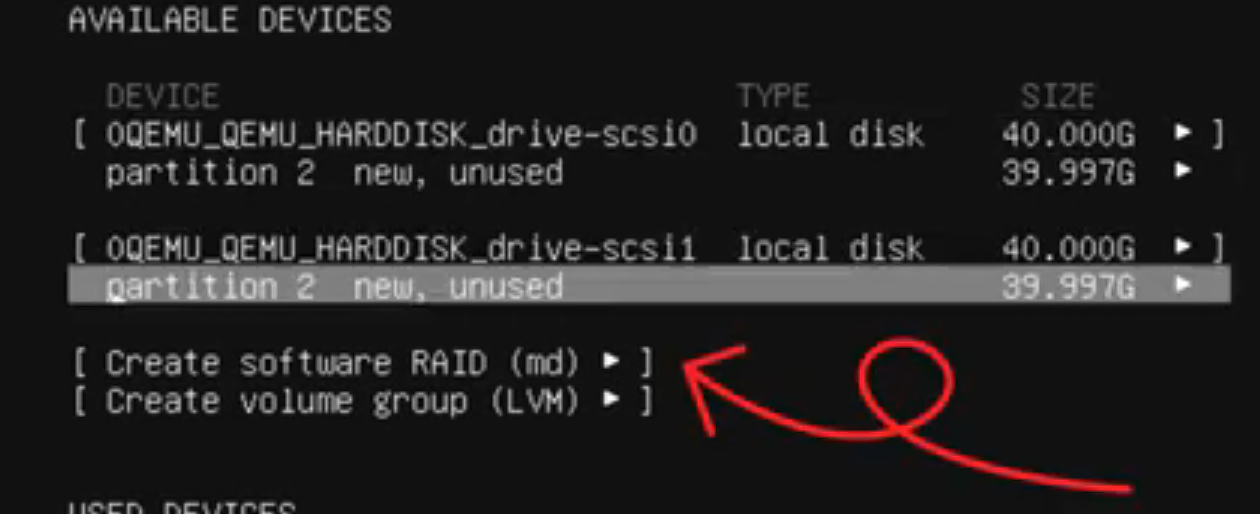
Name: Set it as md0 or choose a name of your preference.
RAID Level: Select 1 (Mirrored).
Devices: Select both partitions (they must have an active status).
Once both partitions are selected, the RAID partition size will appear at the bottom.
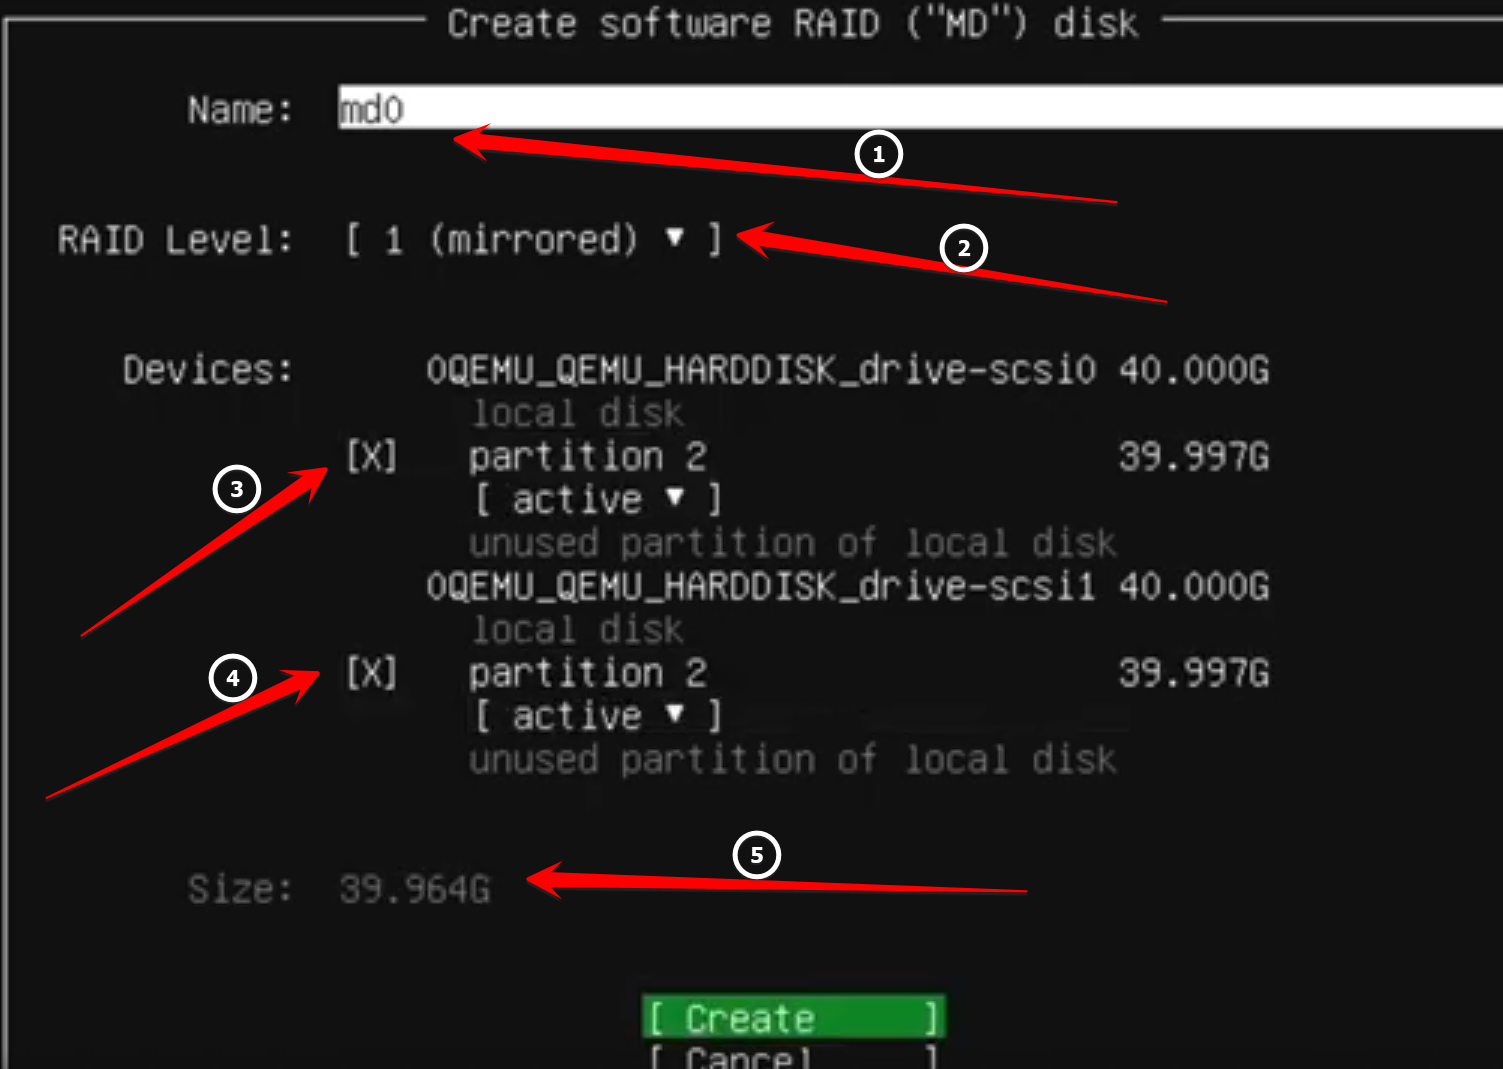
If the RAID is configured successfully, it should now appear under “Available Devices”.

Step 5: Mount the Root Filesystem
Hit Enter on “md0” and select “Format”.

Format: Choose ext4.
Mount: Set it as / (root filesystem).
Done.
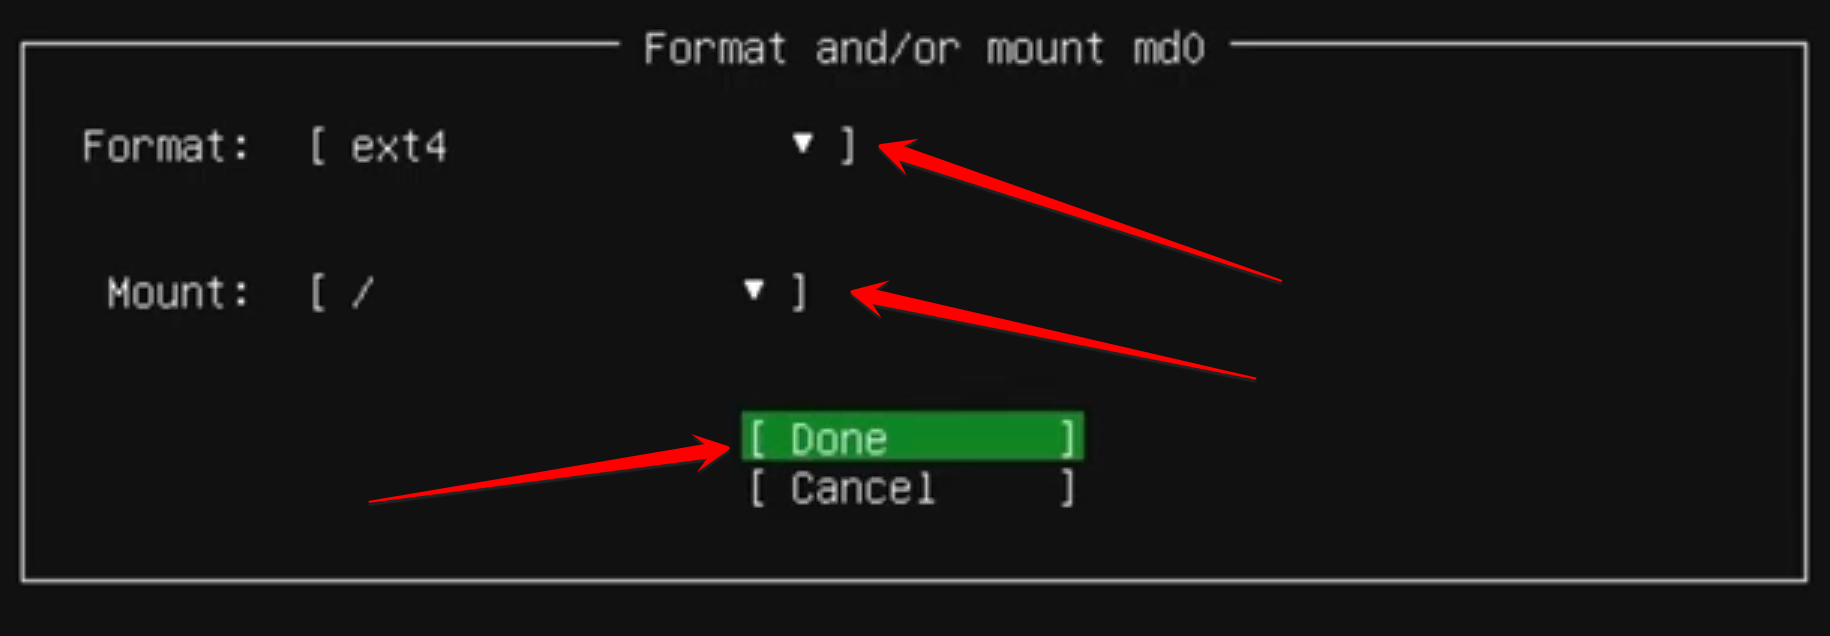
If you see the mount point with the device type as Software RAID, that means your configurations are successful.

You are now good to proceed with the installation ;).
By following these steps, you have successfully set up a software RAID on Ubuntu 24.04. This ensures redundancy, allowing your system to boot even if one of the drives fails. Thank you for stopping by 🙂
