Creating a separate Guest Wi-Fi network ensures your guests have internet access without disturbing your main office or LAN network. Crucially, it allows you to easily control the speed and access privileges of guest users.
Step 1: Create the Virtual Wireless Network (Virtual AP)
You will create a new virtual wireless interface that shares the physical wireless card (WLAN) but operates under a separate SSID.
-
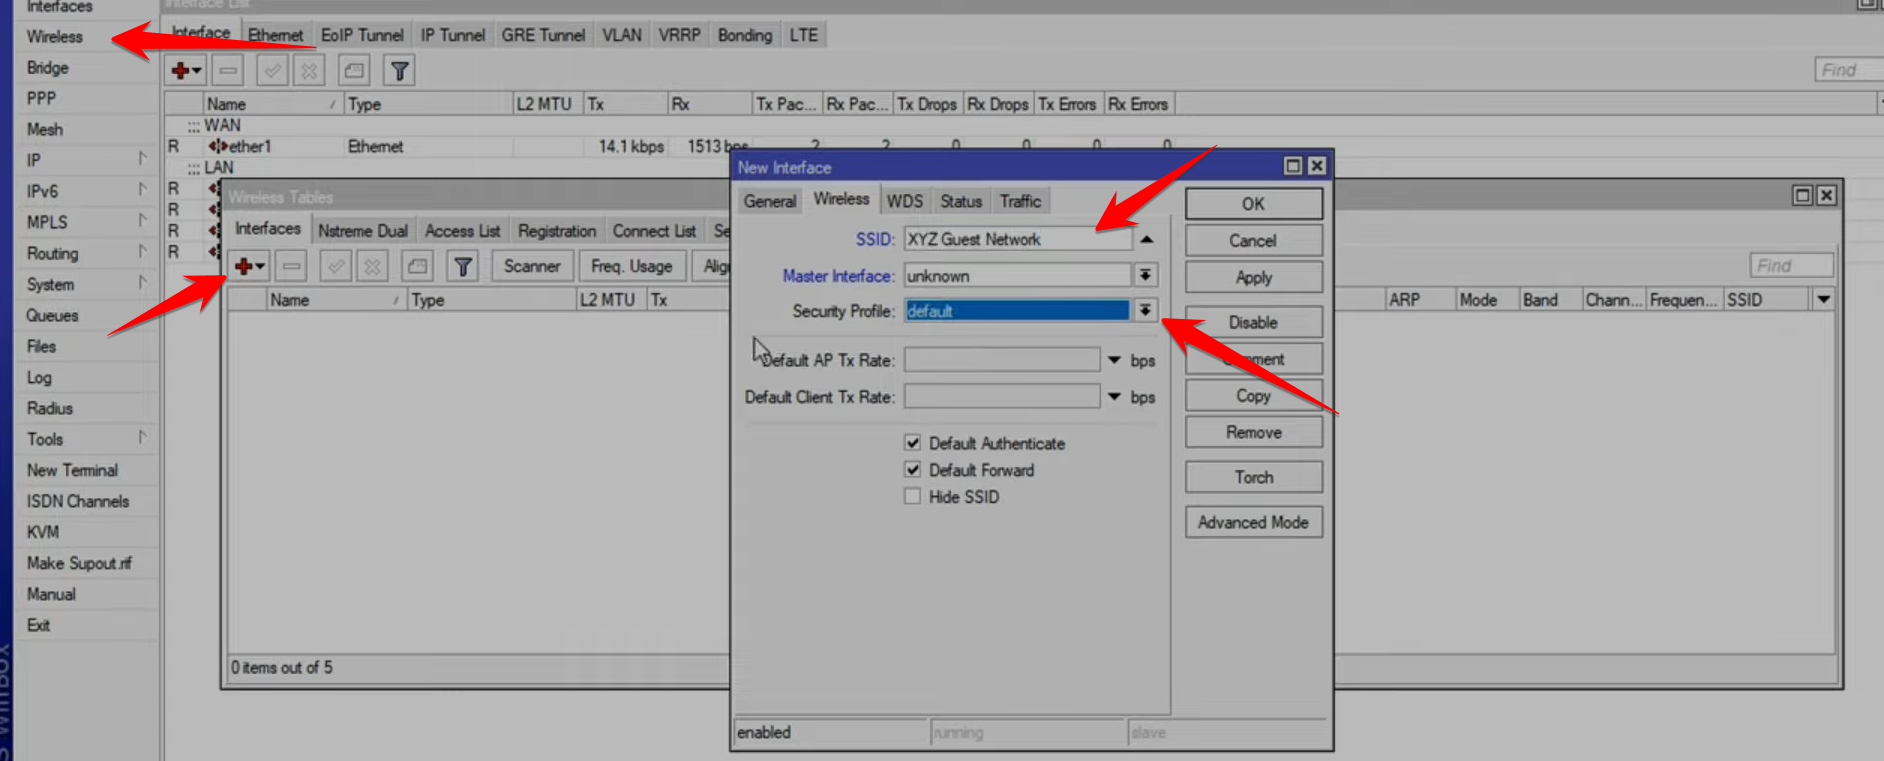
Go to Wireless and click the
+sign. -
Select Virtual AP (or
vAP). -
On the General tab, set the Name and the desired SSID (e.g.,
XYZ Guest Network). -
Set the Master Interface to your physical wireless interface (e.g.,
wlan1).
Configure Security Profile
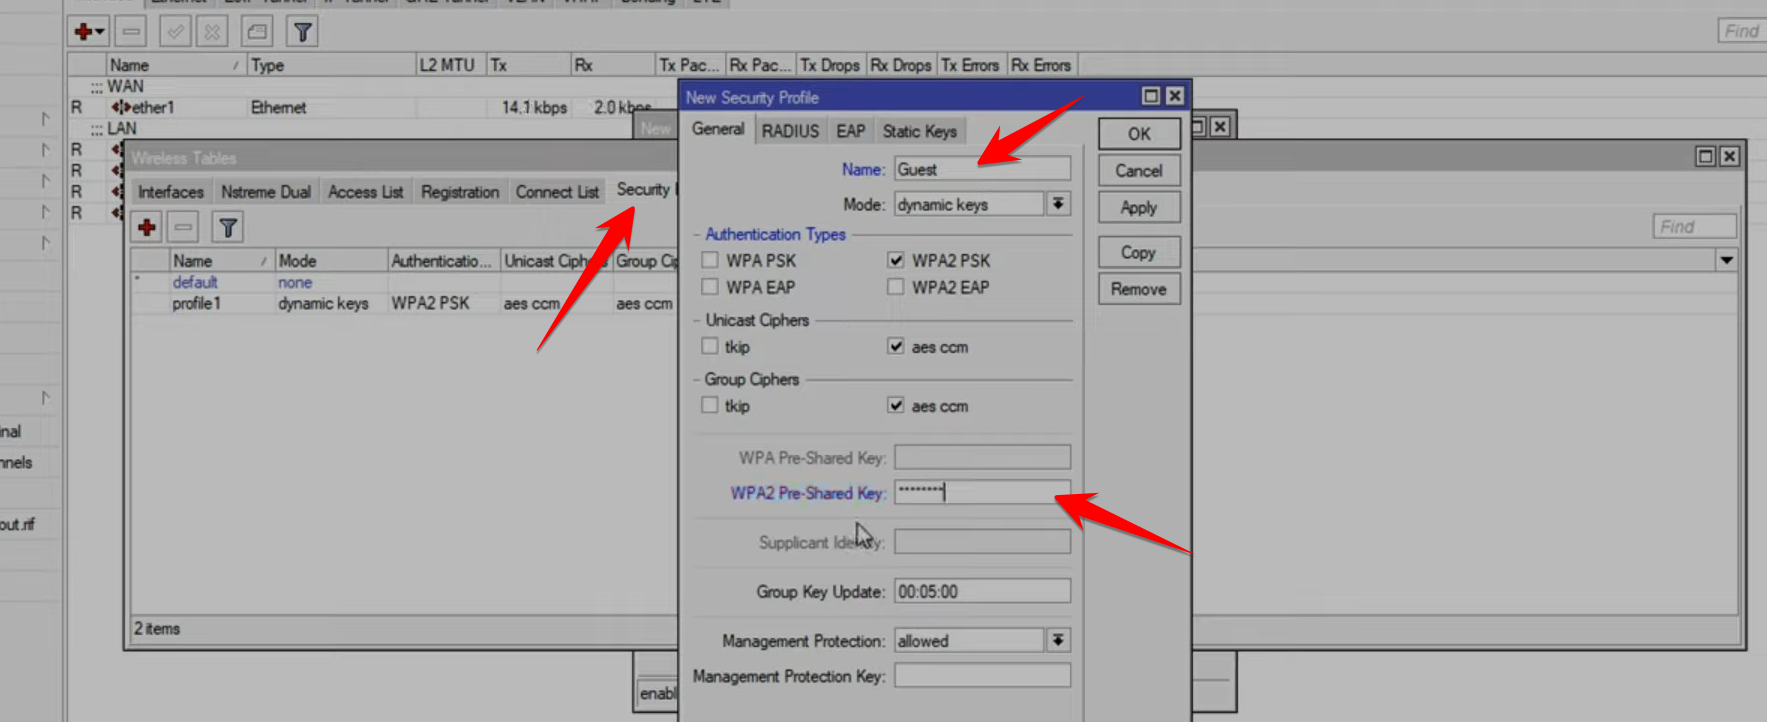
Before applying the Virtual AP, create a Security Profile for the guest network password.
-
Go to Wireless and select the Security Profiles tab.
-
Click
+to create a new profile (e.g.,guest). -
Set Mode to
dynamic keys, check WPA2 PSK, and enter your secure password.
Step 2: Assign IP Address and DHCP Server
The guest network must have its own unique IP subnet to separate it from your main LAN.
-
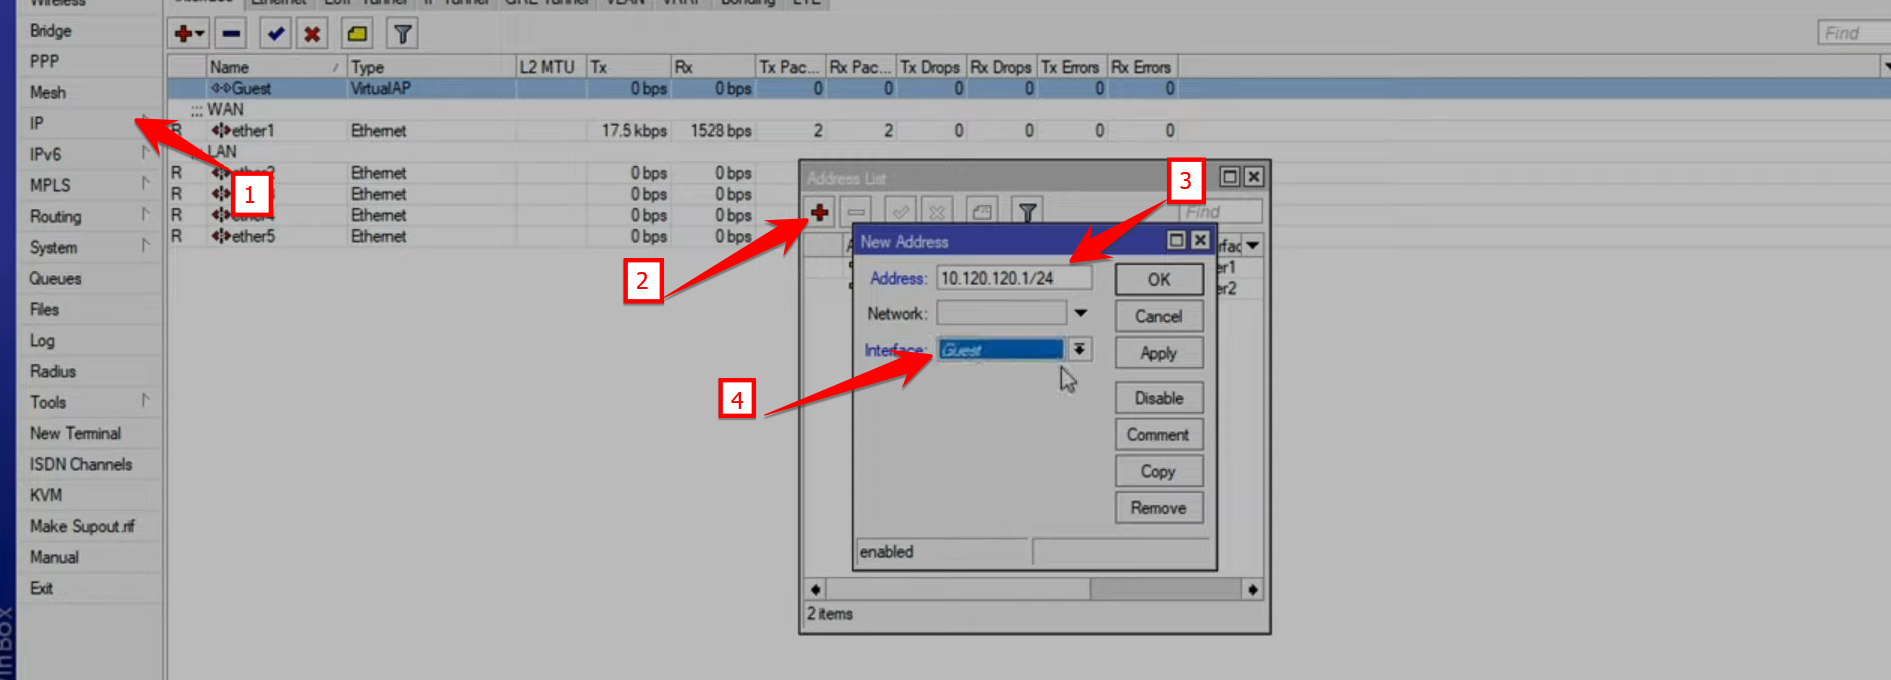
Assign IP Address: Go to IP > Addresses.
-
Add a new IP address (e.g.,
10.120.120.1/24) and assign it to the new Virtual AP Interface (guest).
-
-
-
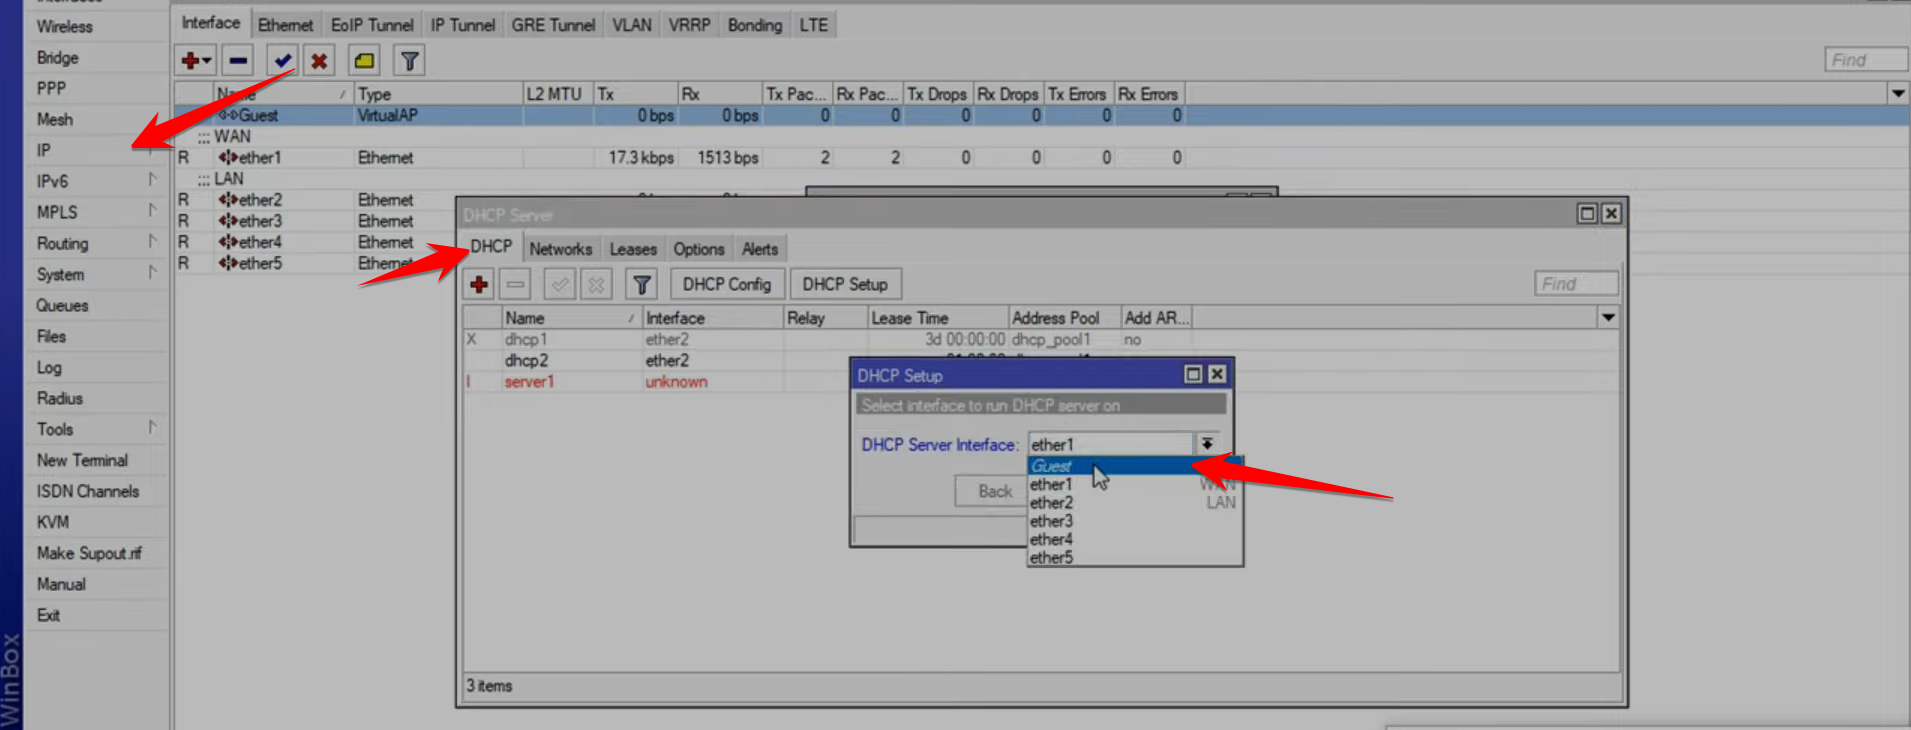
Use the DHCP Setup Wizard and select the Guest Interface (
guest). The wizard will automatically configure the address space, gateway, and pool.
-
Step 3: Enable Internet Access (NAT)
You need a Masquerade rule so that devices on the new guest subnet can access the internet via your router’s WAN link.
-
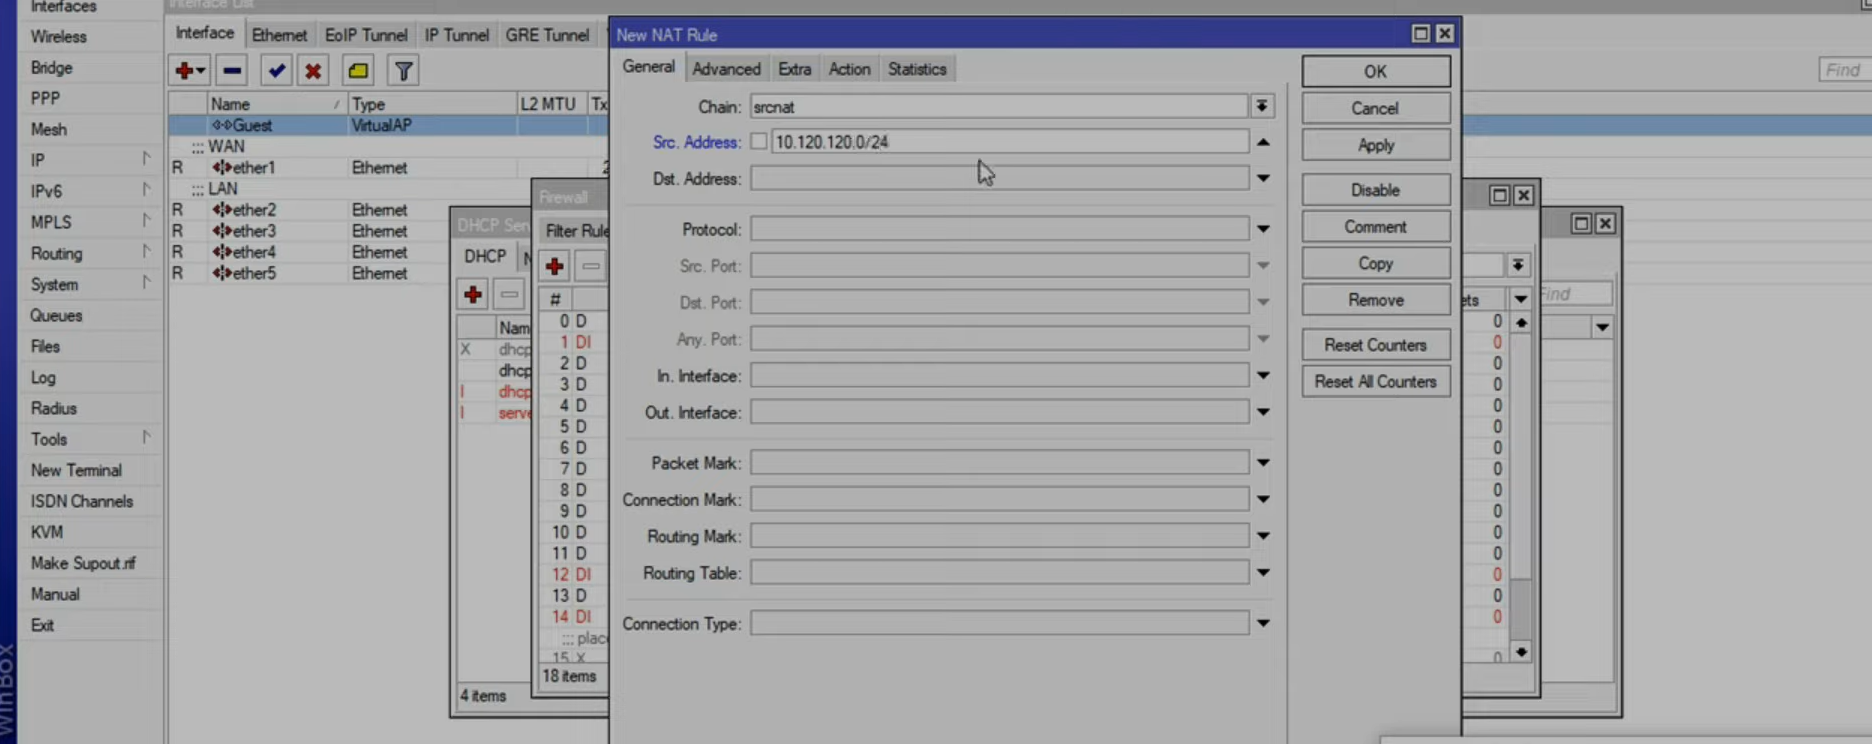
Go to IP > Firewall and select the NAT tab.
-
Click
+to add a new rule.-
Chain:
srcnat -
Src. Address: The entire guest subnet (e.g.,
10.120.120.0/24). -
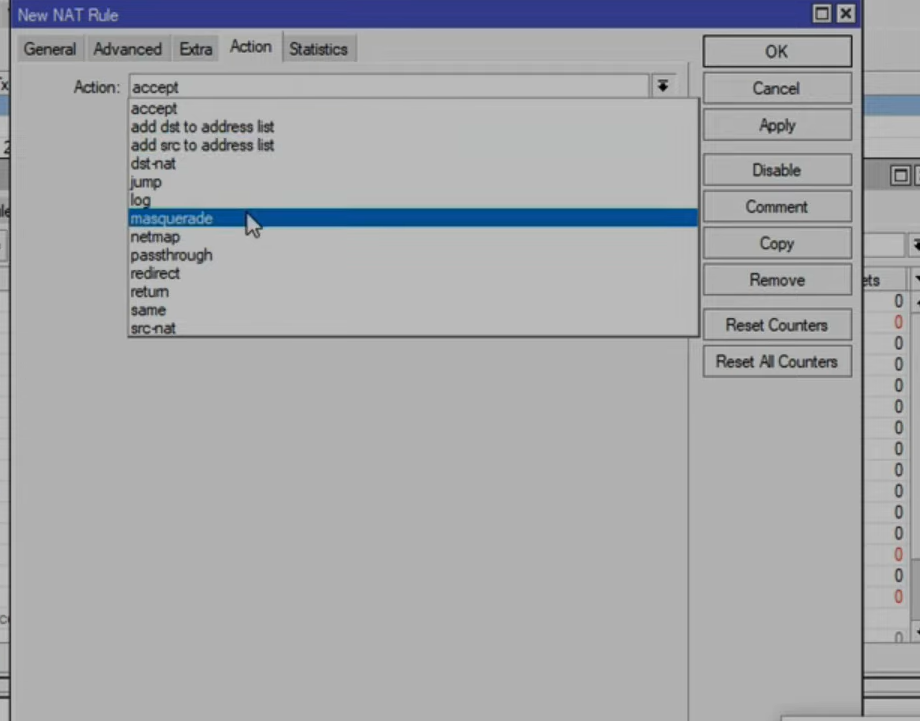
Action Tab: Action:
masquerade.
-
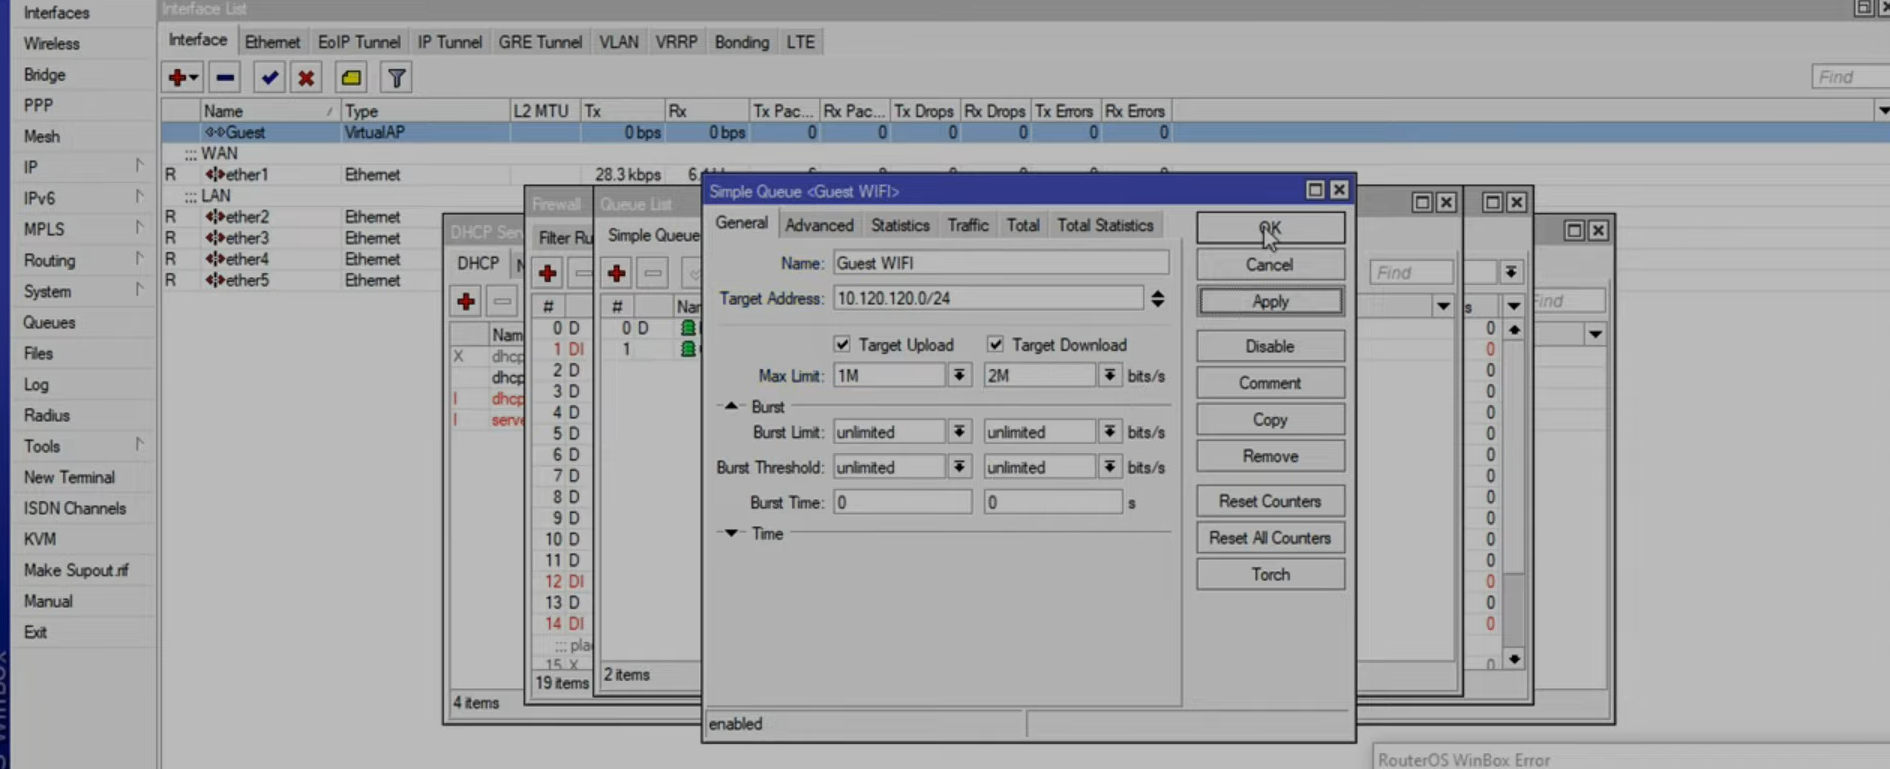
Step 4: Limit Guest Bandwidth (Simple Queue)
This final step prevents guests from consuming all your available bandwidth.
-
Go to Queues and select the Simple Queues tab.
-
Click
+to create a new queue. -
Name:
Guest-WiFi-Limit -
Target: Set the entire guest subnet (e.g.,
10.120.120.0/24). -
Max Limit: Set your desired bandwidth limits:
-
Target Upload Max Limit: e.g.,
1M(1 Megabit) -
Target Download Max Limit: e.g.,
2M(2 Megabits)
-