
how to integrate a Ubiquiti device (such as a NanoStation or AirMax device) with a MikroTik router using VLAN tagging to extend a VLAN-segmented network.
The process involves two main stages: configuring the VLAN on the MikroTik router and then configuring the corresponding VLAN and bridges on the Ubiquiti device.
1. MikroTik Router Configuration
First, you define the VLAN interface and assign an IP address on the MikroTik router.
-
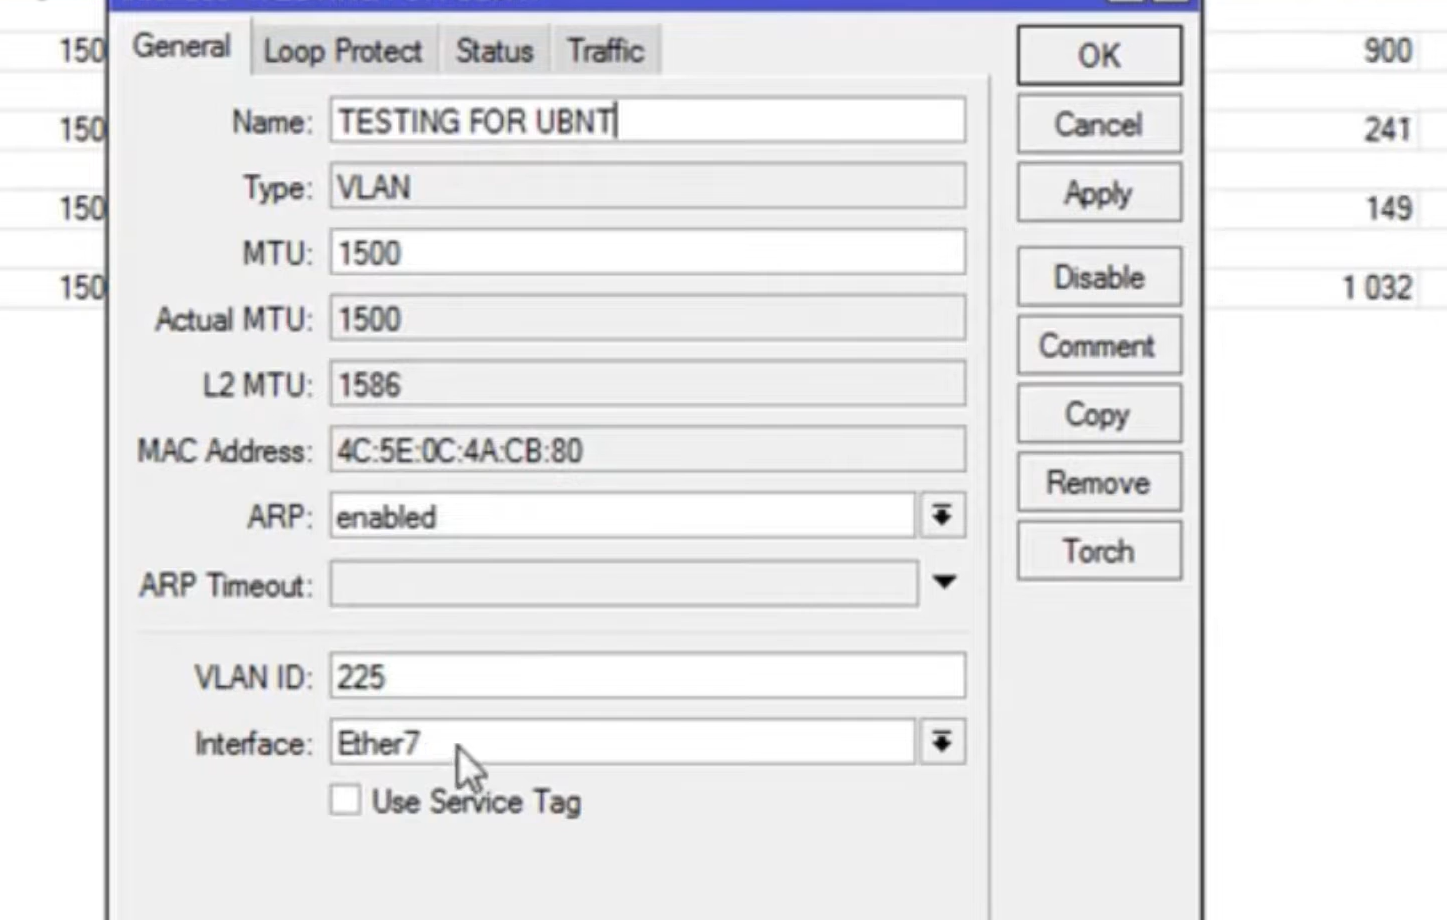
VLAN Interface: Create a new VLAN interface.
-
Name: e.g.,
testing-for-ubnt -
VLAN ID: Specify the ID (e.g., 225).
-
Interface: Select the physical port connected to the Ubiquiti device.
-
-
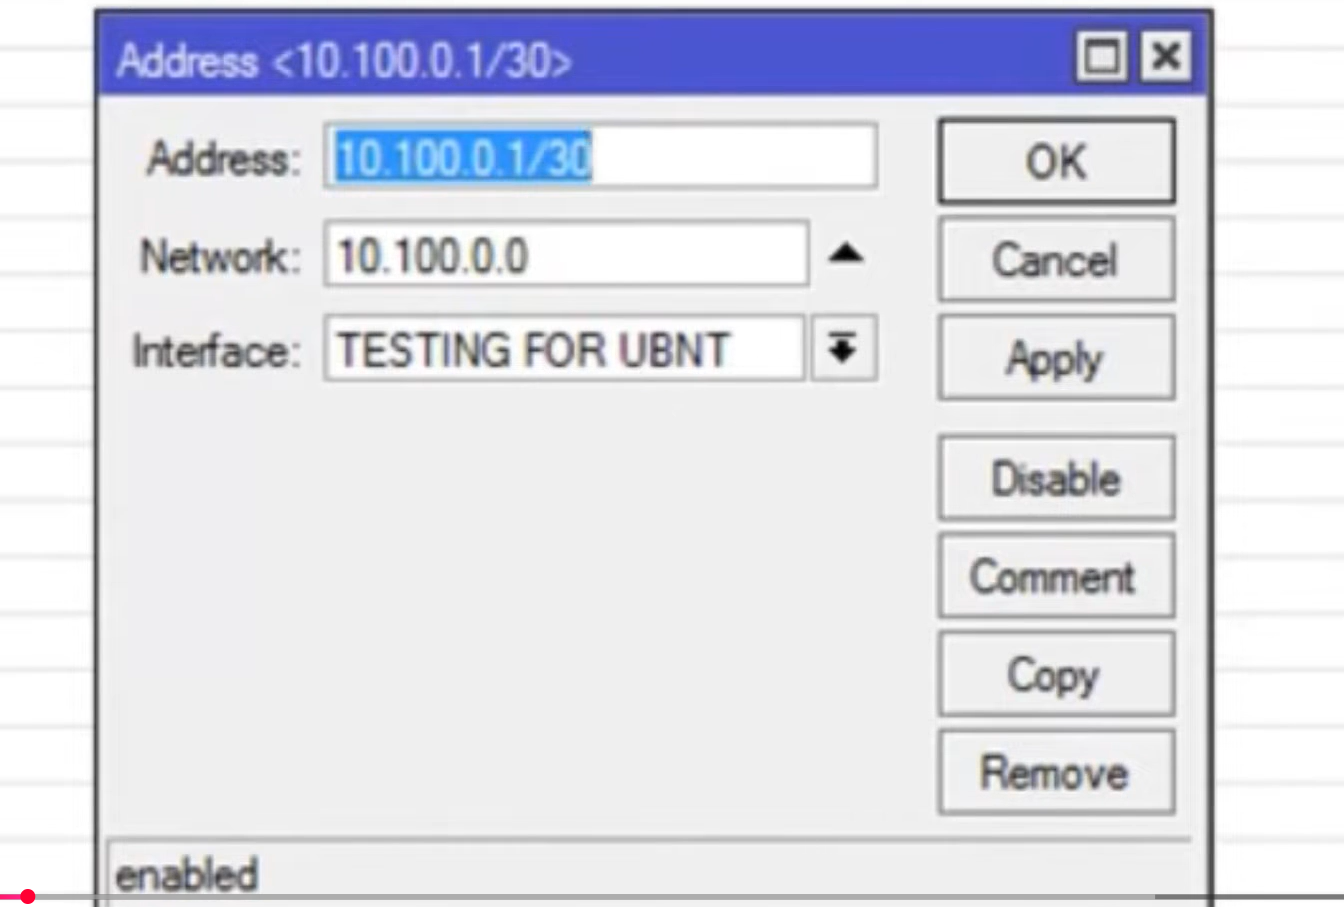
IP Address: Assign an IP address and network mask (e.g.,
10.100.0.1/30) to this newly created VLAN interface.
2. Ubiquiti Device Configuration
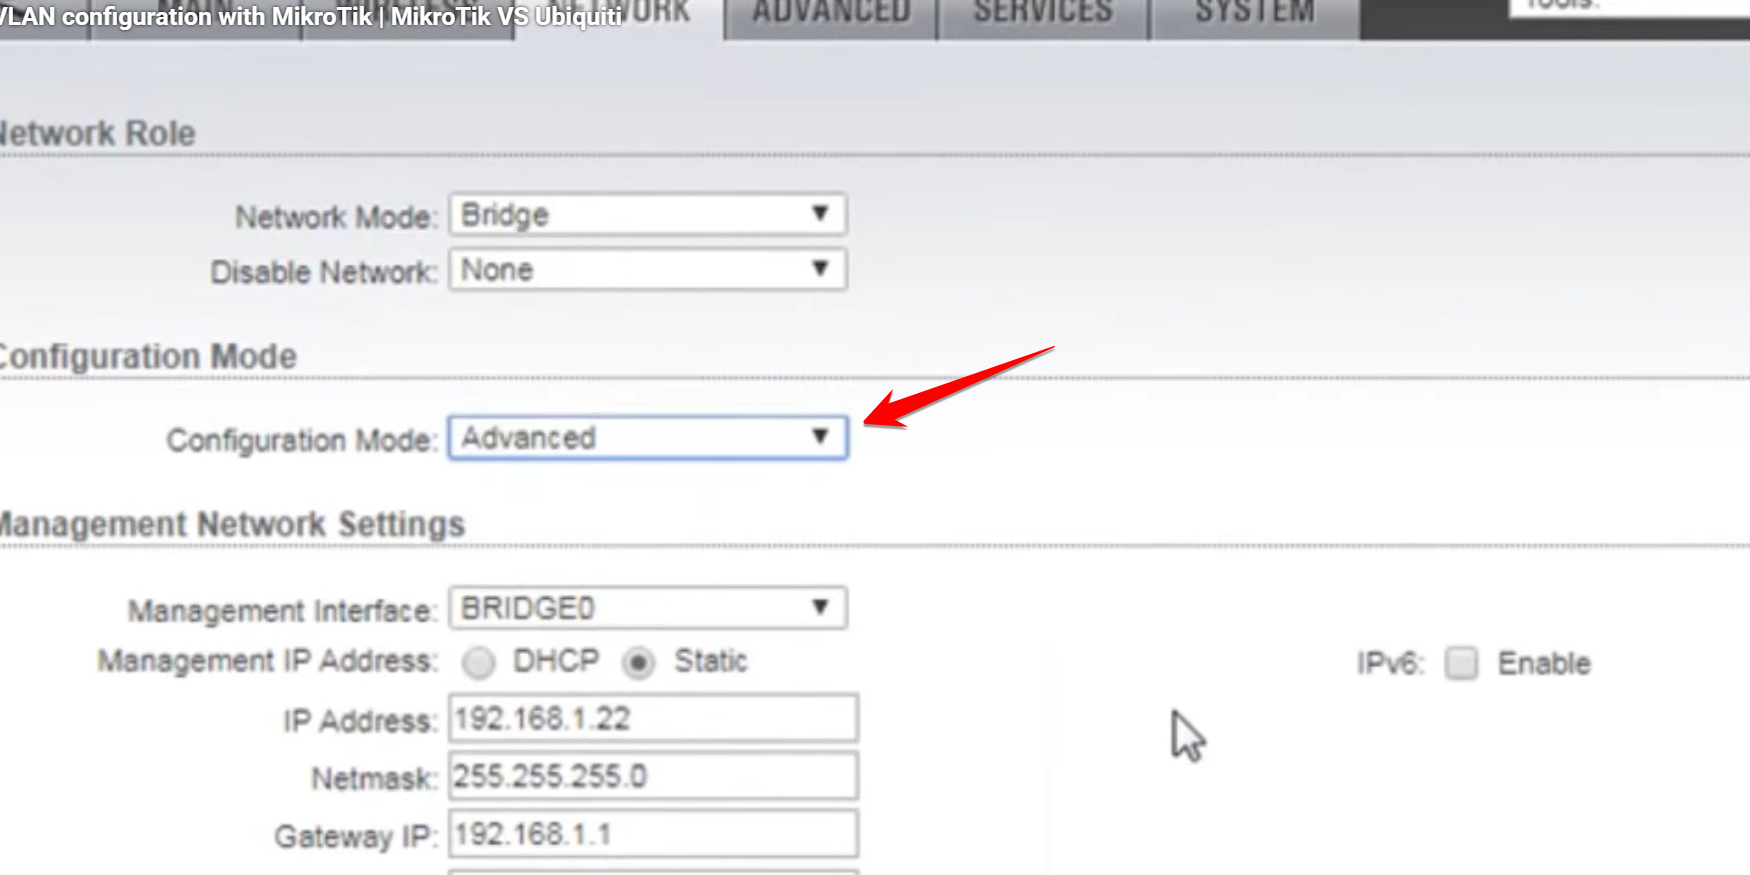
The Ubiquiti device acts as a Layer 2 bridge. Its configuration, found under the Network section, involves setting the configuration mode to Advanced and then configuring VLANs and bridges.
-
Change Configuration Mode:
-
Go to Network and switch the configuration mode to Advanced
-
-
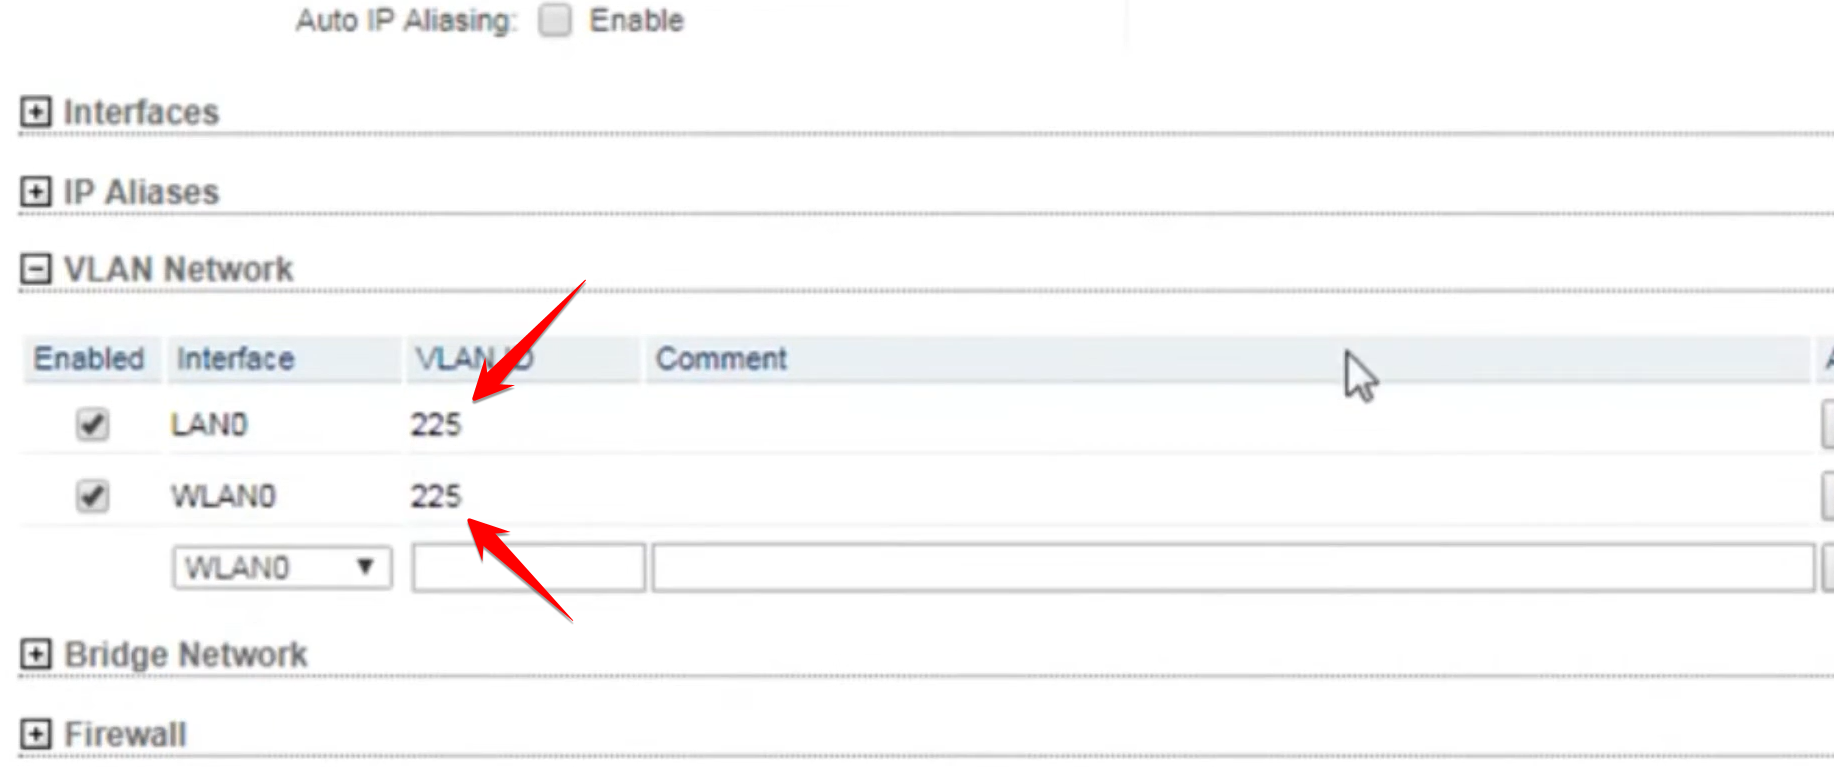
Configure VLAN Interfaces:
-
Under VLAN Network, set the required VLAN ID (e.g., 225) for both the LAN interface (the wired connection to the MikroTik) and the WLAN interface (the wireless link).
-
-
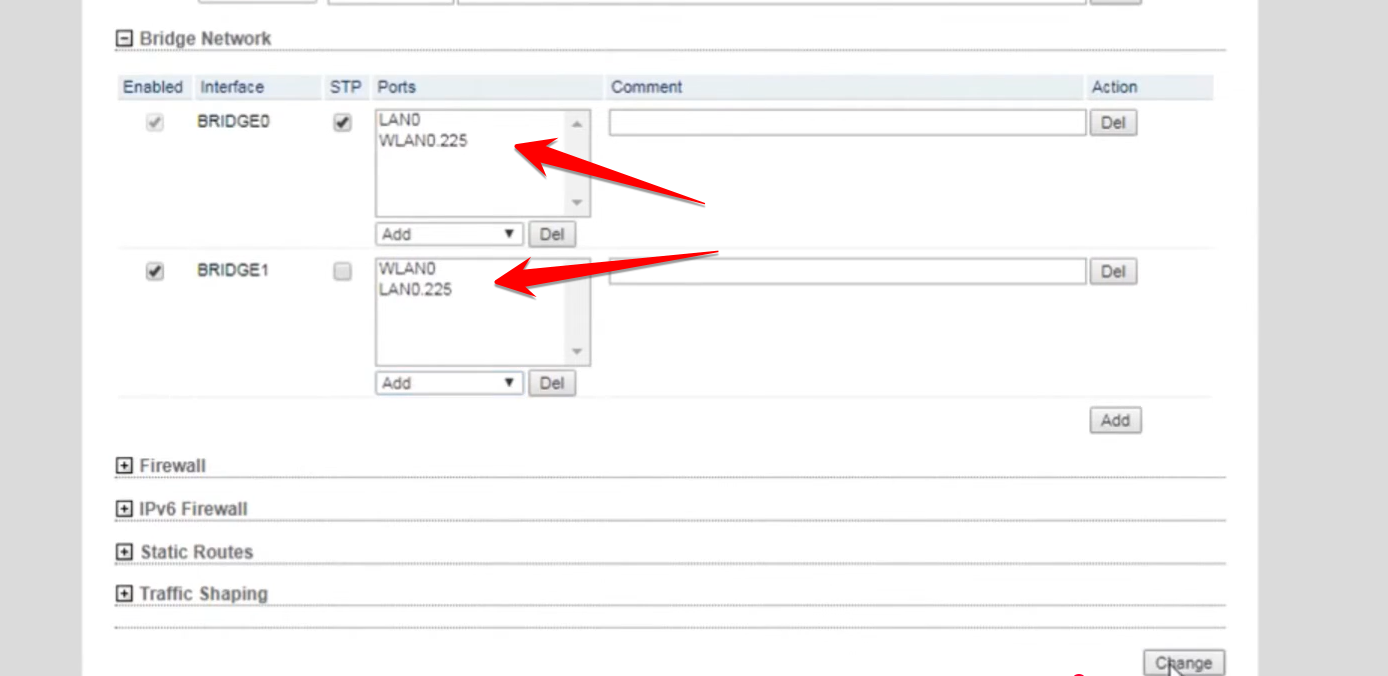
Create Bridges: You need two bridges to logically link the VLAN interfaces.
-
Bridge 0: Add the VLAN 225 interface (e.g.,
LAN 225) and the physical LAN 0 interface. -
Bridge 1: Add the VLAN 225 interface (e.g.,
LAN 225) and the WLAN 0 interface. (Note: The video’s setup for the second bridge is highly specific to the Ubiquiti firmware’s bridging logic.) [01:55 – 02:15]
-
-
Apply Settings: Click the Change button and then Apply the settings
After the configuration is applied, the Ubiquiti device correctly tags the traffic, allowing devices connected to the extended LAN to communicate with the MikroTik router’s VLAN gateway


