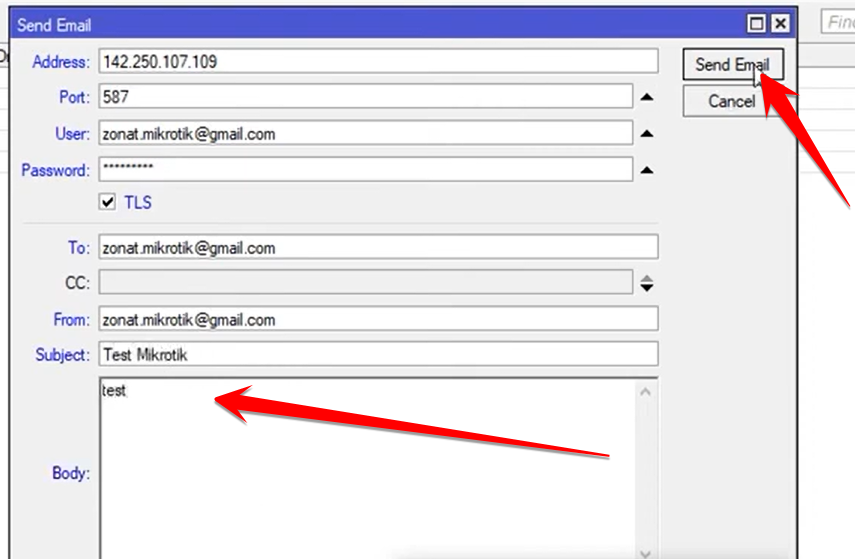
Setting up your MikroTik to send system alerts, reports, or backup files requires configuring the built-in email tool with Google’s SMTP settings. The configuration shown in this video involves using the Gmail SMTP server’s IP address and the secure TLS protocol on port 587.
1. Get the Gmail SMTP Server IP Address
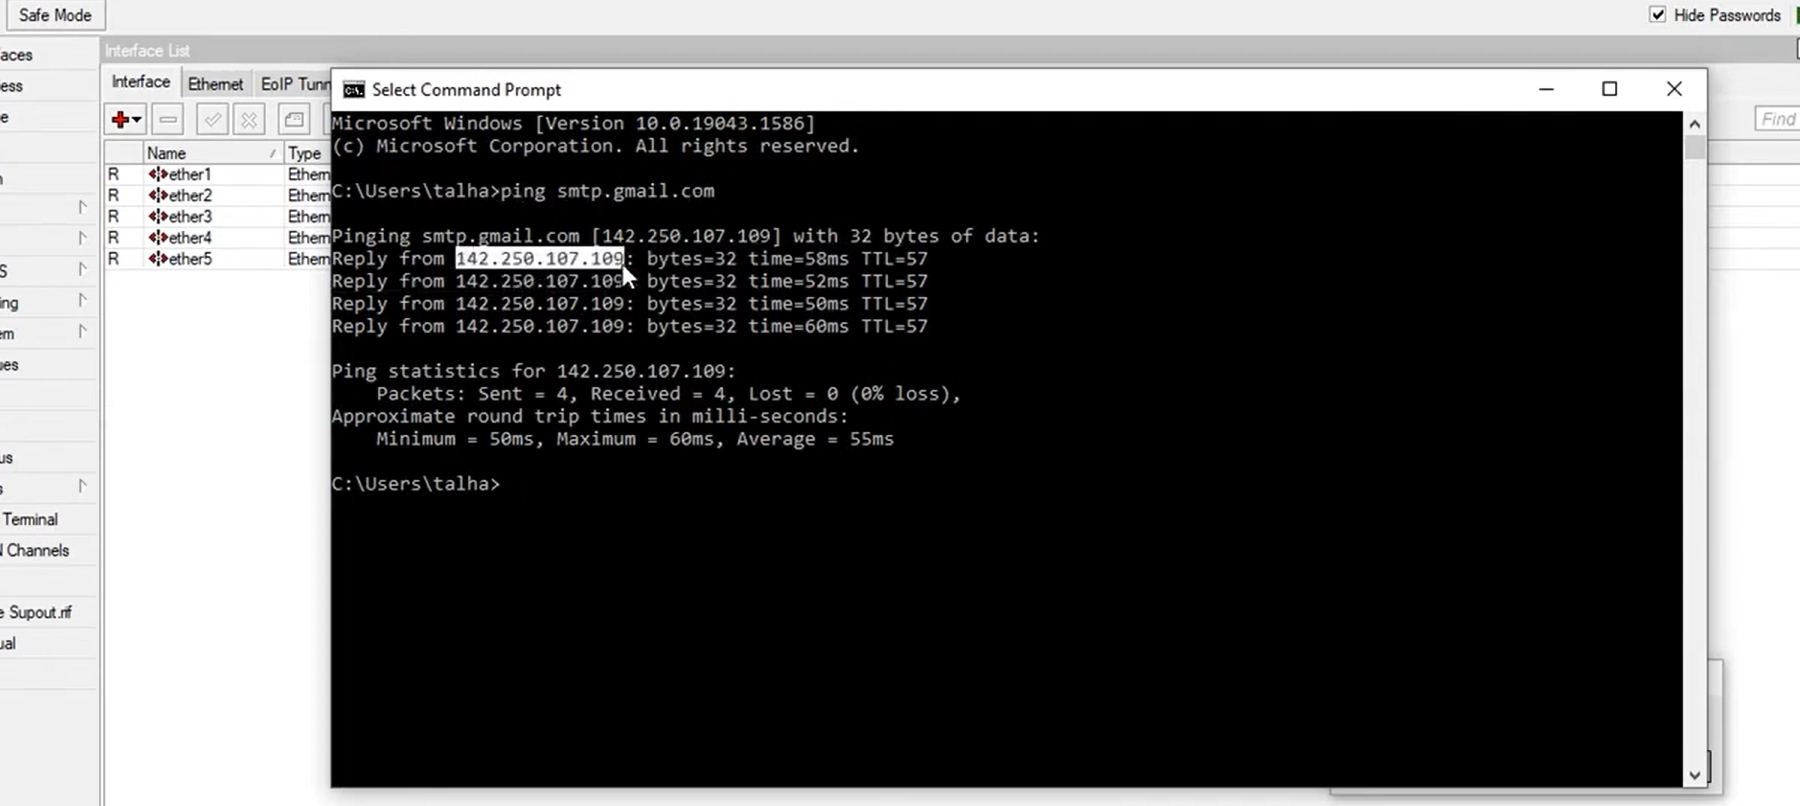
MikroTik’s email tool (at the time of the video’s creation) may require the numerical IP address instead of the domain name (smtp.gmail.com). You must use your computer’s command prompt (CMD) to find this IP.
-
Open your command prompt (CMD or Terminal).
-
Run the command:
ping smtp.gmail.com -
Note the IP address returned (e.g.,
142.250.27.108).
2. Configure the Email Tool in WinBox
You will configure the SMTP server settings under the Tools menu. Note: Google requires an App Password for external devices like MikroTik. Ensure you use this 16-character App Password, not your main Gmail password.
-
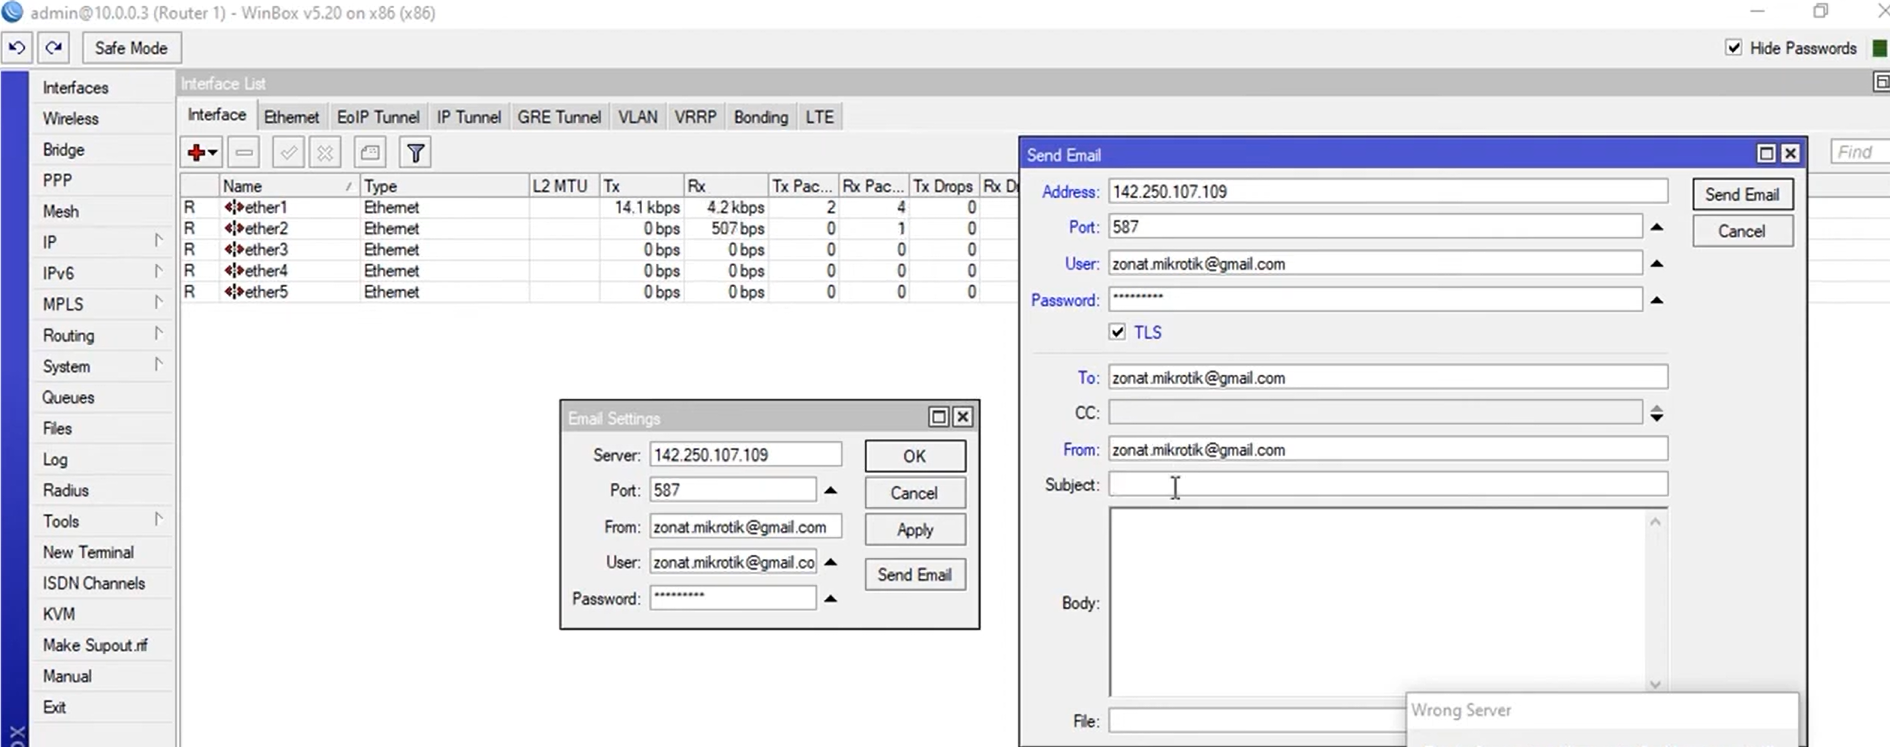
Open WinBox and navigate to Tools > Email.
-
Set the following parameters:
-
Address: Enter the IP address you found in Step 1 (e.g.,
142.250.27.108). -
Port: Set to
587. -
Start TLS: Check this box (or set to
yes). -
From: Enter your full Gmail address (e.g.,
[email protected]). -
User: Enter your full Gmail address again.
-
Password: Enter your 16-character App Password.
-
-
Click Apply and OK.
3. Send a Test Email
To confirm the configuration is working, send a test message from the same window.
-
In the Tools > Email window, click the Send Email button.
-
In the new dialog, fill out the following (you can copy your settings from the main window):
-
To: Enter the recipient’s email address.
-
Subject: Enter a subject (e.g.,
Test MikroTik). -
Body: Enter a brief message.
-
-
Click Send.