VMware Workstation works well as a tool for handling multiple operating systems all at once. This guide goes over the two main tasks that people usually handle. Those tasks include bringing in an existing virtual machine and setting up a completely new custom one.
Step 01
Opening an Existing Virtual Machine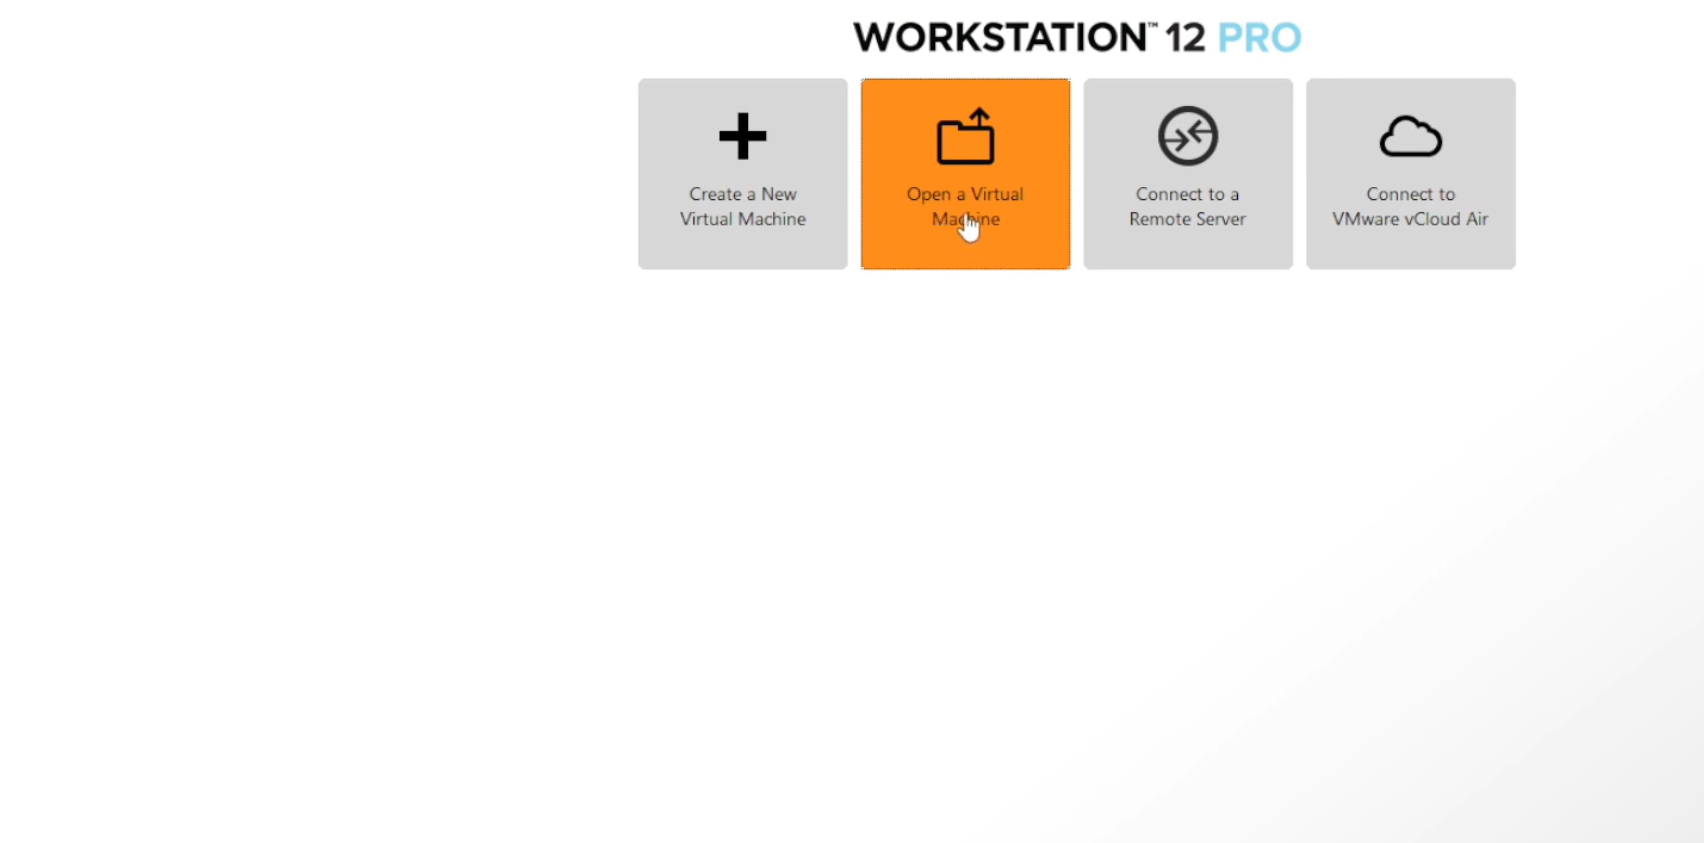
You can add VM files to your Workstation setup if they sit on your computer already. That might come from a backup or something you downloaded. It is pretty straightforward to get them into the inventory.
Click “Open a Virtual Machine”. You find that option right in the main VMware Workstation interface. It lets you load an existing VM. This takes about thirty seconds or so.
Locate the File. Go to the folder holding your VM. Pick out the configuration file for it. That file usually ends with a .vmx extension.
Choose Import Type. The VM loads up after that. If you turn it on, VMware asks whether you “Moved” the VM or “Copied” it.
Select “I moved it” in cases where the VM opens on a new machine or spot for the first time.
Select “I copied it” when you made a duplicate of the VM right on the same host computer. That happens around one minute and fourteen seconds into the process.
Step 02:
Creating a New Virtual Machine (Typical vs. Custom)
You have options when making a VM. Pick between a fast Typical setup or a more detailed Custom one. Beginners do best with the Typical setup most of the time.
Start the Wizard. Just click “Create a New Virtual Machine”.
Select Setup Type. Go with “Typical (recommended)” if you want a quicker way to install everything.
Installer Source. You pick from a few options here.
Installer disk image file (iso). Use this one if the installation file stays saved on your local drive.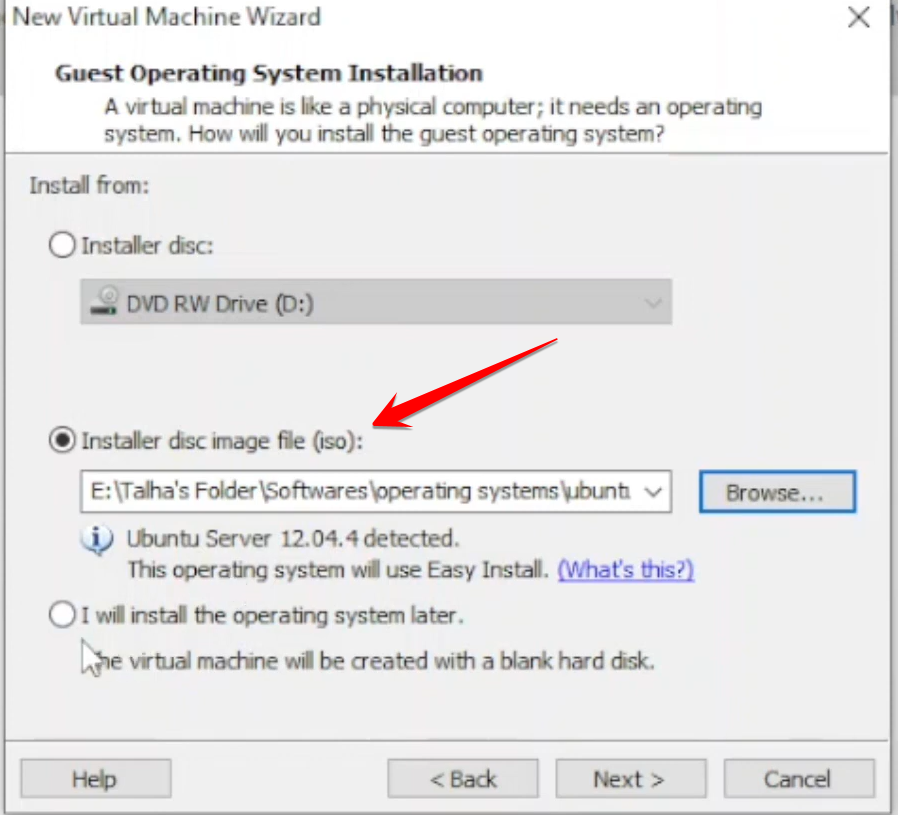
Installer disc. Go for this if a physical CD or DVD sits in your optical drive.
I will install the operating system later. Choose this to set up the hardware first.
Guest OS Type. Pick the kind of operating system you intend to install. That could be Windows or Linux or even VMware ESXi. Then select the exact version for it.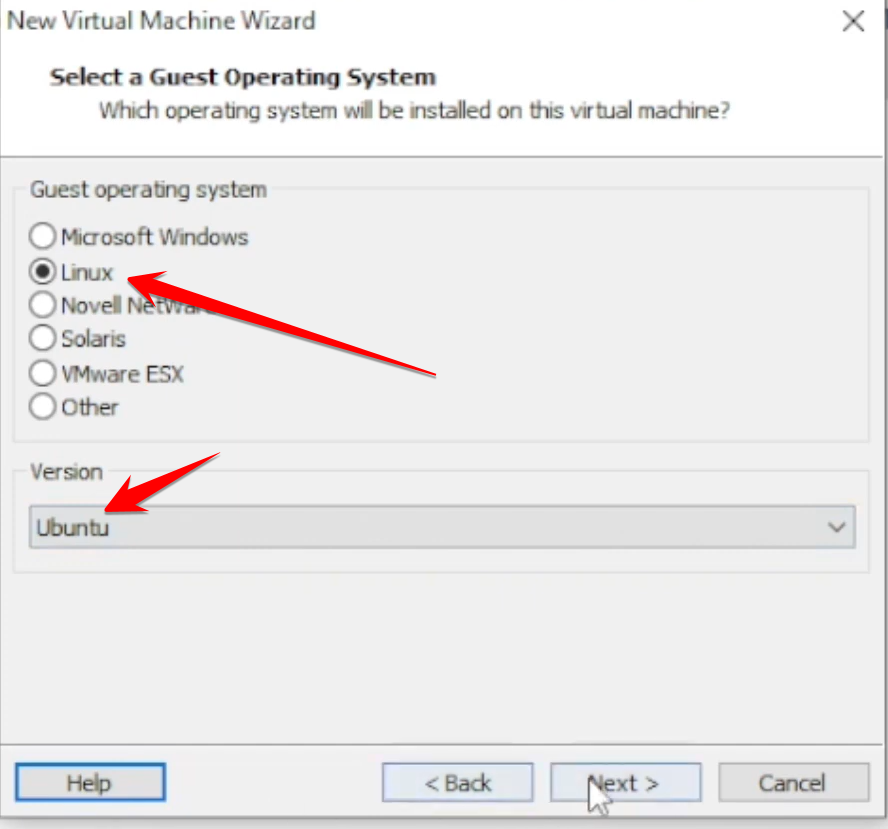
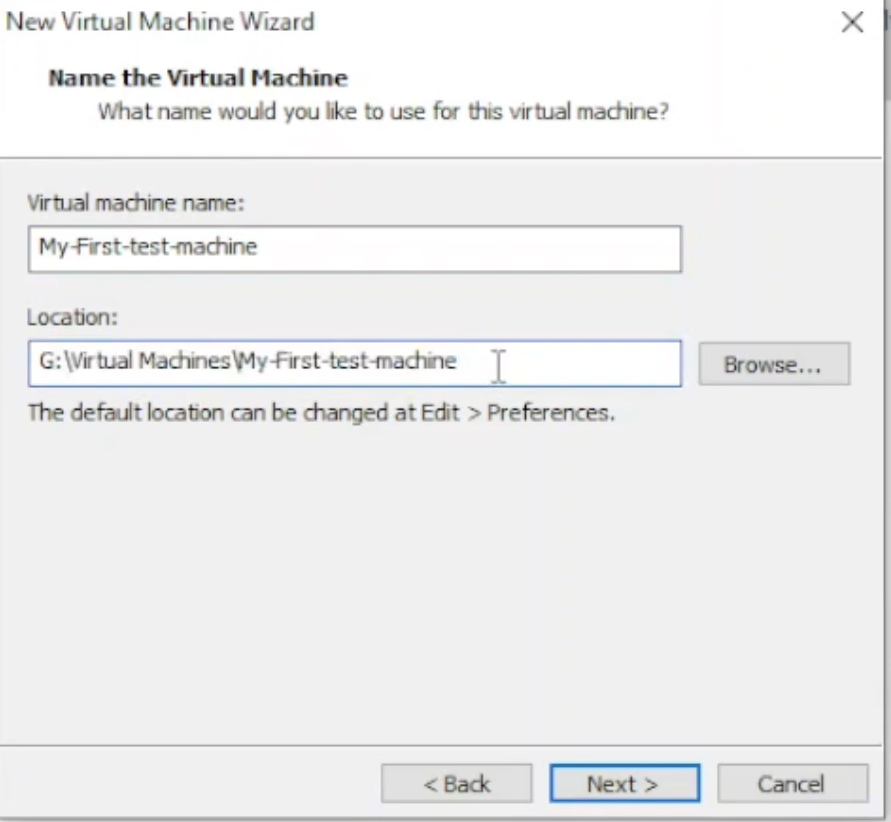
Name and Location. Give the VM a clear name like “My First Test Machine”. Set the directory where all the files go. It helps to make a dedicated folder for each VM. That way you avoid any mix-ups.
Step 03:
Disk and Custom Hardware Configuration
These last steps focus on giving the VM the resources it needs.
Disk Size. Decide on the max size for the virtual hard drive. Something like forty GB works in many cases.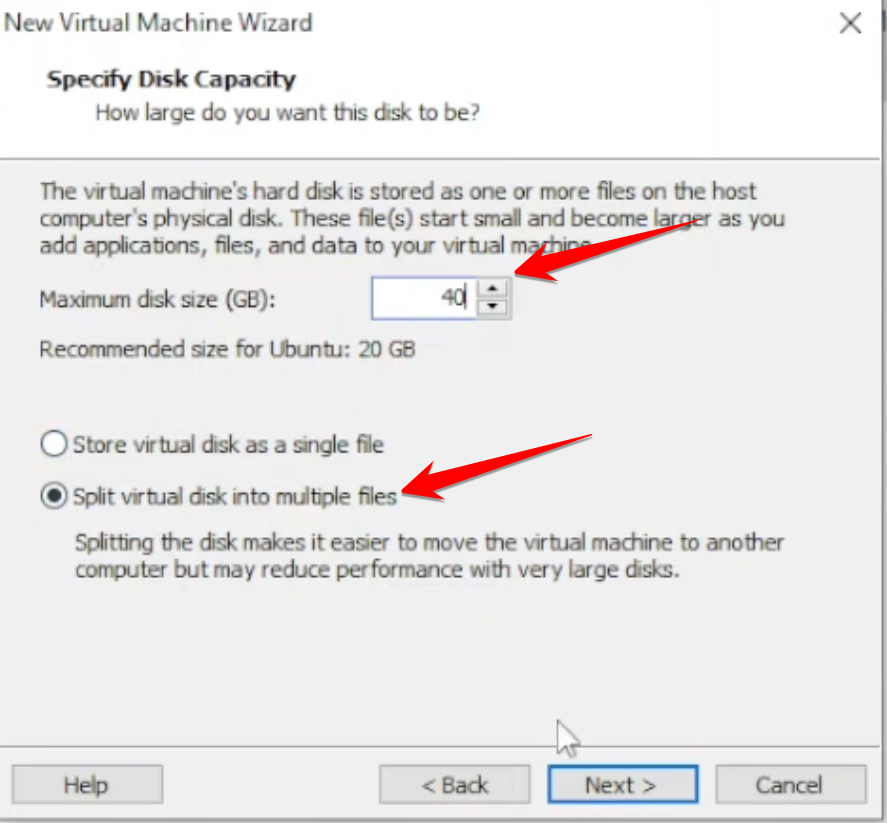
Disk Storage Method. Pick how the disk file gets stored on your system.
Store virtual disk as a single file. This suits production work and better performance. It uses the full space right away though.
Split virtual disk into multiple files. This fits testing or moving VMs around. The file only expands as you add data. It grows gradually that way.
Customize Hardware (Optional). Before you hit finish, pick “Customize Hardware”. That lets you tweak the default settings.
Memory. Bump up the RAM amount if needed. Go from one GB to four GB for example.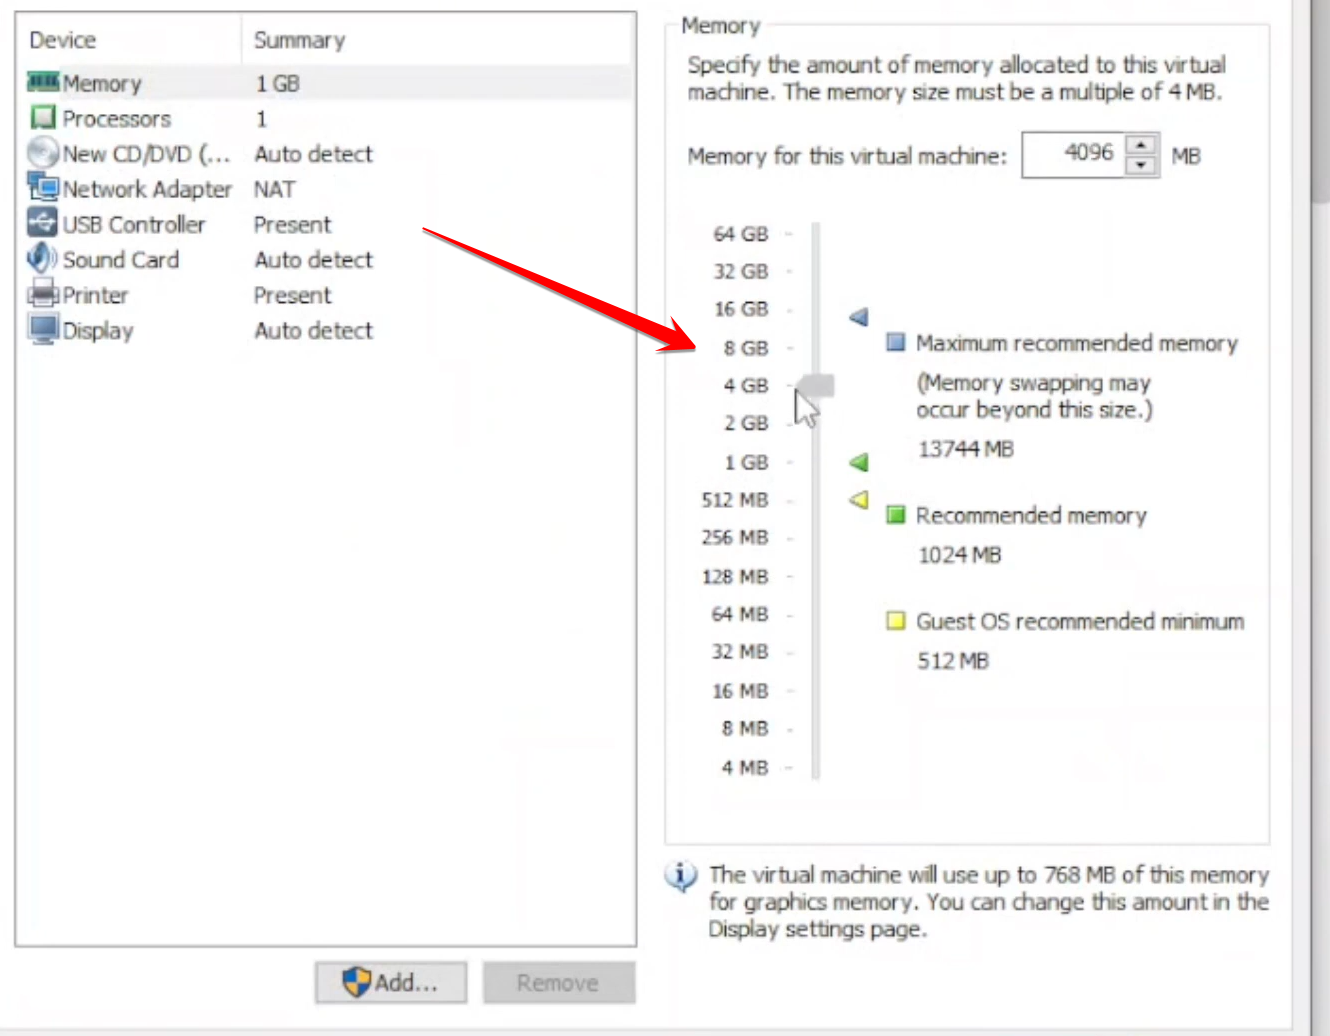
Processors. Change how many CPU cores the VM uses. 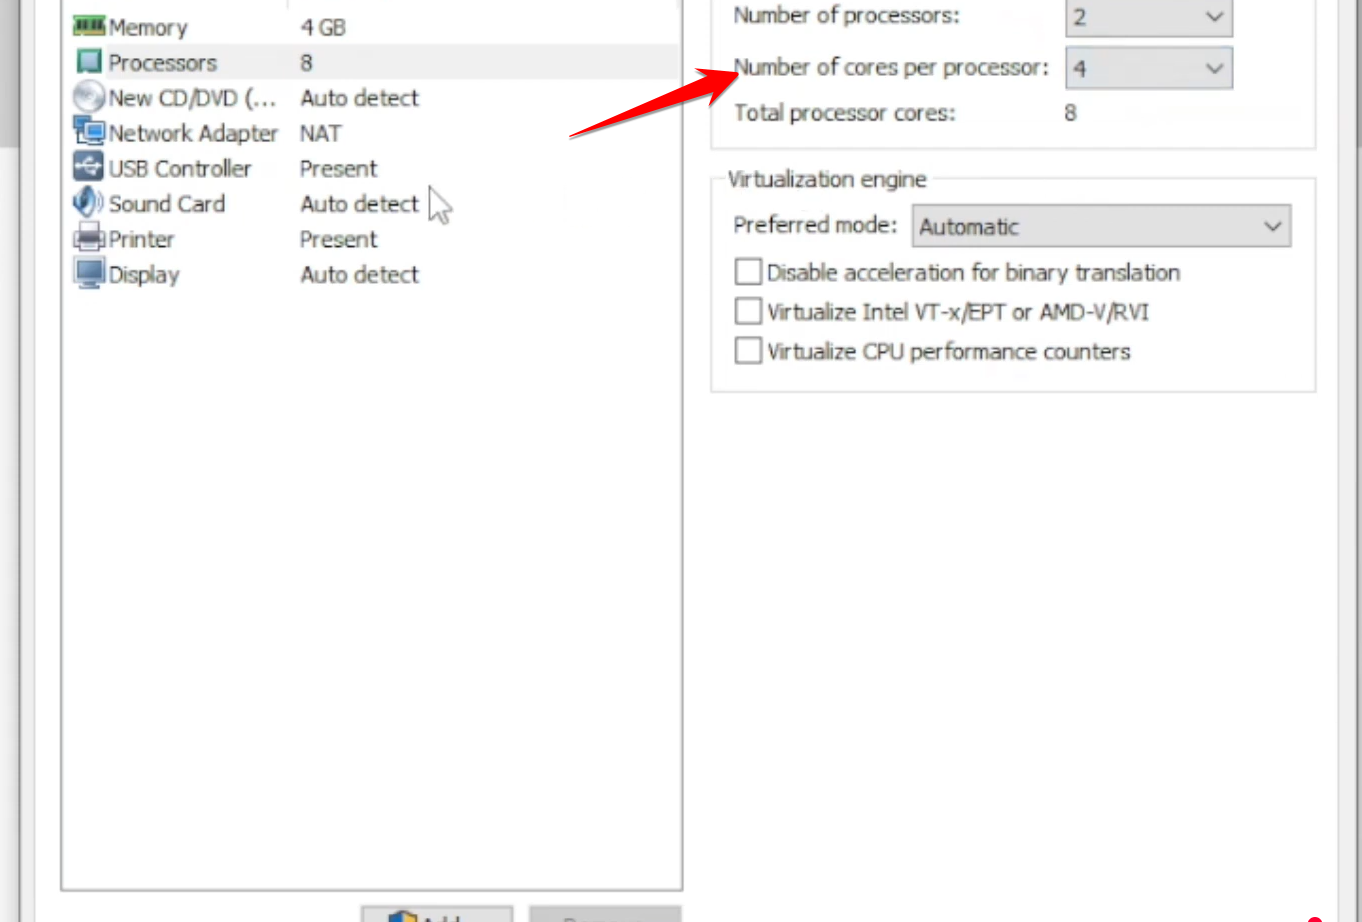
Network Adapter. Switch the networking mode as required. Use Bridged mode if the VM needs an IP from your actual router.
Finish. Click Finish once everything looks good. The VM shows up in your Workstation library then.