Installing a server OS is more than just clicking ‘Next.’ To ensure your new server is optimized for performance and network stability, you need to make critical choices during the installation process, especially regarding network configuration and storage layout.
This guide will walk you through installing Ubuntu Server 24.04 LTS (Noble Numbat) and show you how to set a static IP and manage disk space correctly during the setup process.
1. Starting the Installation
After booting from your USB or mounting the ISO (in a hypervisor like Proxmox):
-
Language and Installer: Select your language (
English) and choose to Continue without updating to save time, as updates can be run post-installation.
-
Keyboard and Installation Type: Confirm your keyboard layout, and select Ubuntu Server for the default, full installation. You can also choose the
minimalversion to reduce the operating system size.
2. Setting a Static IP Address (Crucial Step)
Relying on DHCP is risky for a server. To ensure your server’s IP never changes, you must set it statically during the installation.
-
Enter Network Settings: On the
Network Connectionsscreen, highlight your network interface (ens18,eth0, etc.) and hit Enter.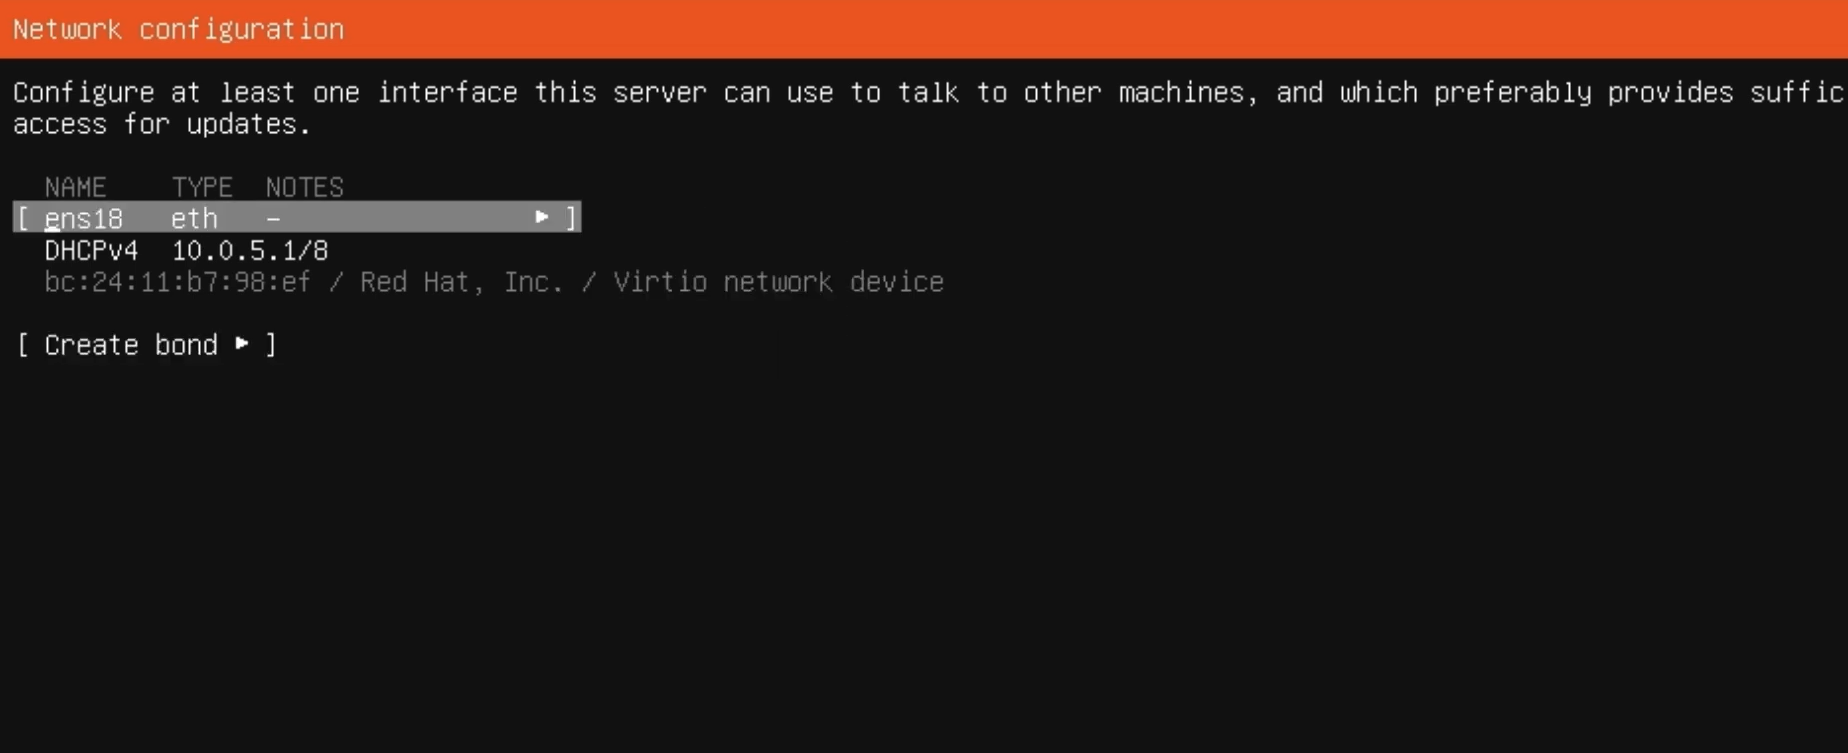
-
Change Method to Manual: Select
IPv4and change the method fromAutomaticto Manual
-
Define Subnet: Enter the full network address with the CIDR suffix (e.g.,
10.0.0.0/8). This is the network range, not the subnet mask.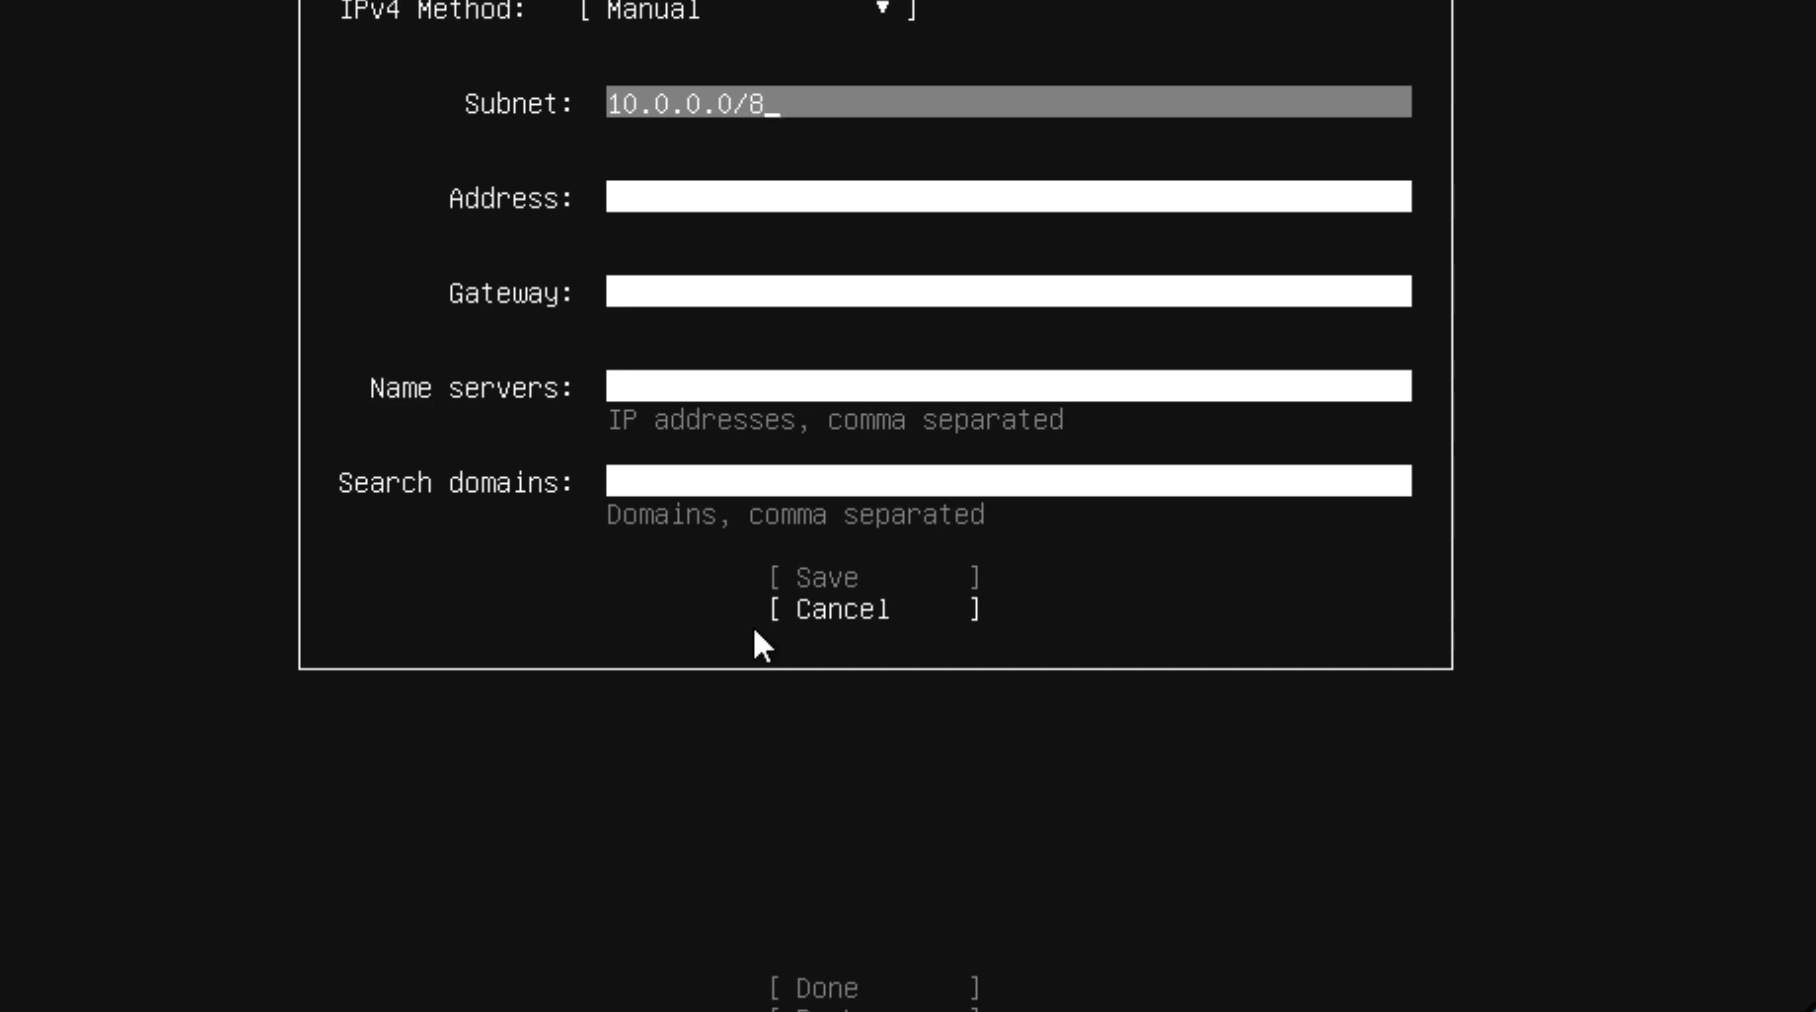
-
Enter IP Details:
-
Address: Your desired static IP (e.g.,
10.0.0.21). -
Gateway: Your router’s IP address.
-
Name servers: Use reliable public DNS (e.g., Google’s
8.8.8.8).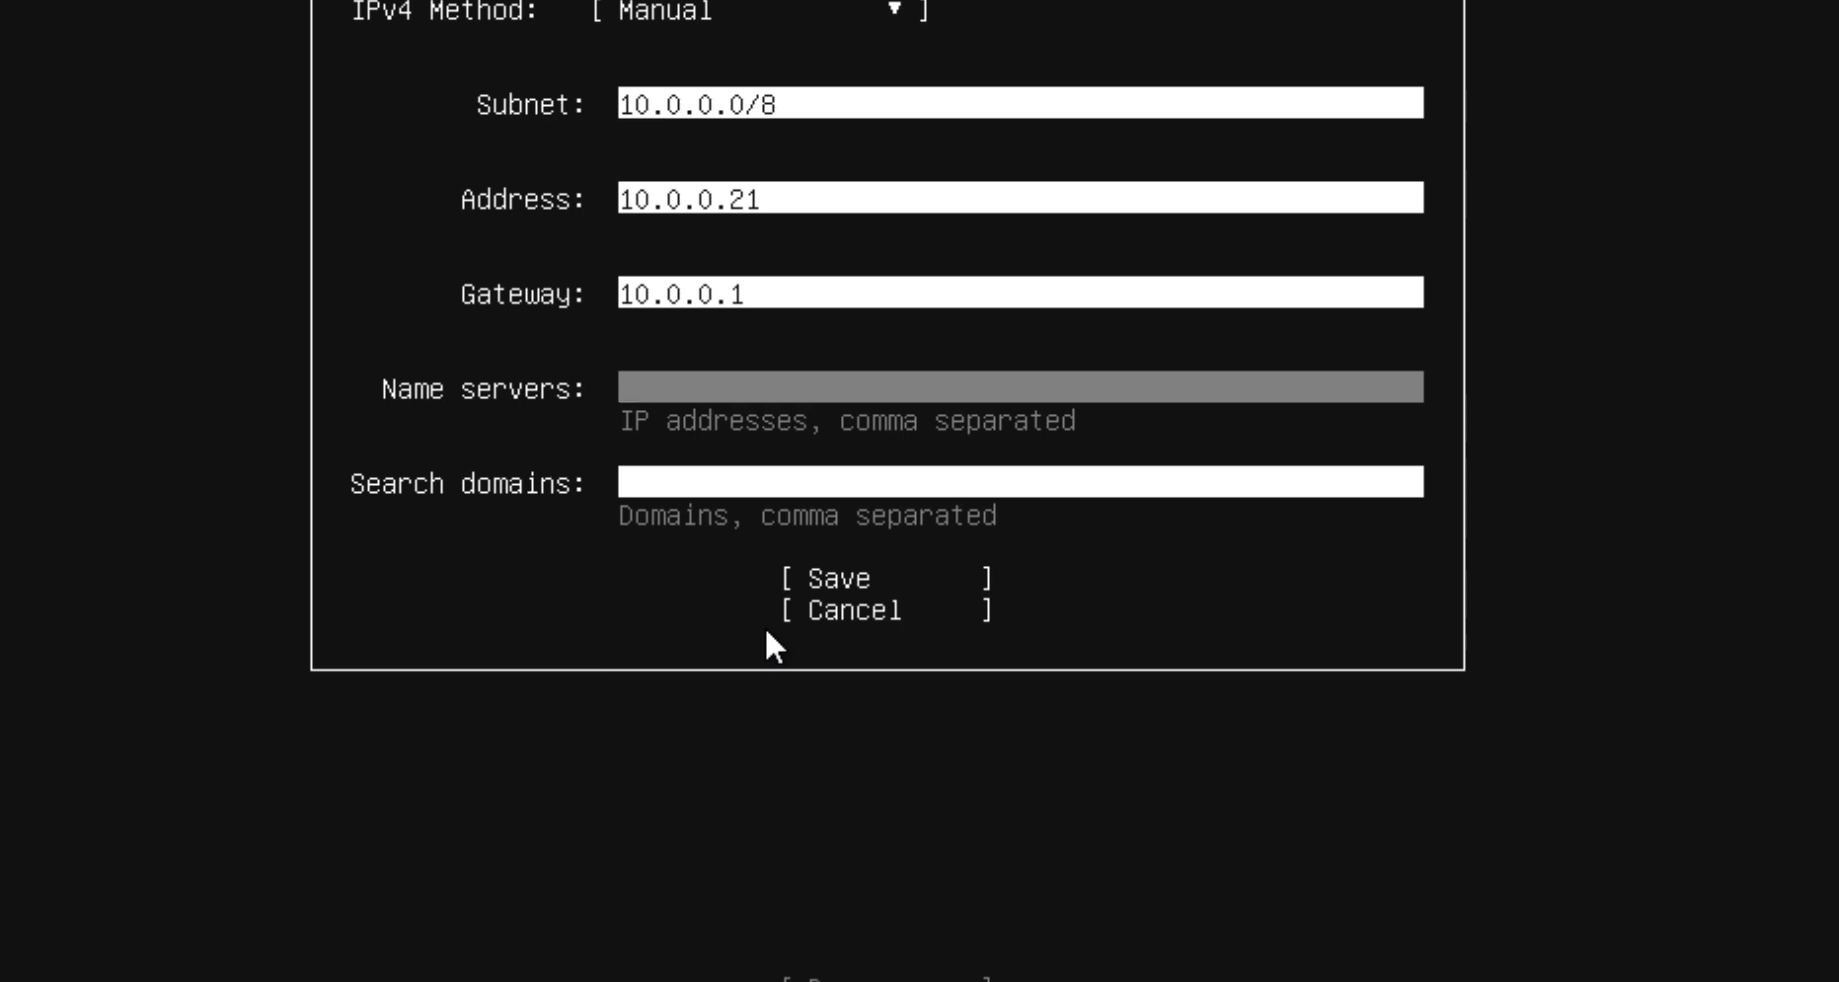
-
-
Save and confirm the configuration is now listed as
Manual.
3. Fixing Disk Partitioning
The installer often defaults to using less than the full disk space, which is an error you must correct before proceeding.
-
Choose Disk Layout: On the Storage Configuration screen, select Use an entire disk and hit Done.
-
Review the Layout (And Fix It): The default layout often incorrectly shows the root partition (
/) size as half of the total disk space (e.g., 48GB instead of 97GB). -
Edit the Disk: Scroll down to Used Devices and select Edit.

-
Maximize Space: Find the largest partition (
ext4) and change the New size field to use the full available space (e.g.,97.996G). Hit Save.
-
(Optional: If you need to manually partition, you can choose Custom storage layout and define partitions for
/bootand/manually).
-
-
 Confirm and Continue: Hit Done to accept the final, correctly sized disk layout.
4. Finalizing the Installation
-
Profile and SSH: Enter your username, server name, and password.

-
Install OpenSSH Server: Crucially, ensure you check the box to install OpenSSH server. This allows you to remotely access and manage your server using PuTTY or any SSH client.

-
Featured Snaps: Skip the suggested snaps (like Docker or Nextcloud) if you prefer to install and configure software manually .
-
Reboot: Wait for the installation to complete, then select Reboot Now .
Your Ubuntu server is now installed with a stable static IP, correctly sized disk space, and remote SSH access enabled!
-