
You will learn how to configure a DHCP server on a VLAN in a MikroTik router.
For this training, we are using MikroTik RouterOS version 5.20, but the same steps apply to other versions as well.
Setting up a DHCP server on VLANs helps automatically assign IP addresses to devices in each network segment. This makes network management easier and prevents IP conflicts.
Step 1: Assign IP Address to VLAN Interface
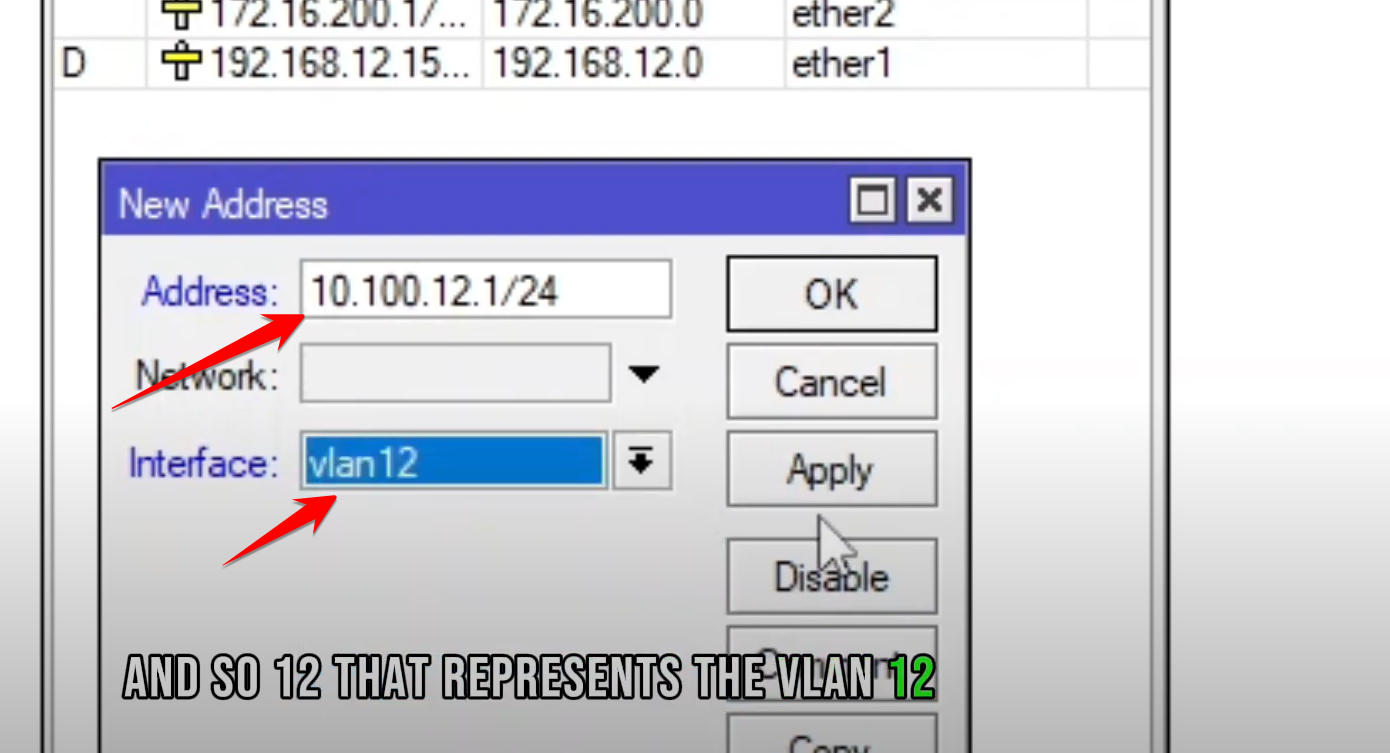
Go to IP → Addresses → + (Add New).
In the new window, type your VLAN IP address (for example: 10.100.12.1/24).
Then select the Interface as vlan12.

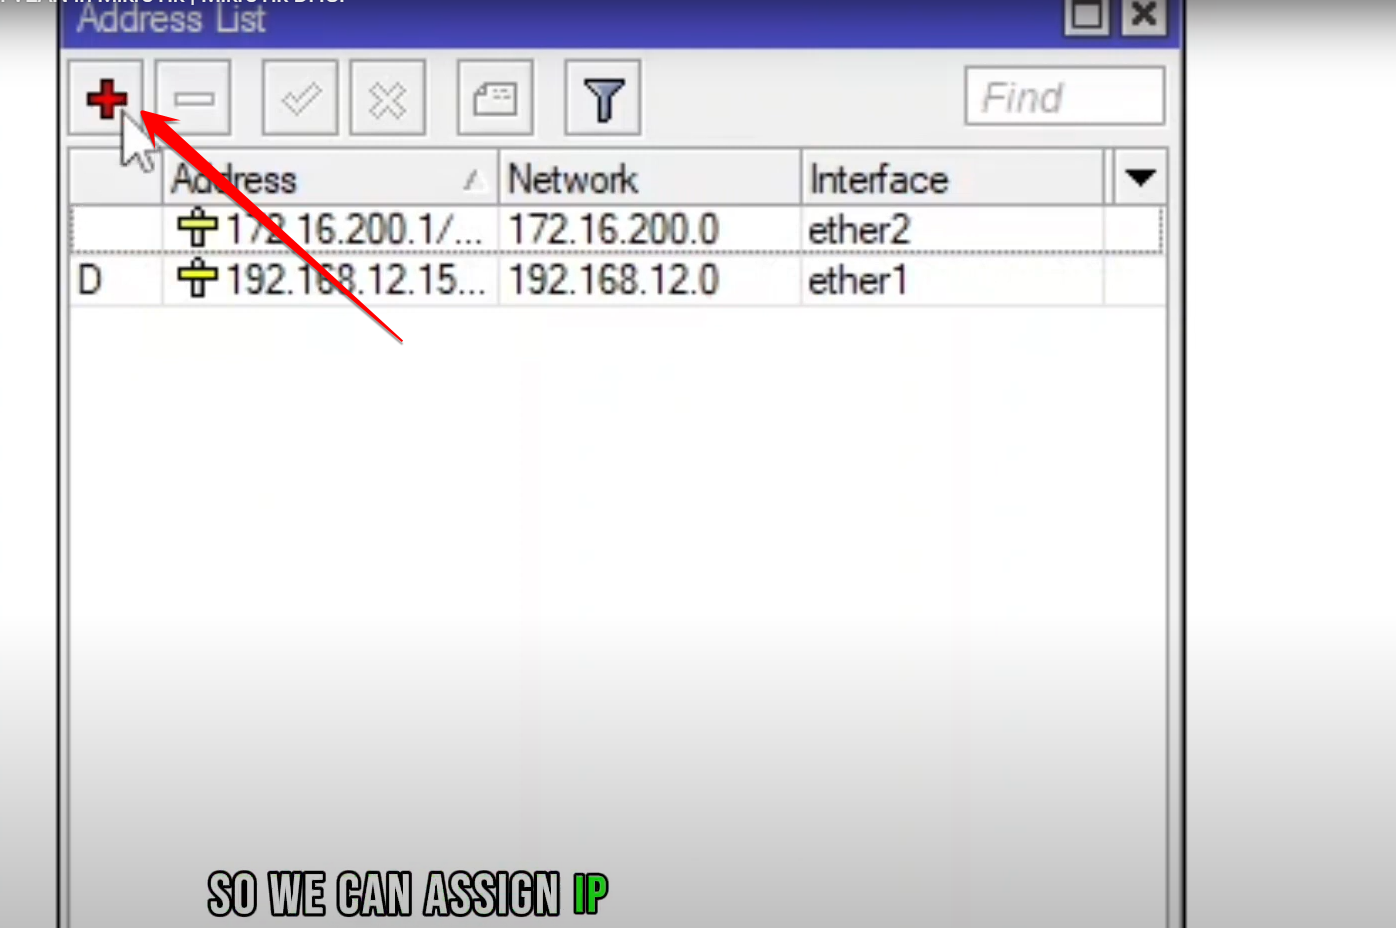
This IP will serve as the gateway for devices connected to VLAN 12.
Step 2: Open DHCP Server Settings
Next, navigate to IP → DHCP Server.
This is where we’ll create a DHCP pool for the VLAN.
Step 3: Run the DHCP Setup Wizard
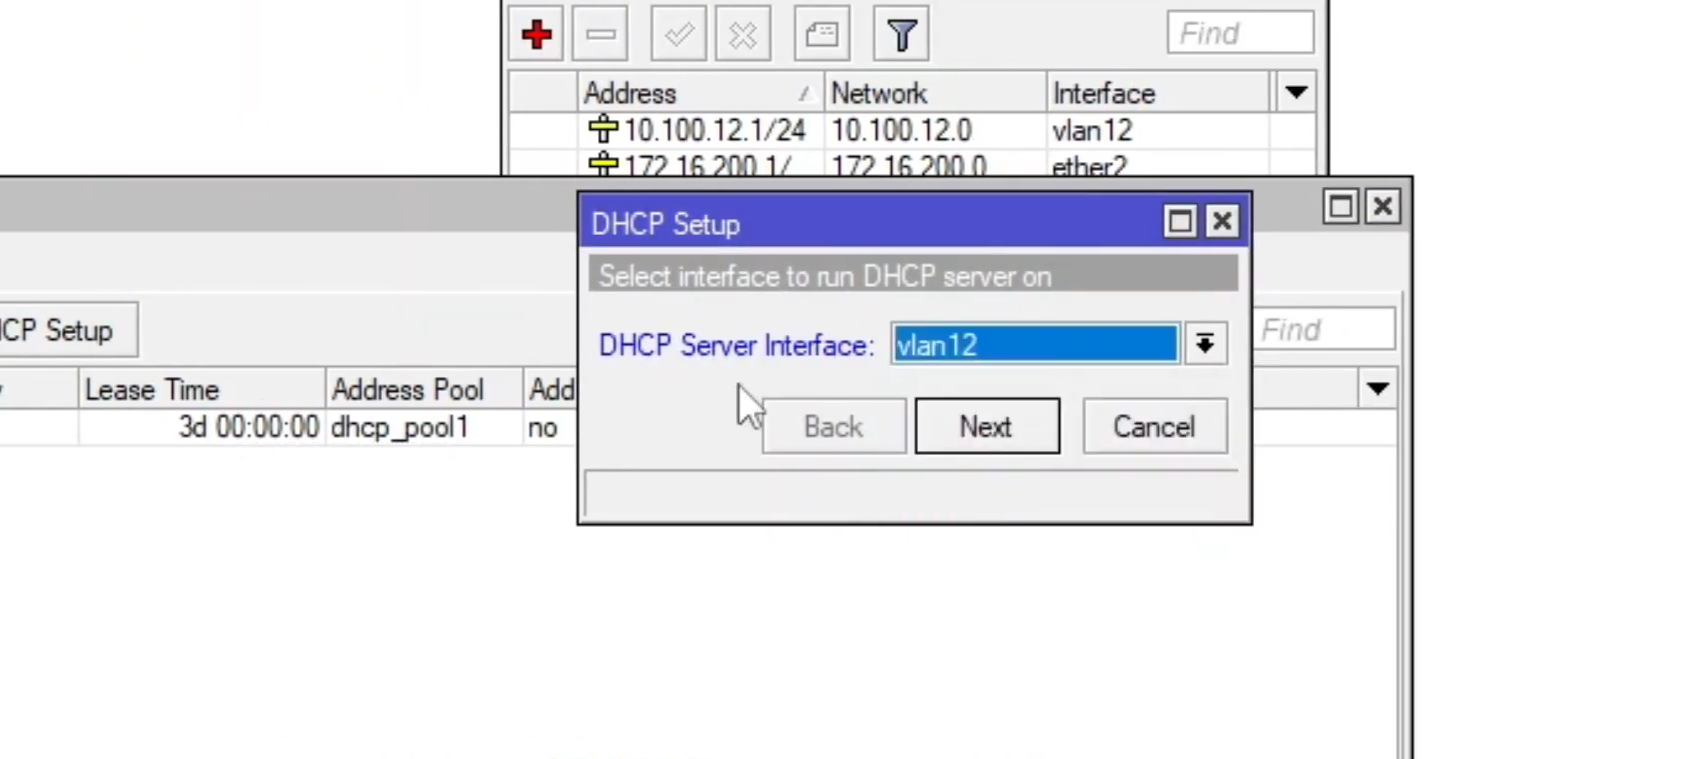
Click on DHCP Setup at the top of the DHCP Server window.
When prompted, select the interface you created earlier — in this case, vlan12 — and click Next.

Follow the wizard:
-
Confirm the detected network address (
10.100.12.0/24) -
Set the IP address range (for example:
10.100.12.10 - 10.100.12.100) -
Add the Gateway (
10.100.12.1) -
Enter DNS servers (for example:
8.8.8.8) -
Set the lease time (default: 3 days)
Then click Finish.
Step 4: Verify DHCP Configuration
Once the setup is complete, go to IP → DHCP Server → Leases.
Here, you can view all devices that have successfully received an IP from the VLAN’s DHCP pool.

If the client receives an IP address automatically, your DHCP configuration is working properly.
Step 5: Configure Lease Time
You’ll be prompted to define the DHCP lease time — which is the amount of time an IP address is assigned to a client before it must be renewed.
In this example, the lease time is set to 6 hours:
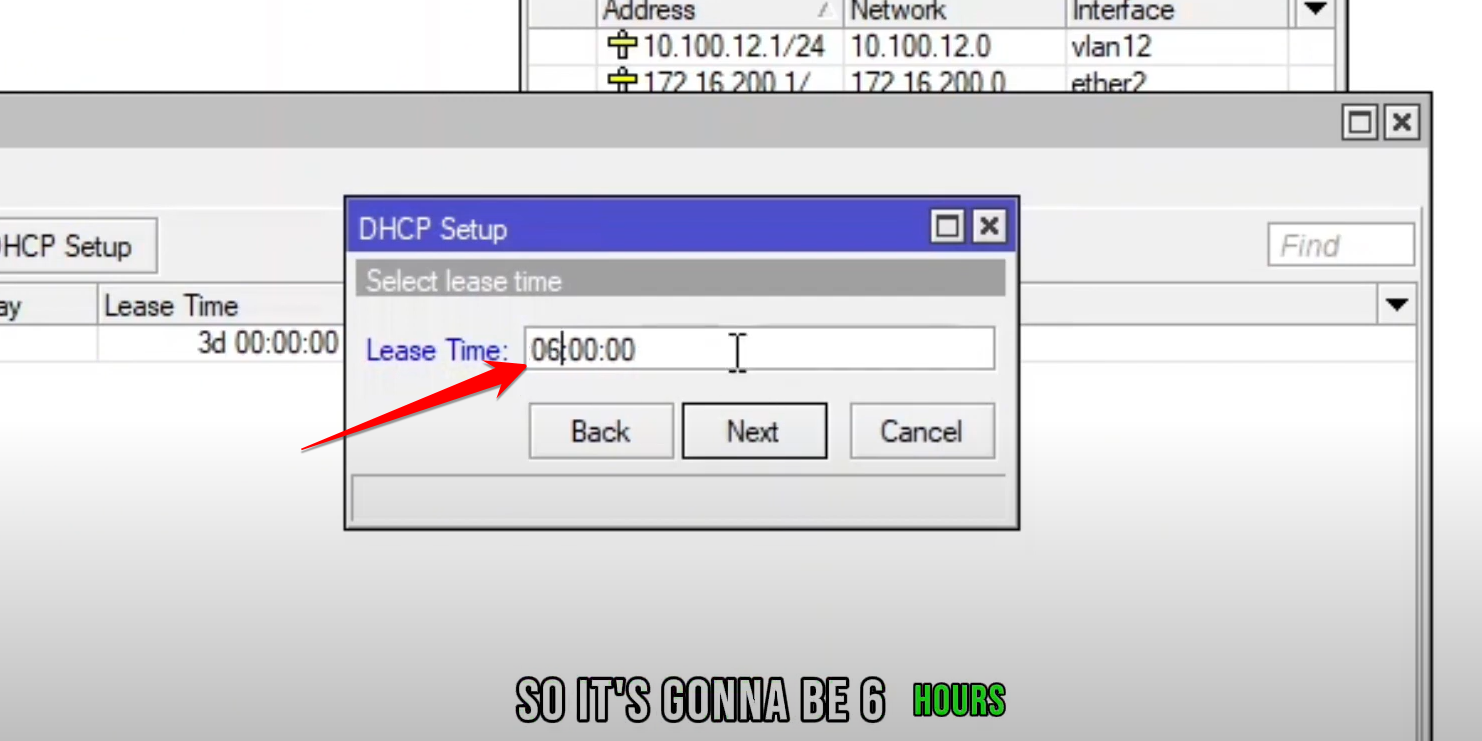
Enter your desired lease time and click Next to continue through the DHCP Setup wizard.
Remaining DHCP Setup Steps
After setting the lease time, continue through the wizard:
-
Gateway for DHCP network:
10.100.12.1 -
Address Pool: e.g.
10.100.12.10–10.100.12.100 -
DNS Servers:
8.8.8.8, or your preferred DNS -
Click Next until the wizard finishes.
Step 6: Testing the Setup
Connect a device to the switch port assigned to VLAN 12.
Open its network settings and verify it has received an IP in the 10.100.12.x range.
If so, congratulations — your VLAN DHCP setup is successful!
You’ve now successfully configured a DHCP server on a VLAN in MikroTik.
This setup ensures that each VLAN automatically distributes IP addresses, improving network segmentation and efficiency.


