
Static routing is an essential networking technique that allows routers to exchange traffic destined for unknown networks. If you have two separate offices, labs, or home networks connected via a private link, static routing is the simplest way to allow communication between them.
This guide details the step-by-step process of configuring static routes on two MikroTik routers (Router 1 and Router 2) to enable connectivity between their respective LAN segments.
1. Understanding the Network Setup
The goal is to allow devices on LAN A to talk to devices on LAN B, and vice-versa.
| Router | Interface | Network | IP Address (Example) |
| Router 1 | LAN A | 172.16.0.0/16 |
172.16.0.1 |
| Router 2 | LAN B | 192.168.1.0/24 |
192.168.1.1 |
| Interconnect | WAN-like Link | Common Network | R1: 192.168.12.101 / R2: 192.168.12.159 |
The initial state is that Router 1 can ping Router 2’s interconnect IP, but it cannot ping Router 2’s LAN IP (192.168.1.1), demonstrating the need for routing.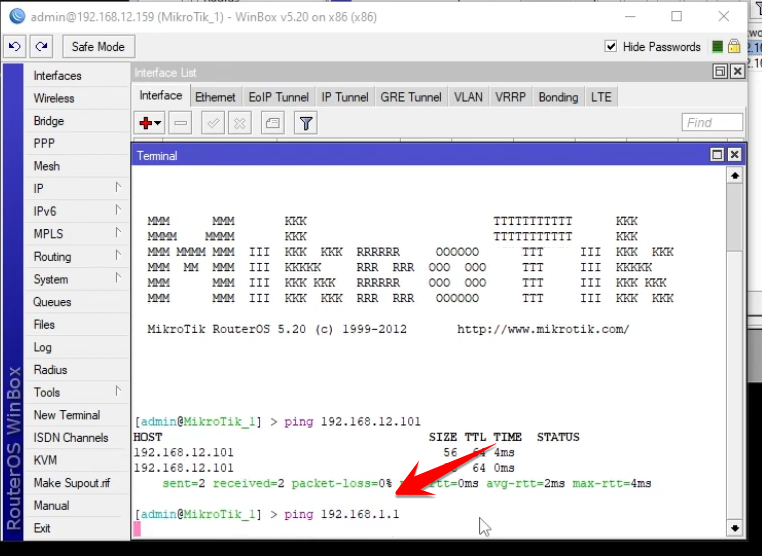
2. Configure the Static Route on Router 1
Router 1 needs a specific instruction on how to forward traffic that is meant for the 192.168.1.0/24 network.
-
Access Routes: In WinBox, navigate to IP > Routes.
-
Add a New Route: Click the + button.
-
Define Destination: In the Dst. Address field, enter the network you are trying to reach (the remote LAN):
-
Dst. Address:
192.168.0.0/24
-
-
Define Gateway: In the Gateway field, enter the next-hop IP address (which is the connecting IP address of Router 2):
-
Gateway:
192.168.12.159
-
-
Click Apply and OK.
3. Configure the Static Route on Router 2
Router 2 requires the same configuration, but with the addresses reversed. It needs an instruction on how to forward traffic meant for the 172.16.0.0/16 network.
-
Access Routes: On Router 2, navigate to IP > Routes.
-
Add a New Route: Click the + button.
-
Define Destination: Enter the remote LAN network of Router 1:
-
Dst. Address:
172.16.0.0/16
-
-
Define Gateway: Enter the next-hop IP address (the connecting IP address of Router 1):
-
Gateway:
192.168.12.101(This will be your Router 1’s interconnect IP)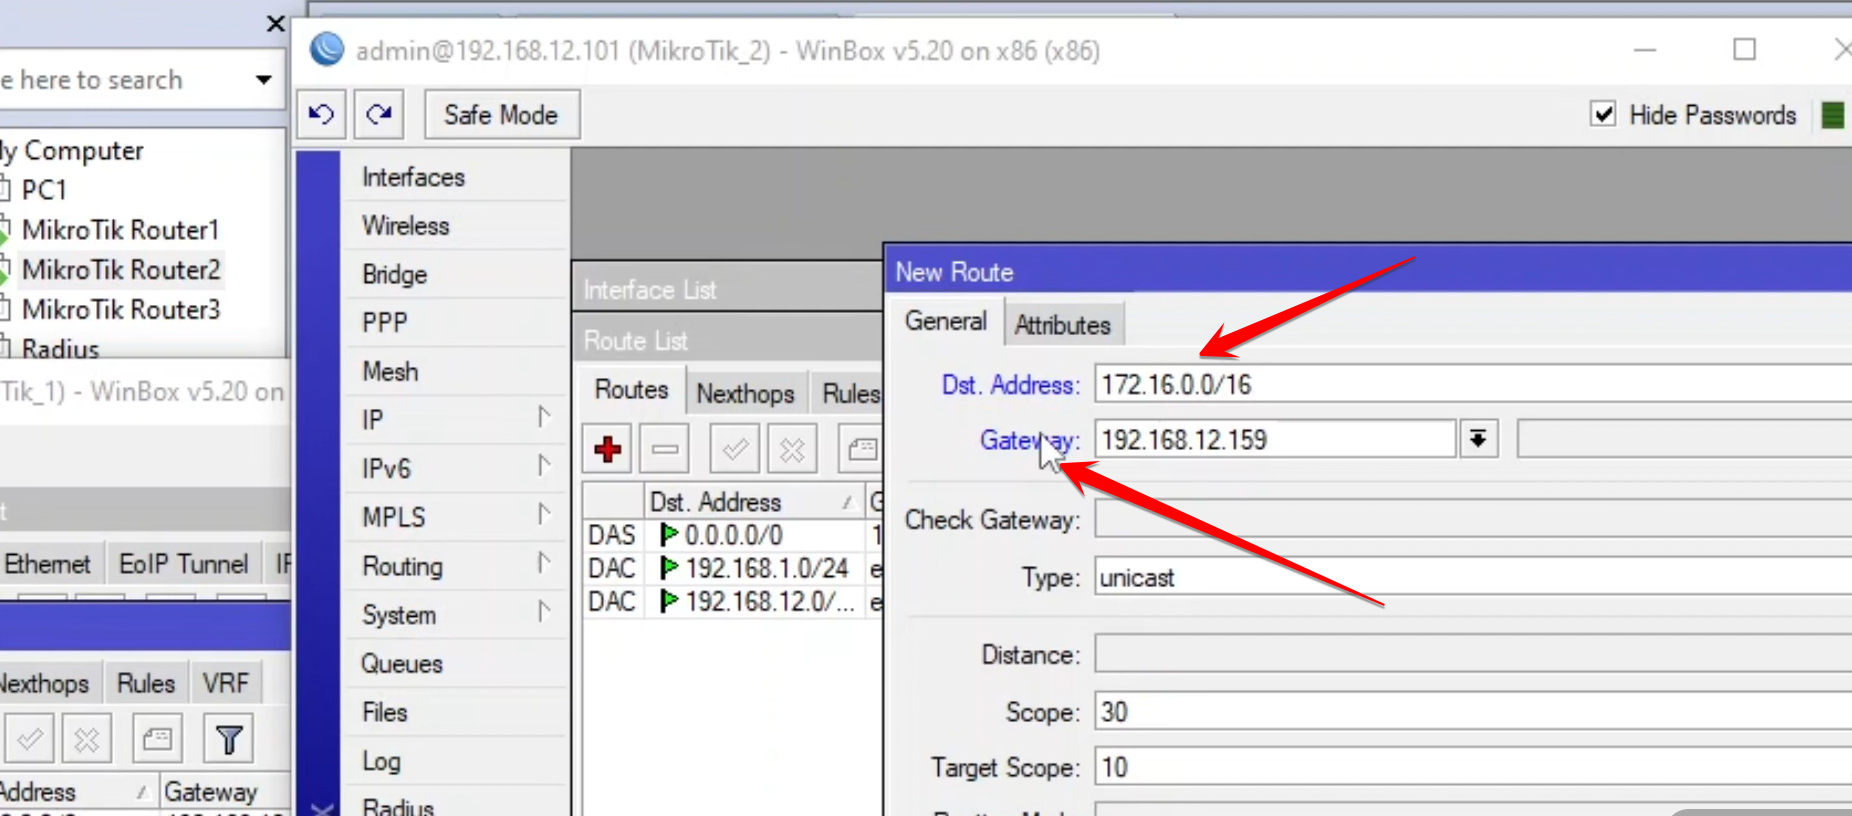
-
-
Click Apply and OK.
4. Verification and Testing
Once both static routes are in place, the routers know exactly where to send traffic for the remote LAN.
-
From Router 1’s terminal, try pinging the LAN interface of Router 2 (
192.168.1.1). -
The ping should now succeed, confirming that full two-way communication has been established between the two separate networks.

Congratulations! Your two separate LANs are now connected and can communicate thanks to static routing.


