
While the “Typical” VM creation process in VMware Workstation is fast, the Custom (Advanced) option gives experienced users full control over the virtual hardware before installing the operating system. This is crucial for optimizing performance, ensuring compatibility, and managing storage efficiently.
To get things going with a custom virtual machine in VMware Workstation, you begin by opening the program. From there, you select File and then New Virtual Machine. Another way is to just click on the Create a New Virtual Machine button. Once you are in the wizard, pick the Custom advanced option. Click next to move forward.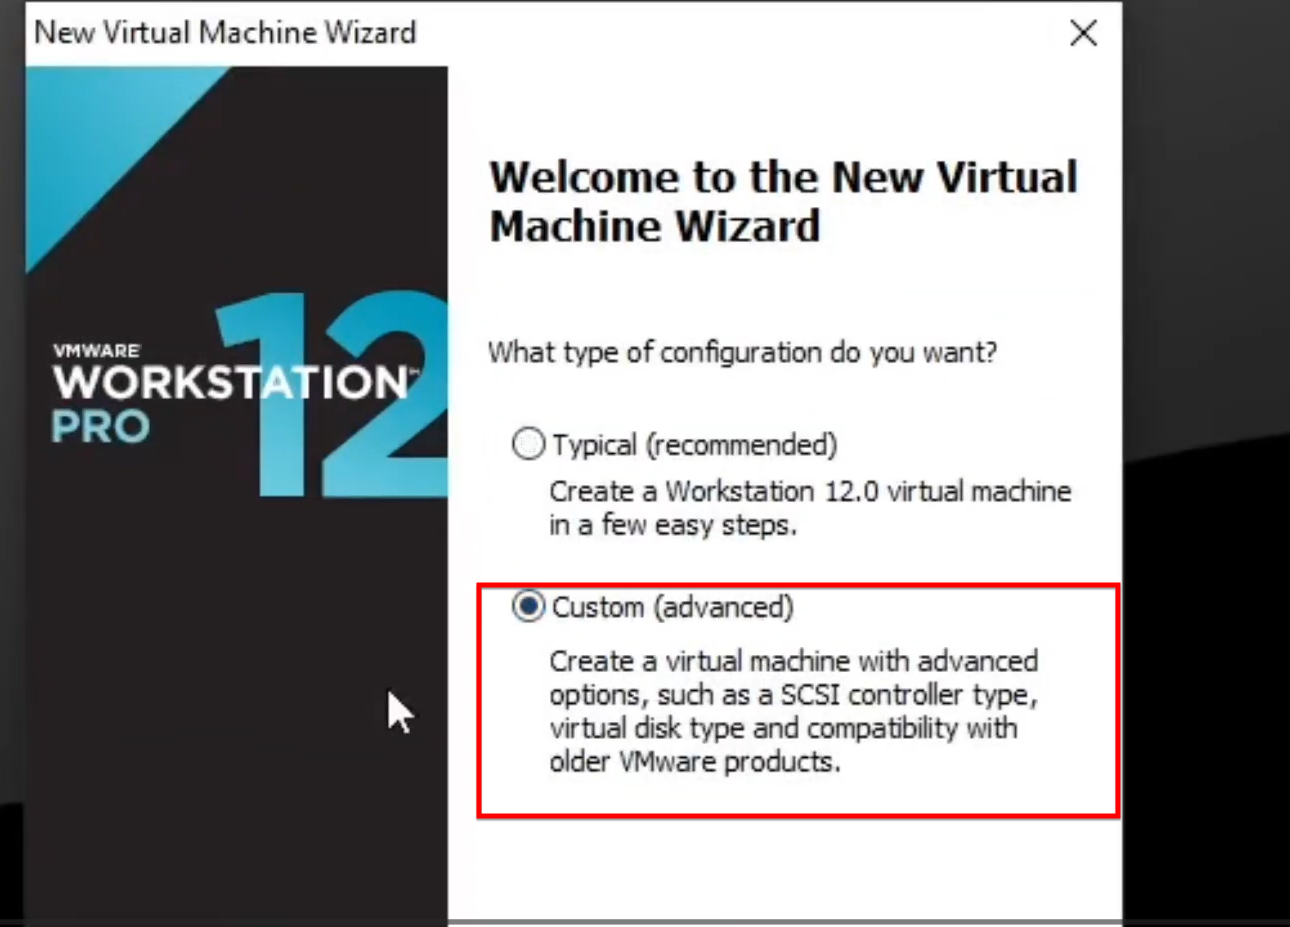
Next comes setting up the compatibility and the type of operating system for your VM. You choose the hardware compatibility version first, like Workstation 12.x or whatever fits. This choice sets the limits on resources and the features the VM can handle. Then, for the installer source, select the option that says you will install the operating system later. That way, you handle all the hardware setup before worrying about the installation media. Now pick the guest operating system type and version, such as Microsoft Windows and specifically Windows 10 x86.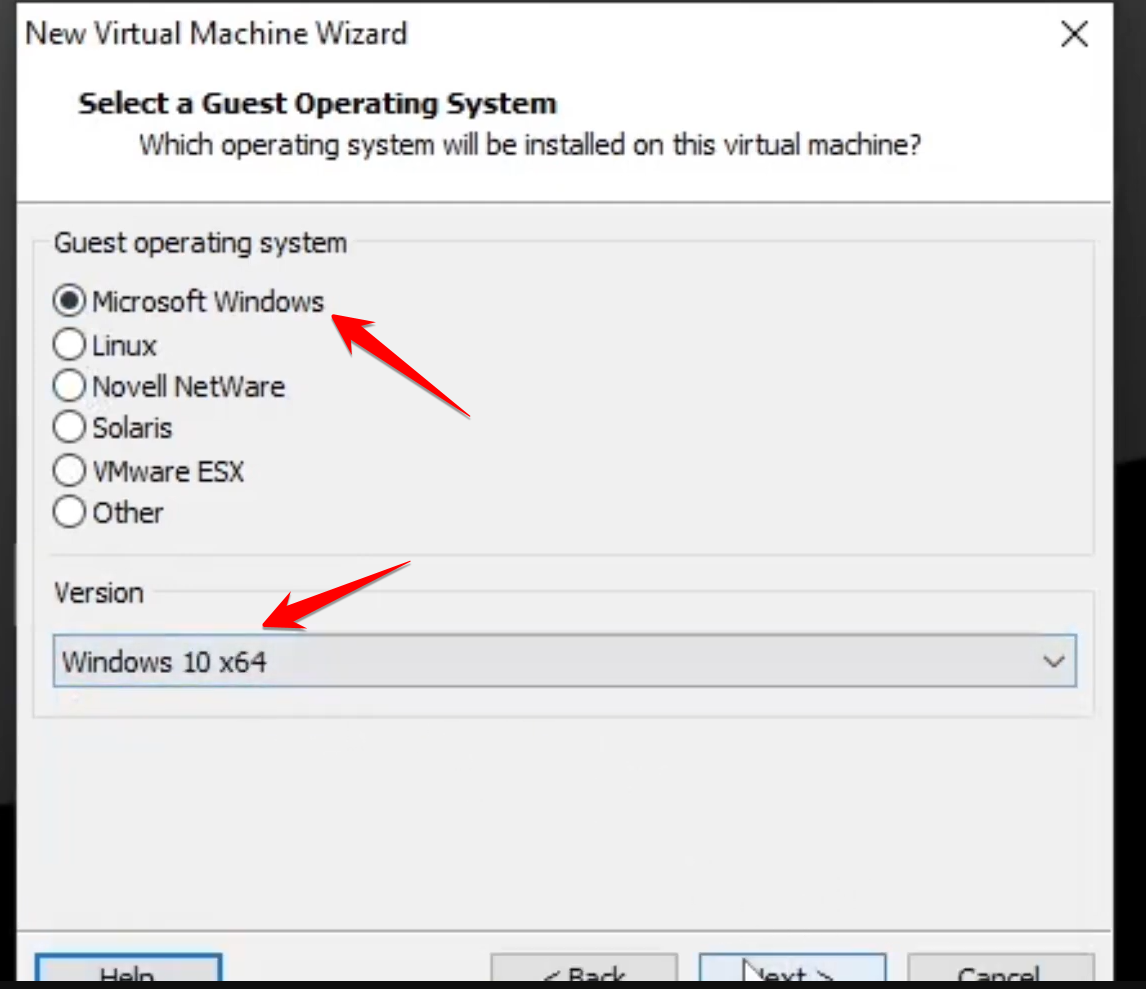
Give the VM a unique name, something like Windows 10 x64 Test. Also specify the directory where all the files for this VM will go. Make sure to use a unique folder to avoid any mix ups with other VMs.
Configuring the virtual hardware is where you really get into the custom part of things. It lets you adjust the key components just how you need them. For the firmware type, decide between the older BIOS standard or the more modern EFI or UEFI setup. Base it on what the guest OS needs or what you want for your testing.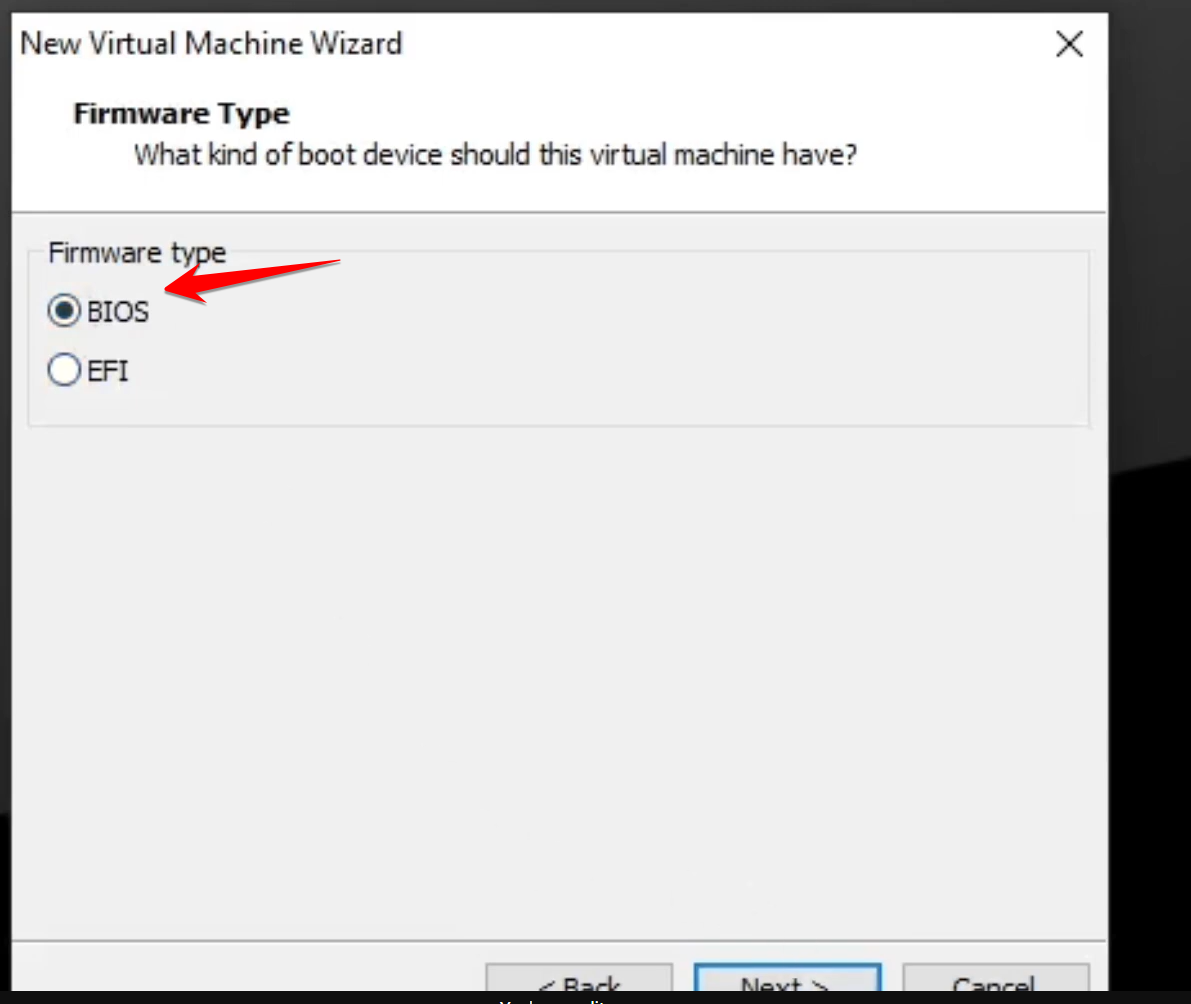
When it comes to processors and cores, assign how many processors you want. Then set the cores per processor to figure out the total CPU power, like two processors with four cores each for eight total.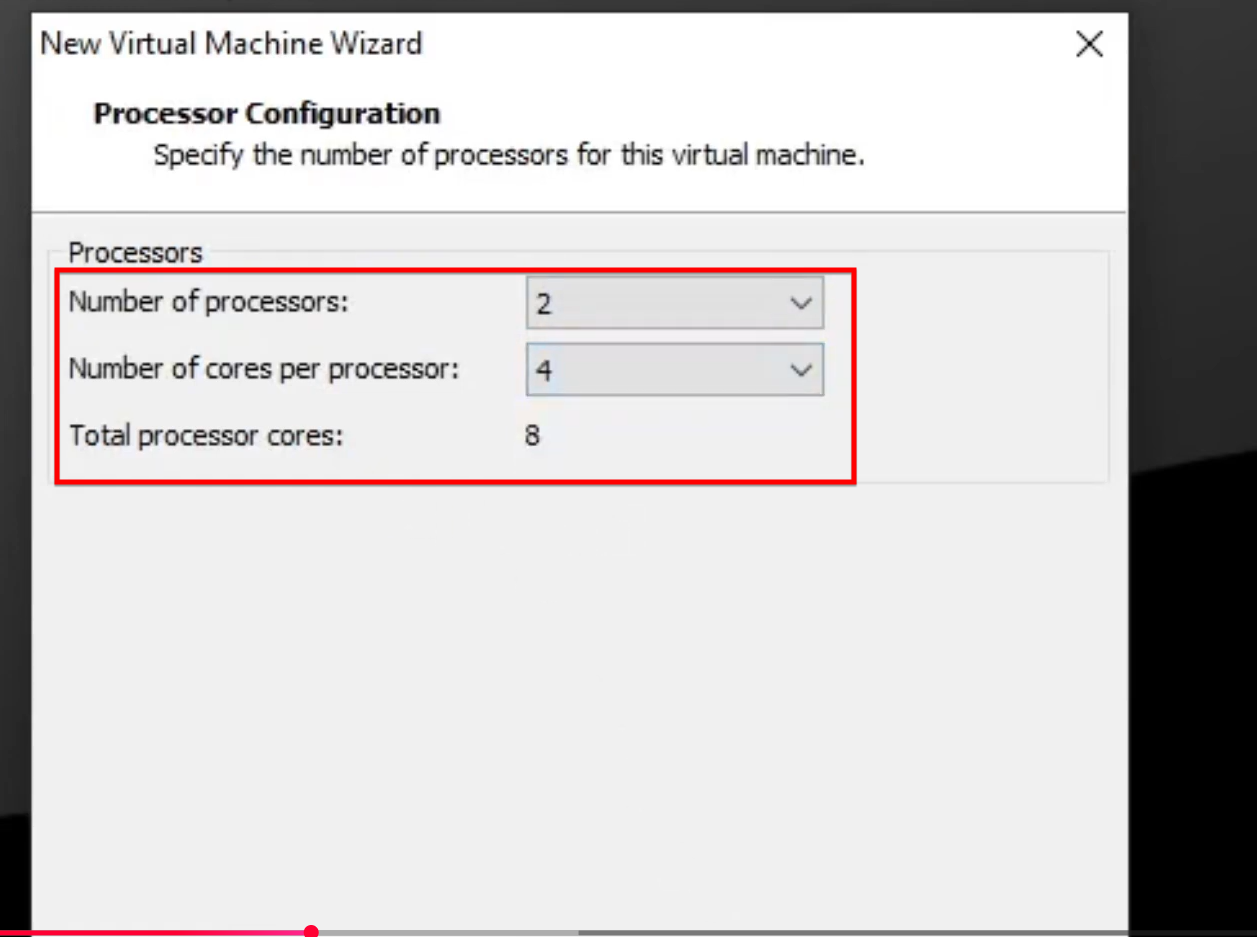 For memory or RAM, dedicate an amount like four gigabytes.Pick the network type next, such as bridged networking so the VM links right to the host network. For I/O controller types, go with LSI Logic SAS since it works well for Windows 10.Choose the disk type as SCSI,
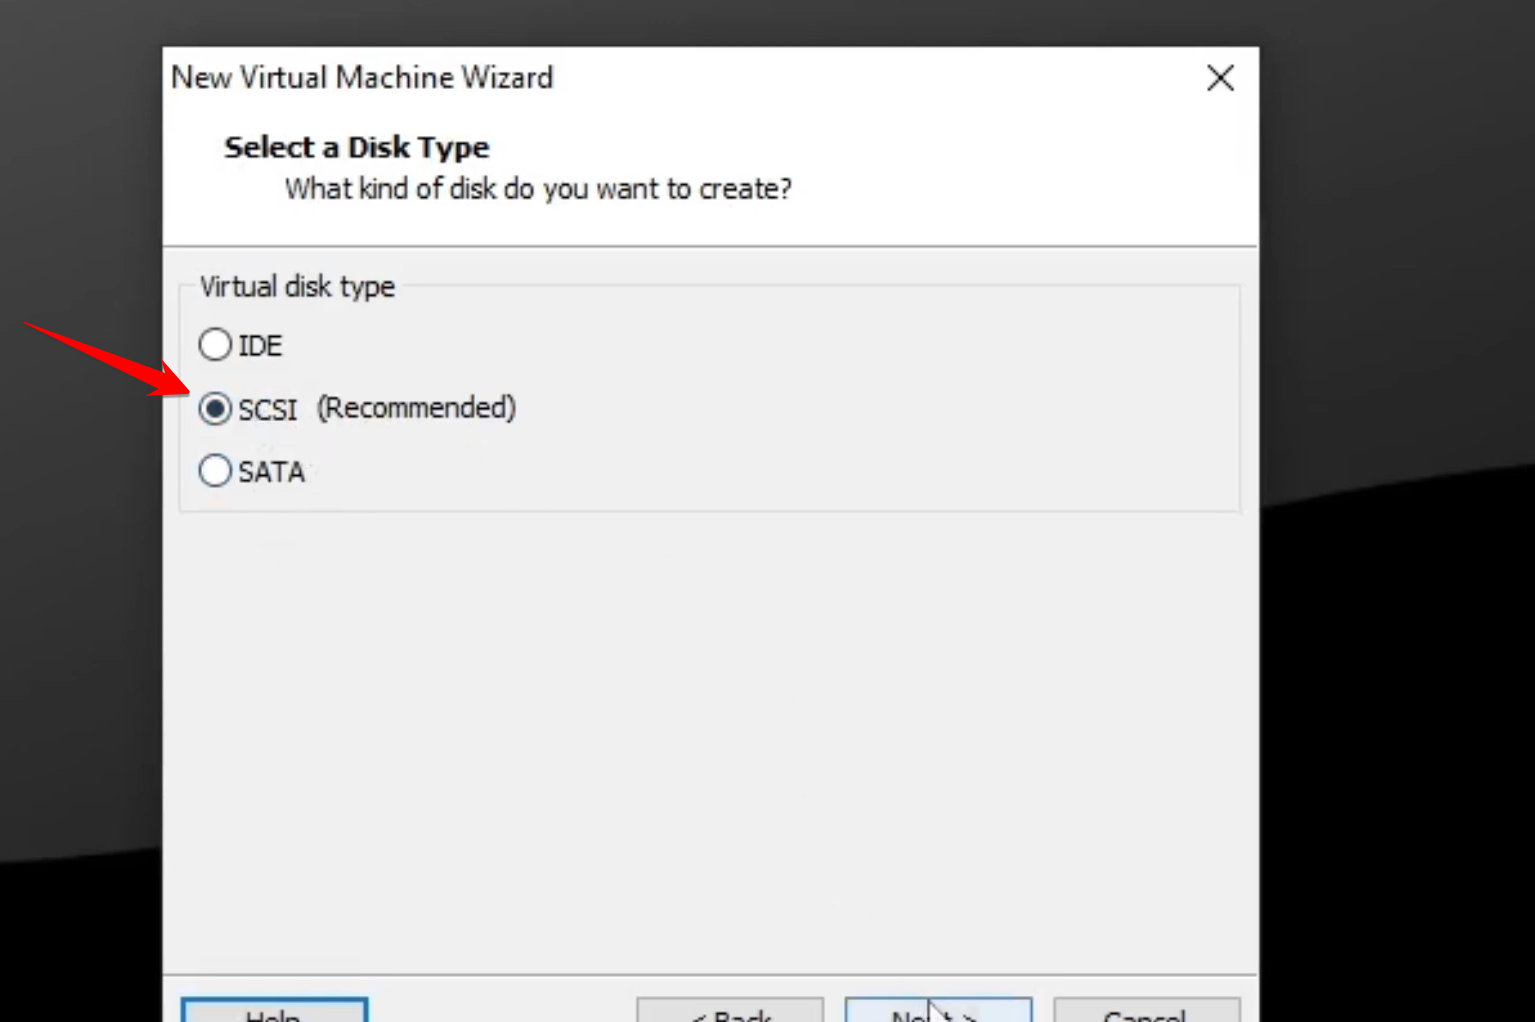 which beats out IDE or SATA for newer VMs. Then select to create a new virtual disk.
The disk allocation strategy matters a lot for how you manage storage on the host machine. Set the maximum size for the virtual disk, say 100 gigabytes. For the storage method, you have a couple of choices to consider. One is to store the virtual disk as a single file. It makes for better performance and easier moves to production setups. But it can be tough to shift around if the file gets big. The other way splits the virtual disk into multiple files, usually two gigabyte chunks each. It makes moving across devices simpler. Plus, it saves on host storage since it grows only as needed up to the max size. Most folks prefer this for testing purposes.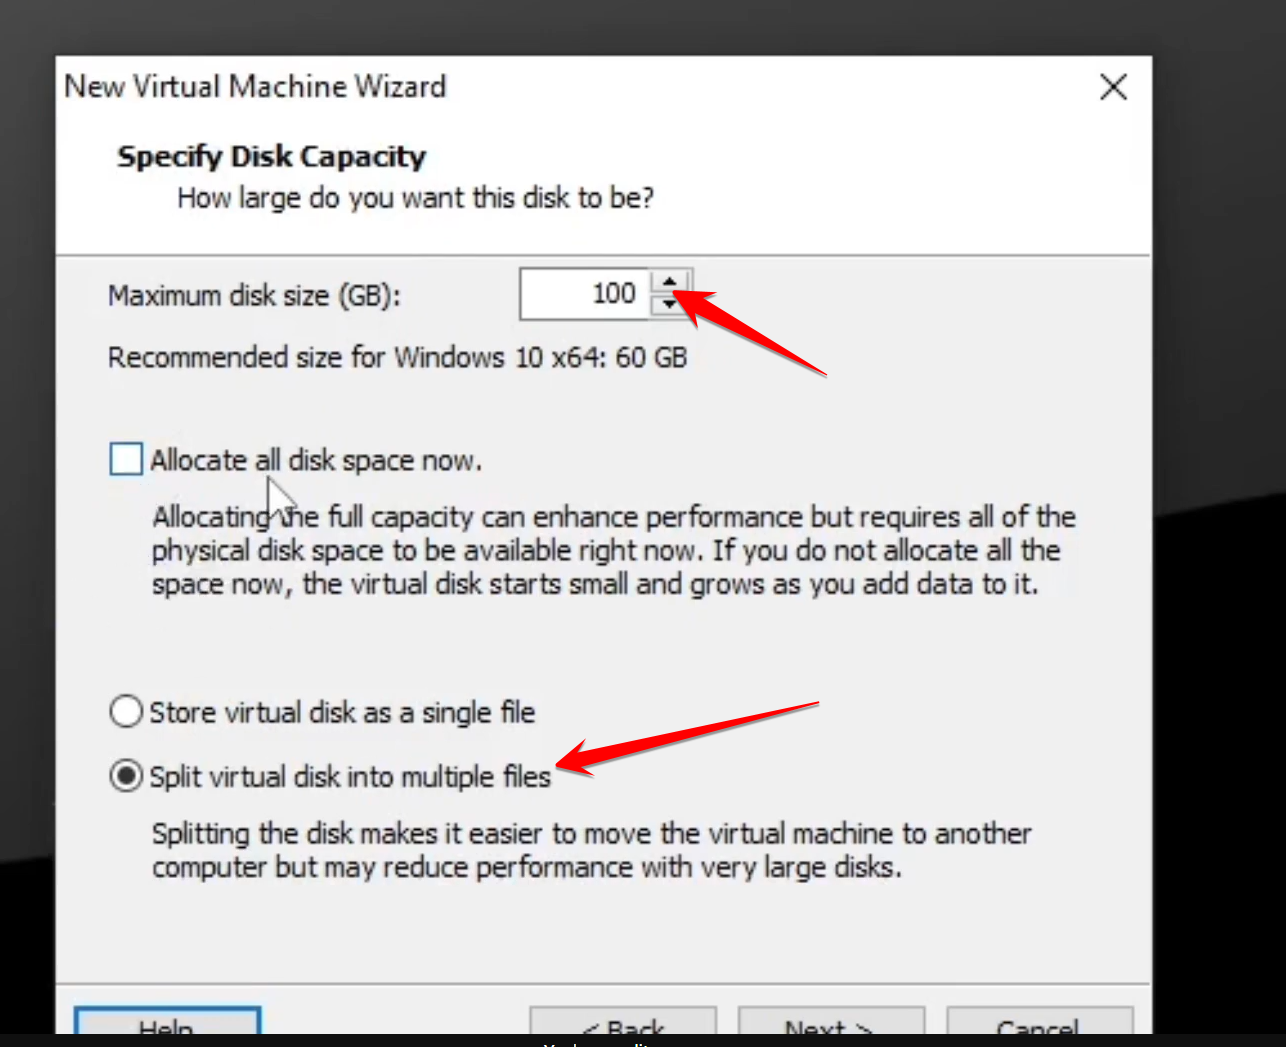
To wrap up the configuration, confirm the name and location for the virtual disk file, which ends in .vmdk. Take a look at the summary of all your settings. If something needs tweaking, click Customize Hardware to go back and adjust, like bumping up the RAM or adding a network adapter. Finally, click Finish. It creates the VM container, and you will see it show up in your Workstation library. From there, it is ready for the operating system installation.


