
In this video tutorial, you’ll learn how to fix the Inaccessible MikroTik issue using the command line terminal. Whether you’re working on a MikroTik RouterBOARD or running MikroTik RouterOS on a PC (x86 installation), these commands will help you regain access and restore proper functionality.
Step 1: Access the Virtual Machine Running MikroTik
First, log into the environment where your MikroTik RouterOS is running. If you’re using MikroTik x86 on a virtual machine, open that VM in your preferred virtualization platform (such as VMware, VirtualBox, or Proxmox).
-
Start the virtual machine.
-
Open its console or terminal window so you can directly run MikroTik commands.
This puts you at the command line interface (CLI) of MikroTik RouterOS, which is where all the recovery and troubleshooting commands will be entered.

Step 2: Log In with Admin Credentials
Once the MikroTik virtual machine finishes booting, you’ll be prompted to log in.
-
Enter the username: usually
admin(default). -
Enter the password: if it’s the first setup, just press Enter since the default password is blank.
-
If you’ve set a custom password earlier, type it in.
After successful login, you’ll see the MikroTik RouterOS command prompt where you can begin running commands.
Step 3: Configure an IP Address and Gateway
Now that you’re logged in, you need to assign an IP address to your MikroTik router so it can be accessed from your network.
Use the following command format:
-
address → The IP address you want to assign (e.g.,
10.100.100.3). -
network → The network address (e.g.,
10.100.100.0). -
interface → The physical or virtual interface where you want this IP bound (e.g.,
ether1).
✅ Example:
/ip address add address=10.100.100.3 network=10.100.100.0 interface=ether1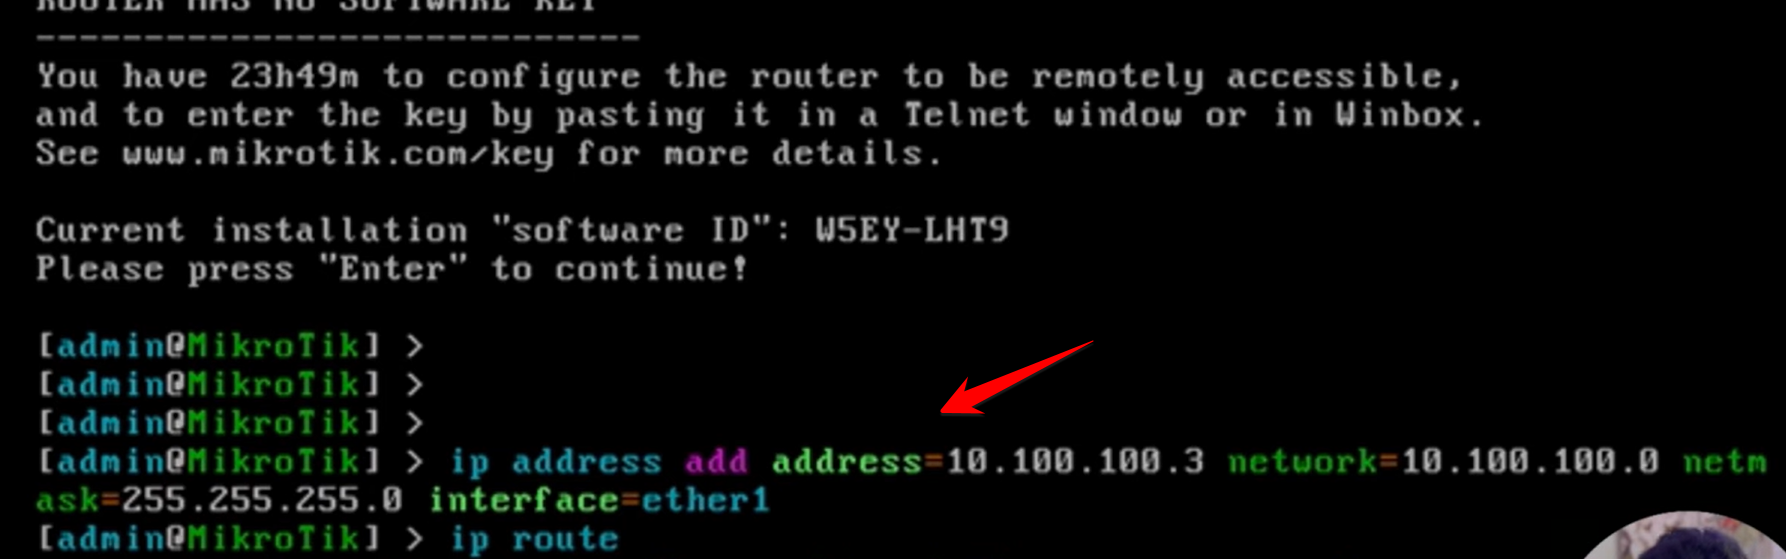
Step 4: Add the Default Gateway
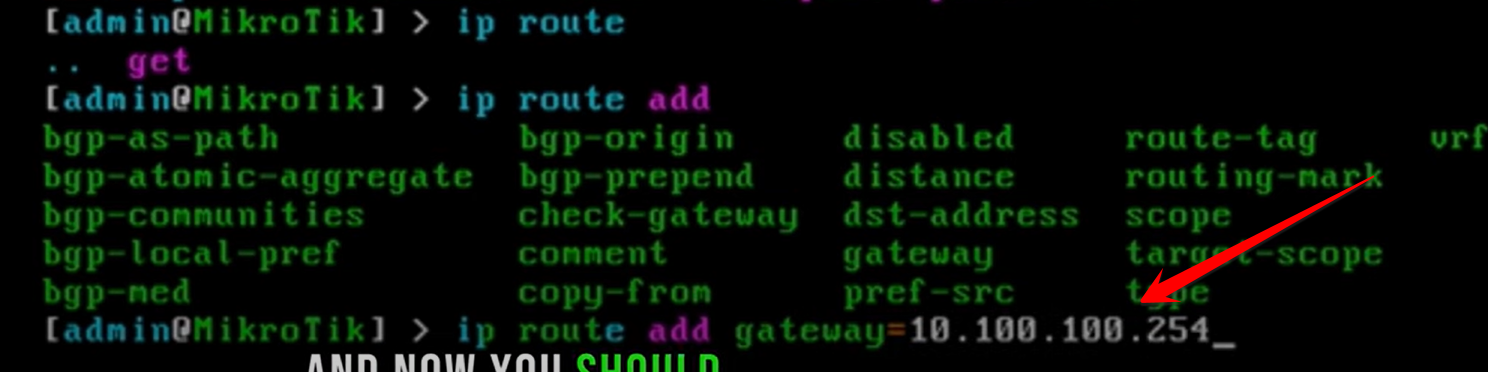
To make sure the router can communicate outside its subnet, add a gateway route:
Example:
/ip route add gateway=10.100.100.254
Step 5: Test Access via Winbox
After setting the IP address and gateway, you should now be able to log in to your router using Winbox (MikroTik’s management utility).
-
Open Winbox on your PC.
-
Enter the IP address you just assigned (e.g.,
10.100.100.3). -
Use your credentials to log in.
If everything is set correctly, Winbox will connect, and your MikroTik router will be fully accessible.


