
Adding a router comes right after you set up a basic LAN with just a switch. This guide takes you through connecting a Layer 3 router to a Layer 2 switch. You will configure a static IP address on the router’s interface. Do that using the Cisco Command Line Interface, or CLI.
Step-01
Build the Basic Topology
First make sure your switch and end devices are all set up. Then go ahead and add the router.
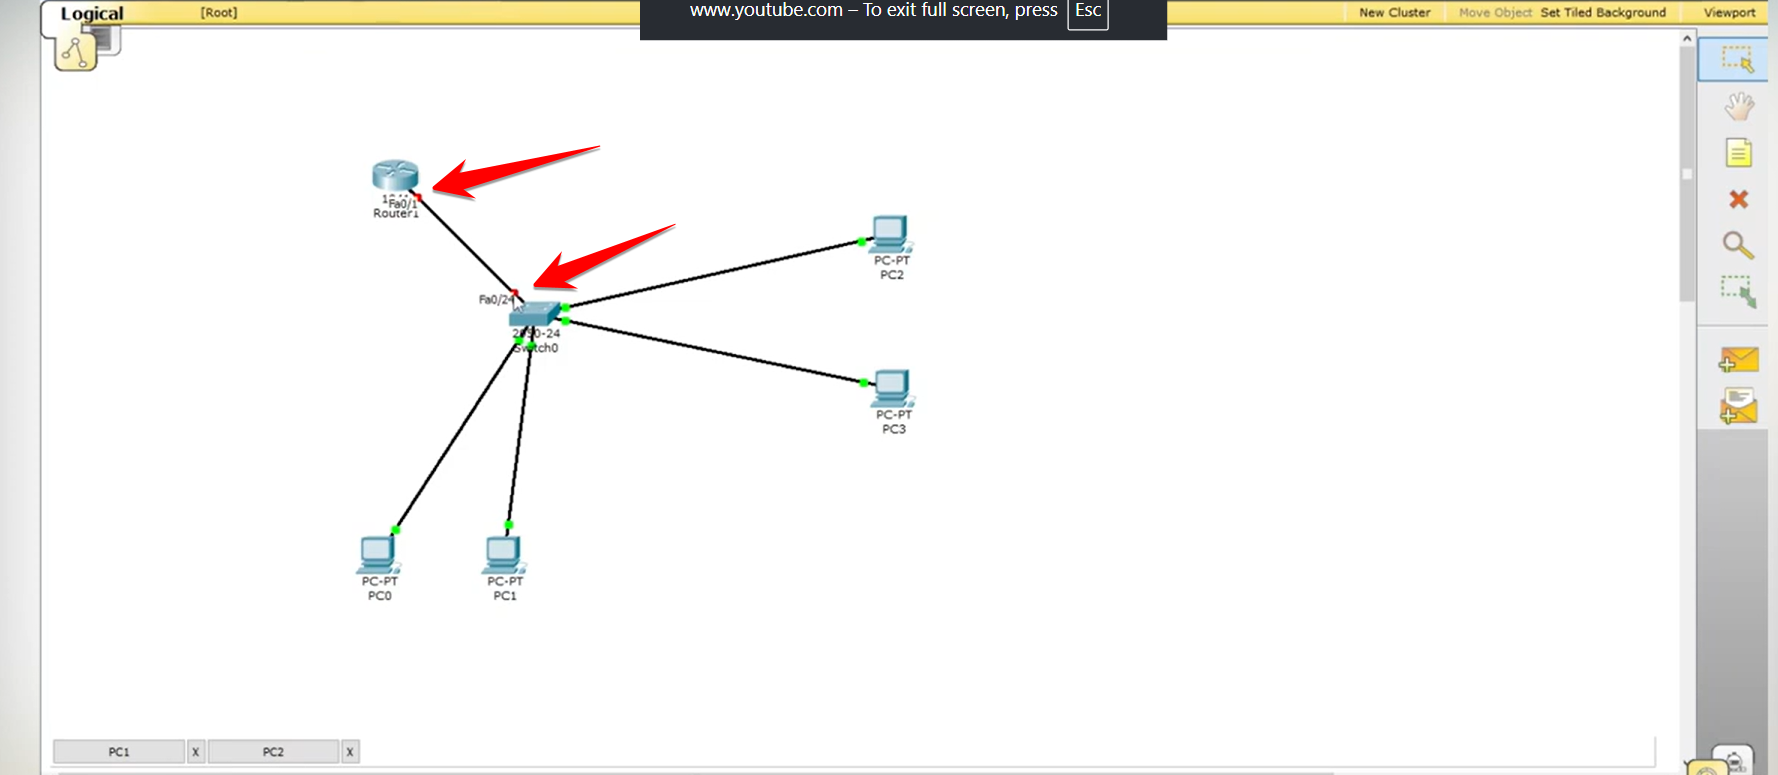
Place the Router. Pick a basic Cisco router, like the 2911 model. Put it into your Packet Tracer workspace.

Connect the Devices. Grab a straight-through cable. Link the switch, say on port FastEthernet0/24, to the router on port FastEthernet0/1.
Observe Link Status. At first both ends of that connection show a red light. That happens because Cisco routers shut down all ports by default.
Step-02
Access and Navigate the CLI
You handle the router setup through the Command Line Interface, or CLI.
- Access the CLI. Click the router. Switch over to the CLI tab.

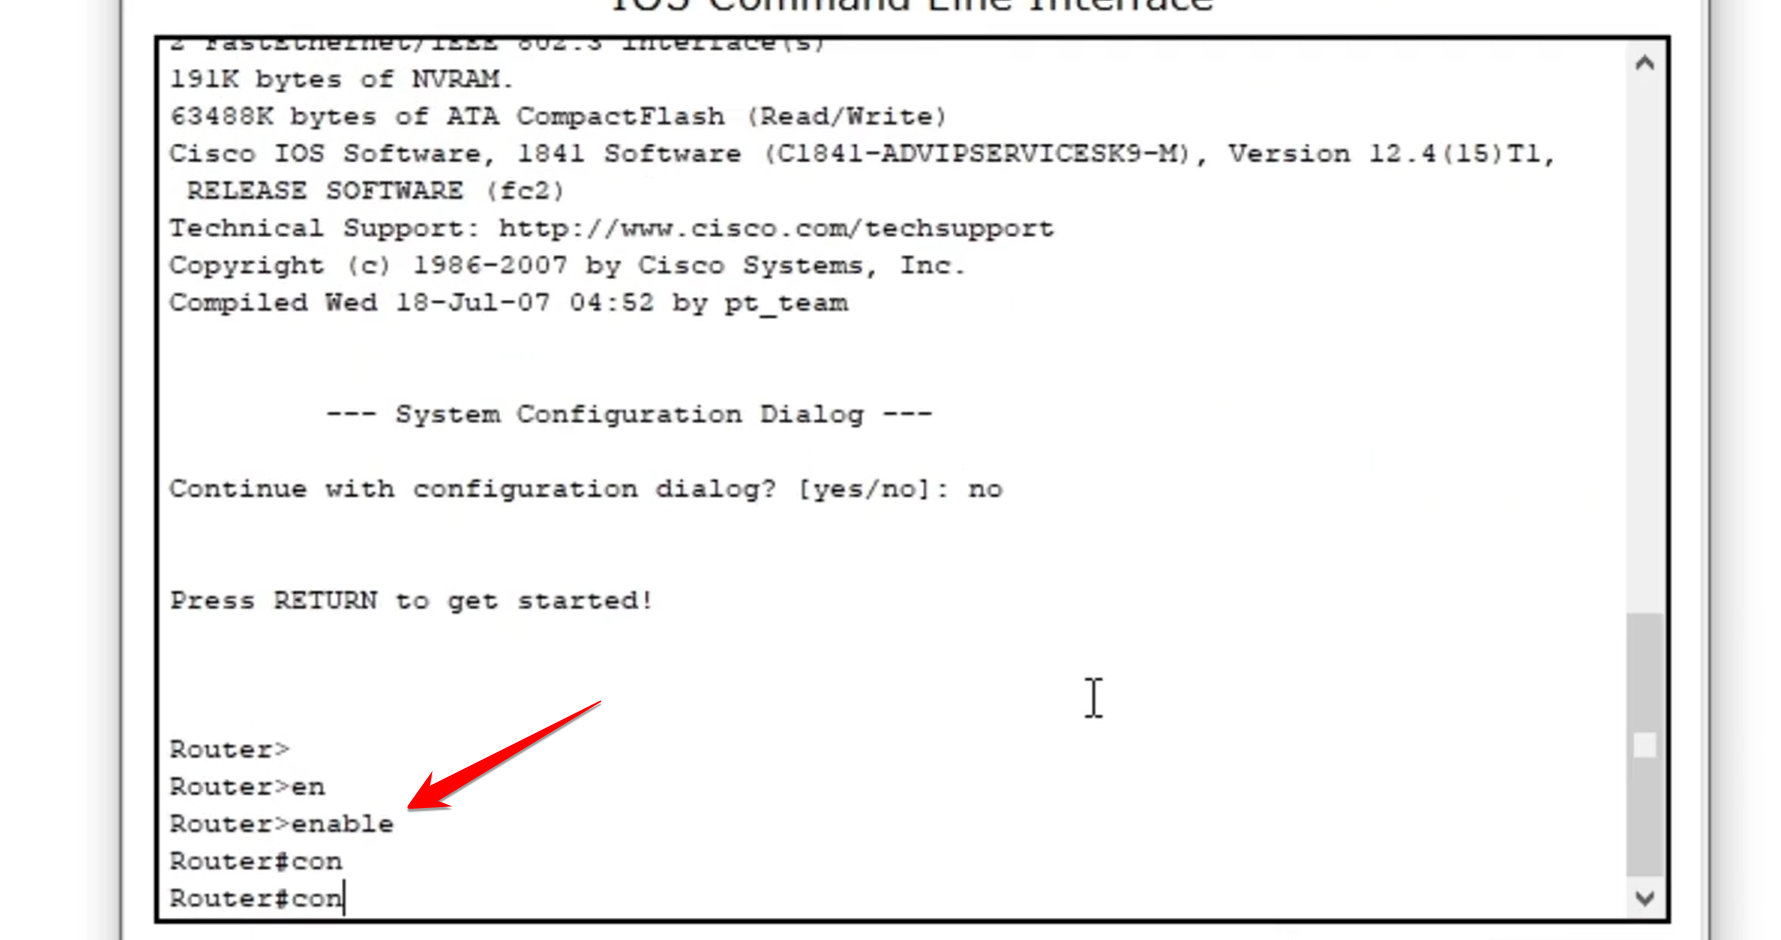
2. Initial Prompt. The setup wizard pops up with a configuration dialogue. Type no to skip it.

3. Enter Configuration Mode. You go through three modes to set up the device.
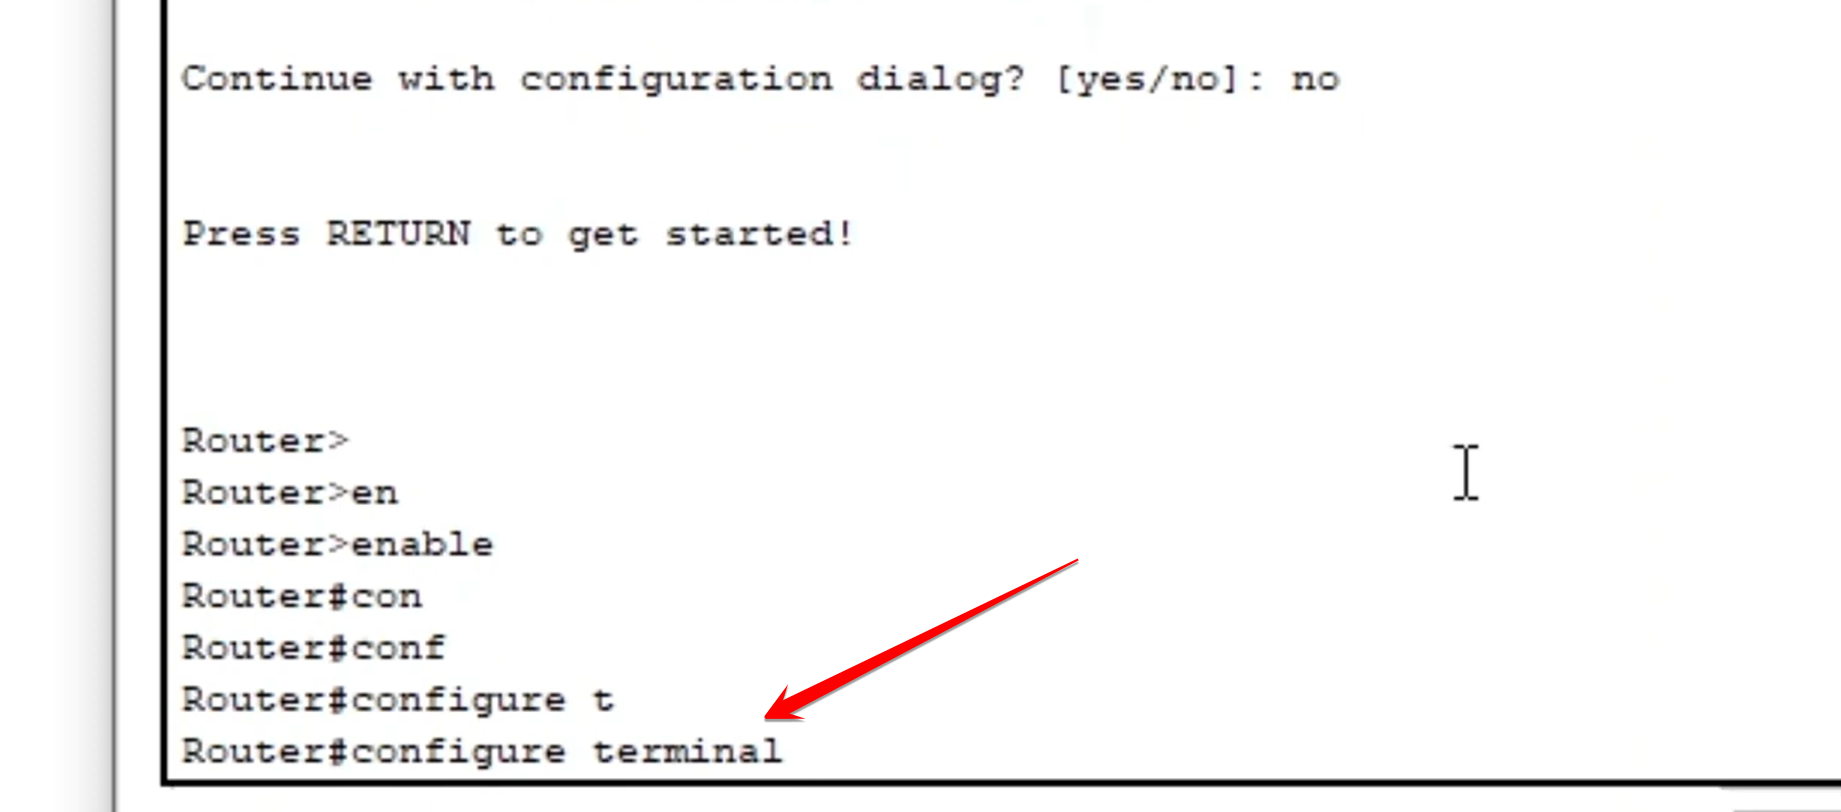
- User EXEC Mode, shown as Router>. Type enable, or just en. That gets you into Privileged EXEC Mode.
- Privileged EXEC Mode, shown as Router#. Type configure terminal, or conf t. Now you are in Global Configuration Mode.
Step-03
Configure the Interface and Assign IP
Stay in Global Configuration Mode. Go to the interface that links to the switch. Apply your settings there.
- Select the Interface. Use its name to enter interface configuration mode.
Router(config)#interface fastethernet 0/1
2. Assign the IP Address. Run the ip address command. Give it the gateway IP you want. Add the subnet mask too. This IP acts as the gateway for every device on the LAN it connects to.
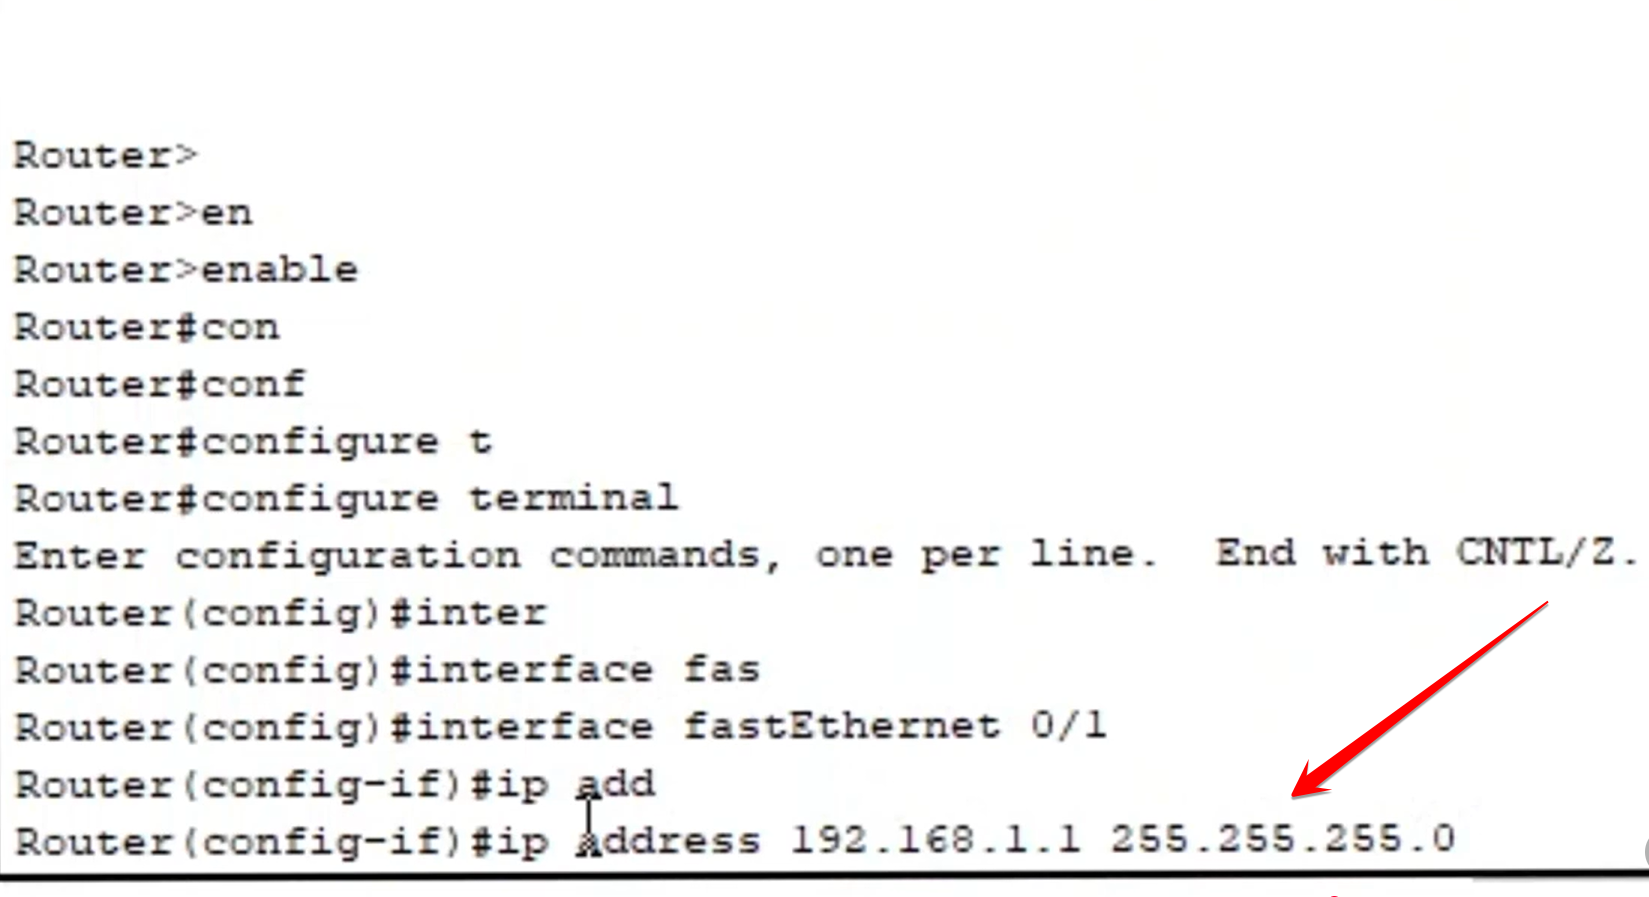
Router(config-if)#ip address 192.168.1.1 255.255.255.0
3. Enable the Port. Run no shutdown to turn on the interface.

Router(config-if)#no shutdown
Right away the link status on the router turns green. The switch port takes longer. It stays orange for about 40 seconds. Then it goes green while running Spanning Tree Protocol, or STP.
Step-04
Test Connectivity from a PC
Wait until the switch link light shows green. Then check if PCs on the LAN can reach their new gateway.
- Access PC Command Prompt. Pick any PC connected to the setup. Go to the Desktop tab. Open the Command Prompt from there.
- Ping the Router. Send a ping to the IP address you set on the router’s interface. That is the PC’s gateway.
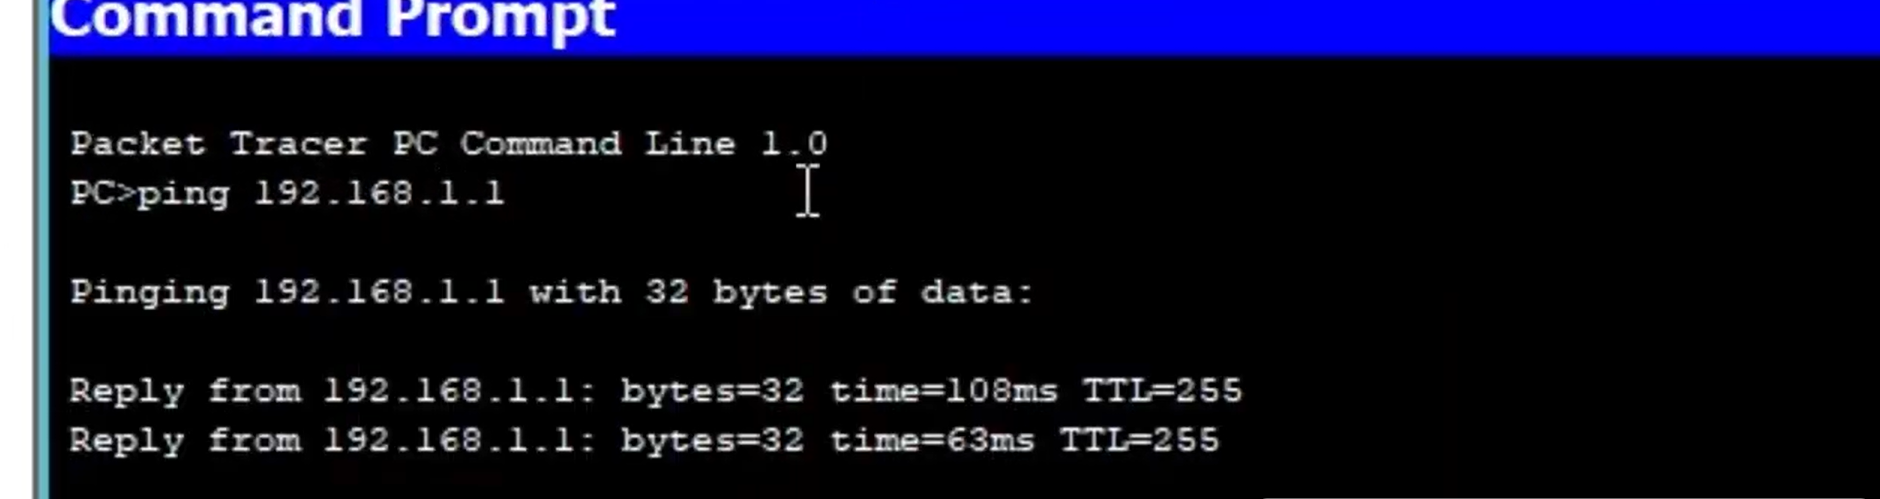
C:\>ping 192.168.1.1
- If the ping works, it means the router’s interface is active. The IP is correct. The connection to the local network holds up fine.