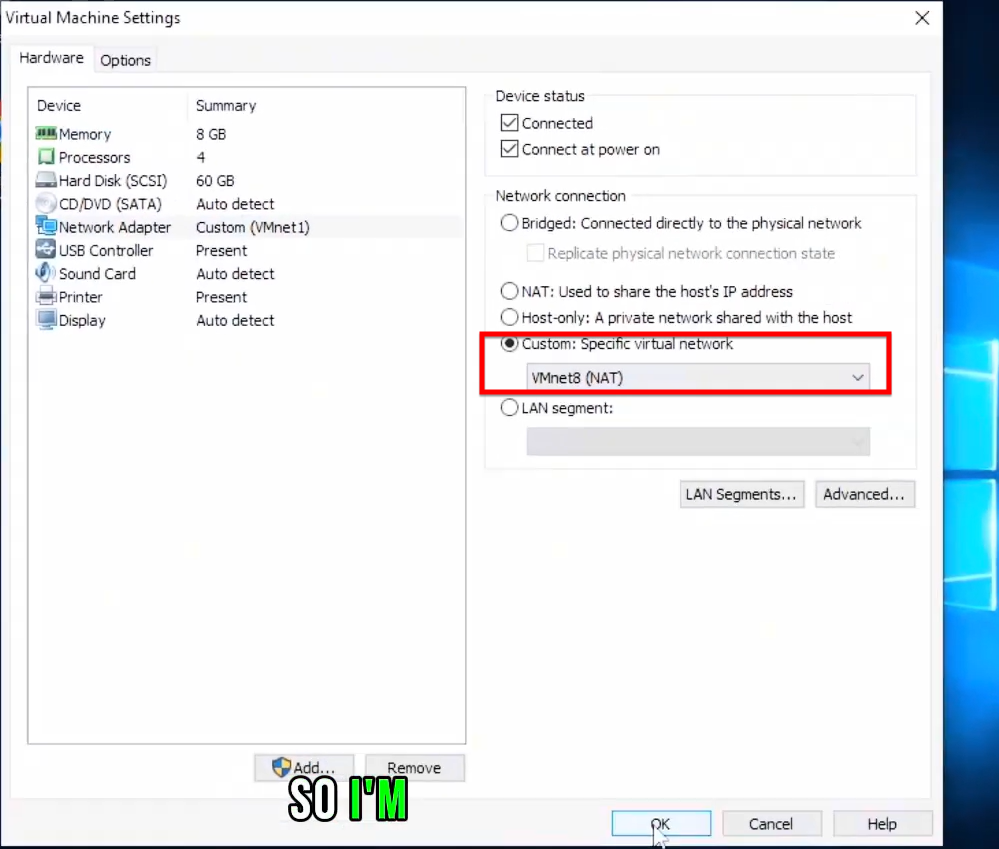
When setting up a Virtual Machine (VM) in VMware Workstation, choosing the correct network adapter mode is crucial for controlling how your VM communicates with your host computer, other VMs, and the external internet.
You can get into the global network settings and tweak them through the Virtual Network Editor. Just head to Edit and then pick Virtual Network Editor.
Step: 01
VMware Workstation offers three key network modes. Each one handles a specific job in a different way. The first mode is Bridged, which uses VMnet0. It lets the VM connect directly to the external network. The host router acts as the DHCP server here. In this setup, the VM shows up like its own separate device on your physical network. It grabs an IP address straight from your home or office router. You can reach the VM from your host computer using RDP or by pinging it. Other external devices can do the same thing.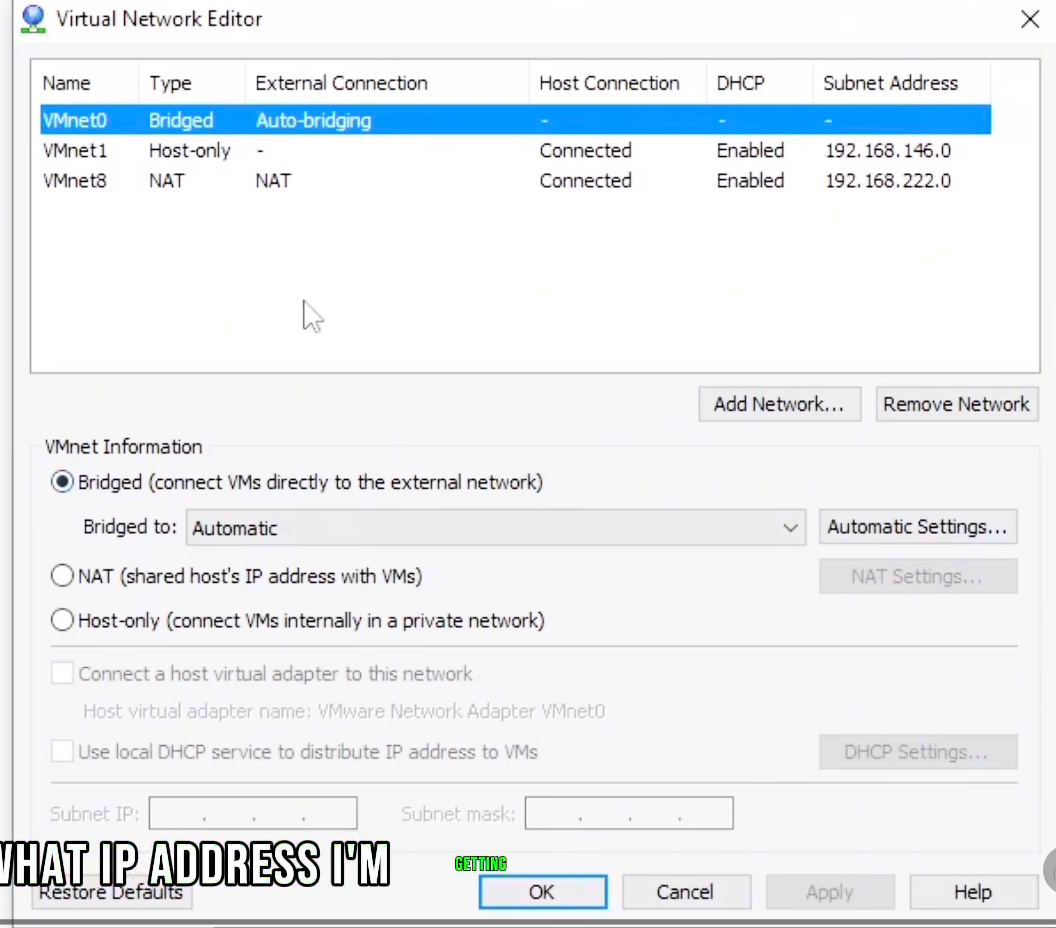 Next comes Host-Only mode on VMnet1. This limits communication to just the host computer and other VMs. VMware provides the DHCP server for it. The VM stays isolated from the external network or internet access. It only talks to the host and VMs on the same VMnet1 switch.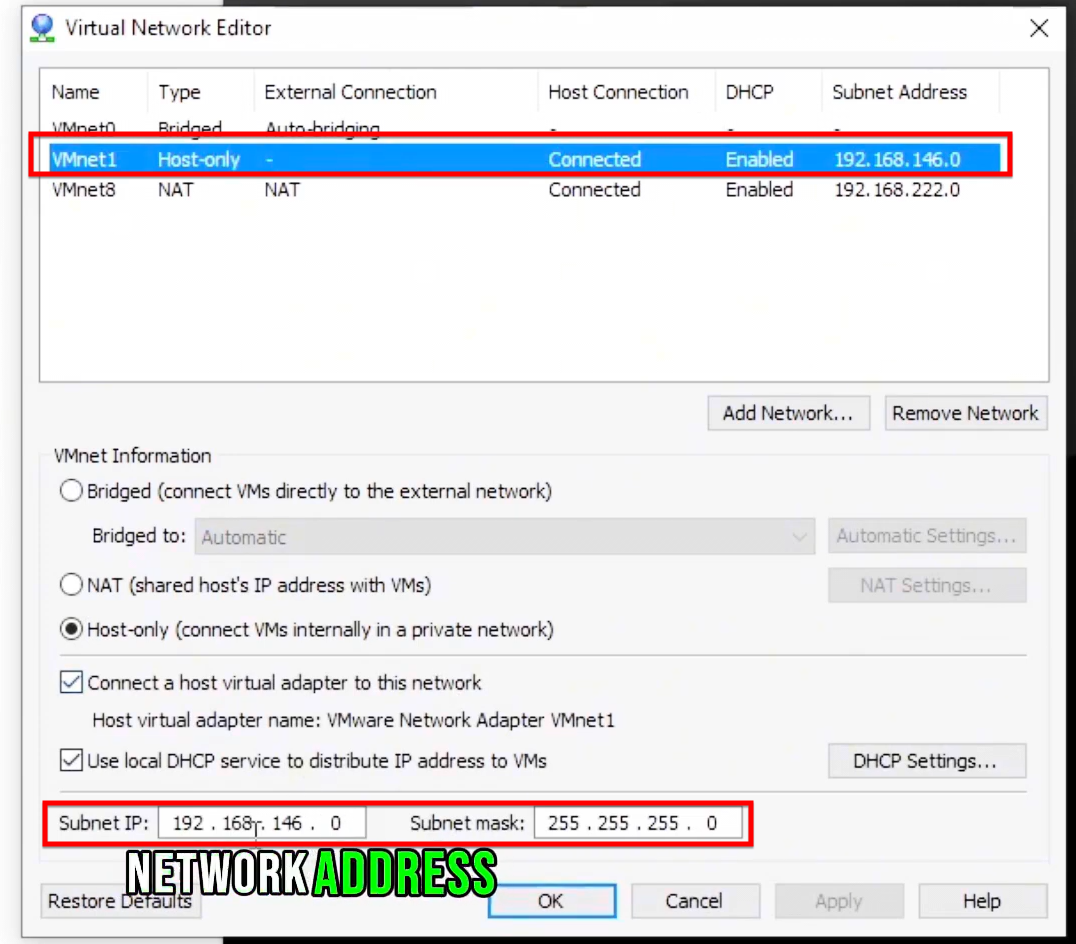
Then there is NAT mode with VMnet8. It gives internet access through the host machine. Again, VMware handles the DHCP. The VM shares the host’s IP address and uses port address translation for web stuff. It runs on a private network away from your physical router. Still, the host can access it and ping it easily.
Step: 02
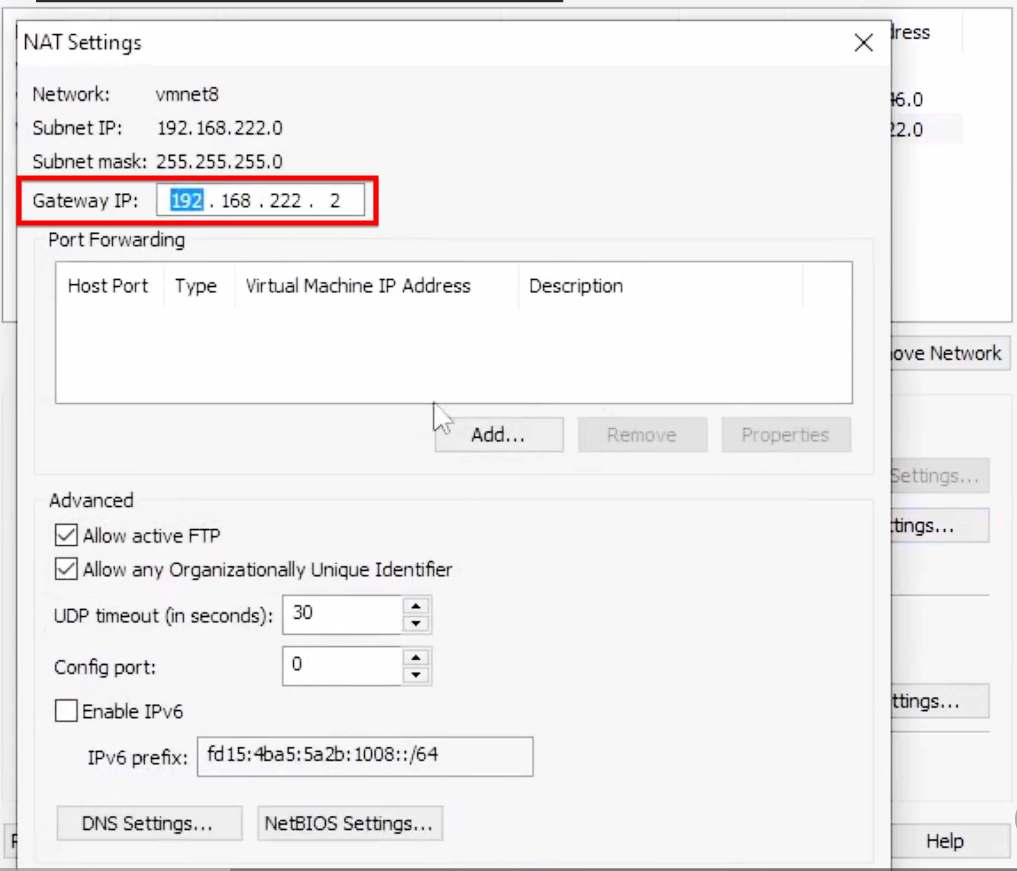
In the Virtual Network Editor, you have options to adjust the address range and gateway for Host-Only on VMnet1 and NAT on VMnet8. For NAT settings, you can check or update the gateway IP that the VM uses to reach the host network.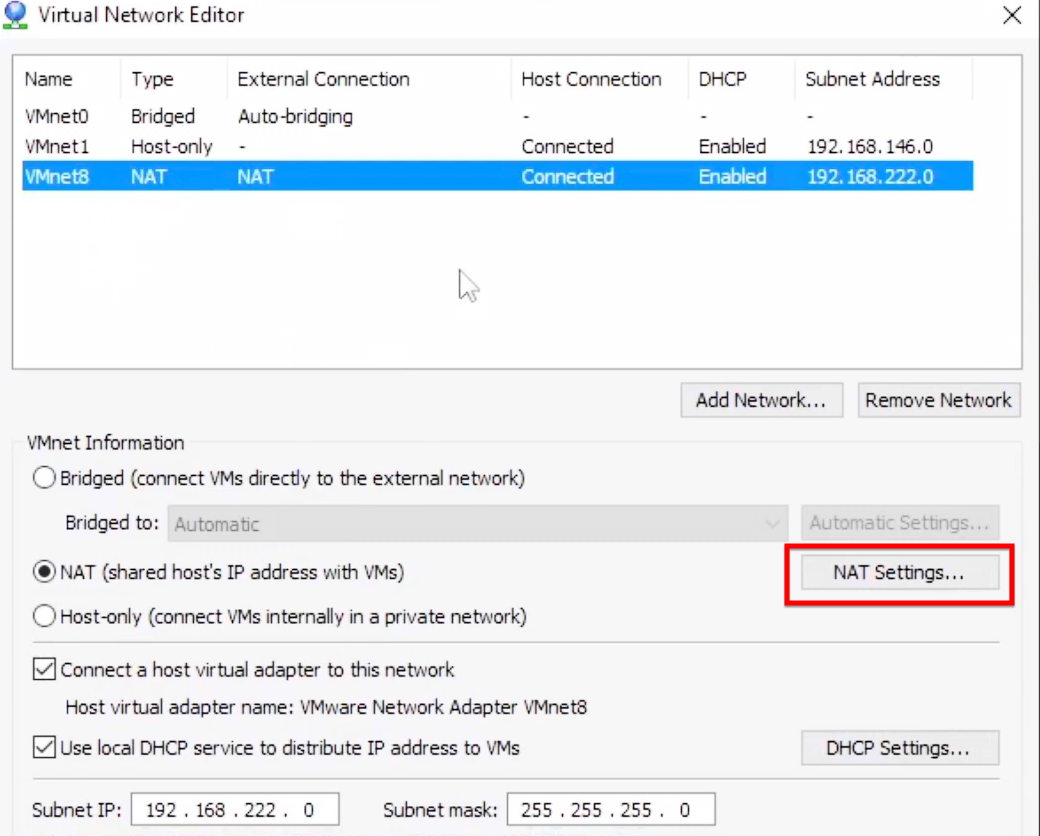
DHCP settings apply to both Host-Only and NAT modes since VMware runs the server. You can see the starting and ending IP addresses assigned to VMs on that virtual switch.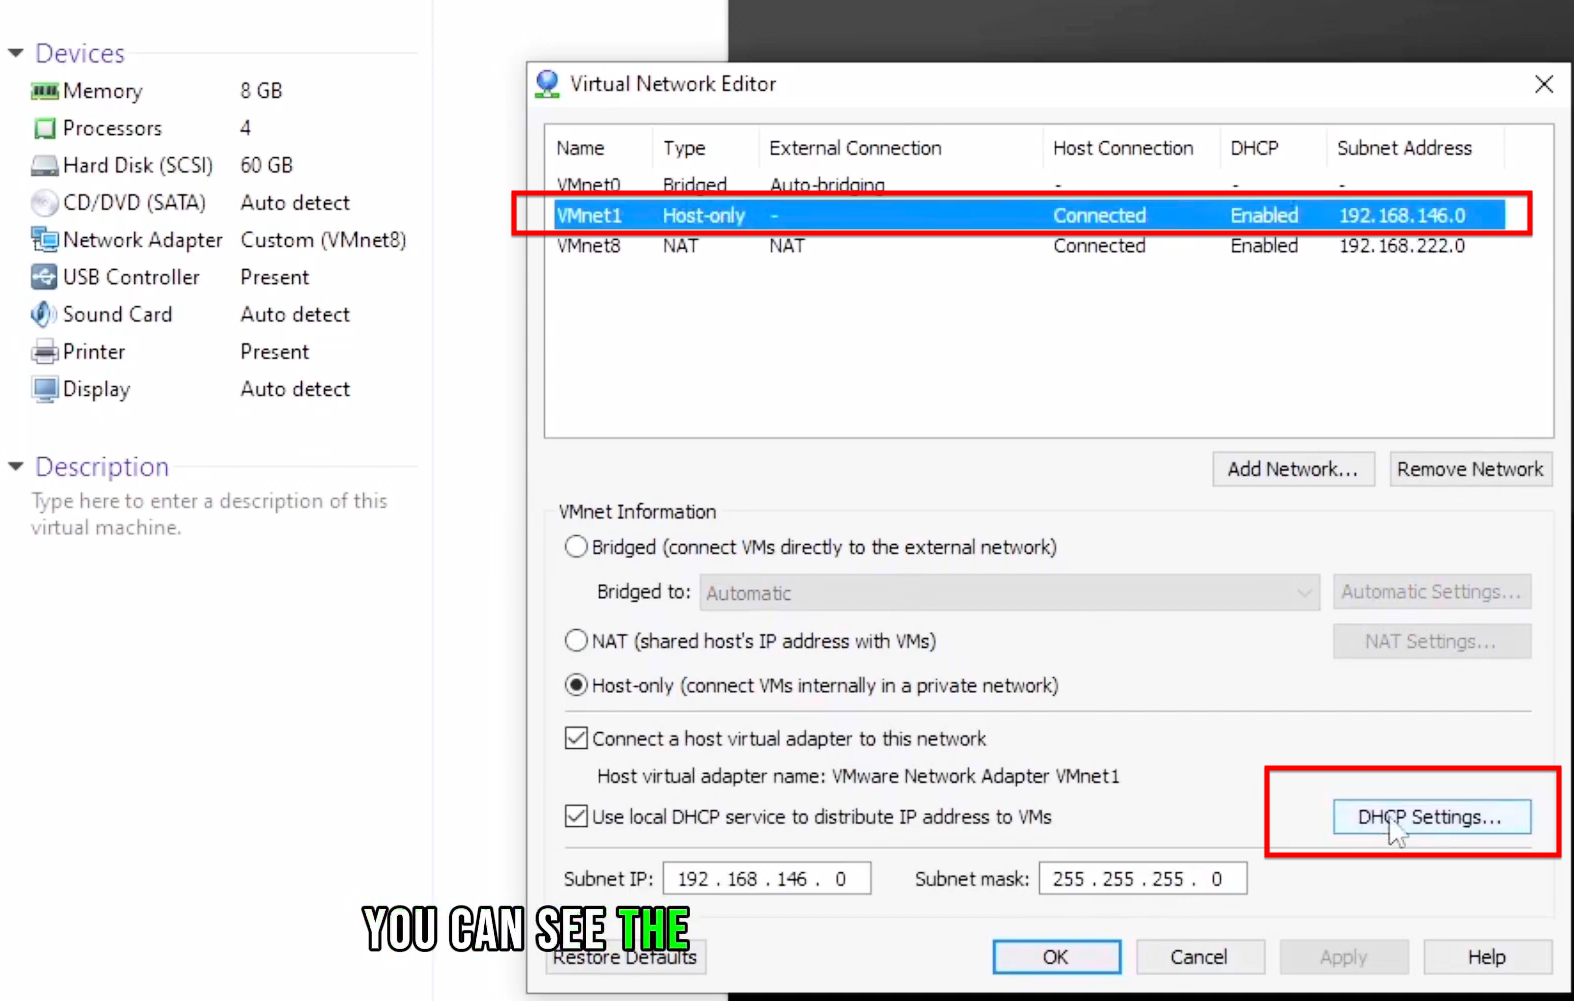
Step: 03
Just a note on Bridged mode. It skips its own DHCP server entirely. Instead, it depends on the external physical network for IP assignments from your home or office router. To switch a VM’s network, open the Virtual Machine Settings. Go to the Network Adapter section. Pick the connection type you want, like Bridged, NAT, or Host-Only. 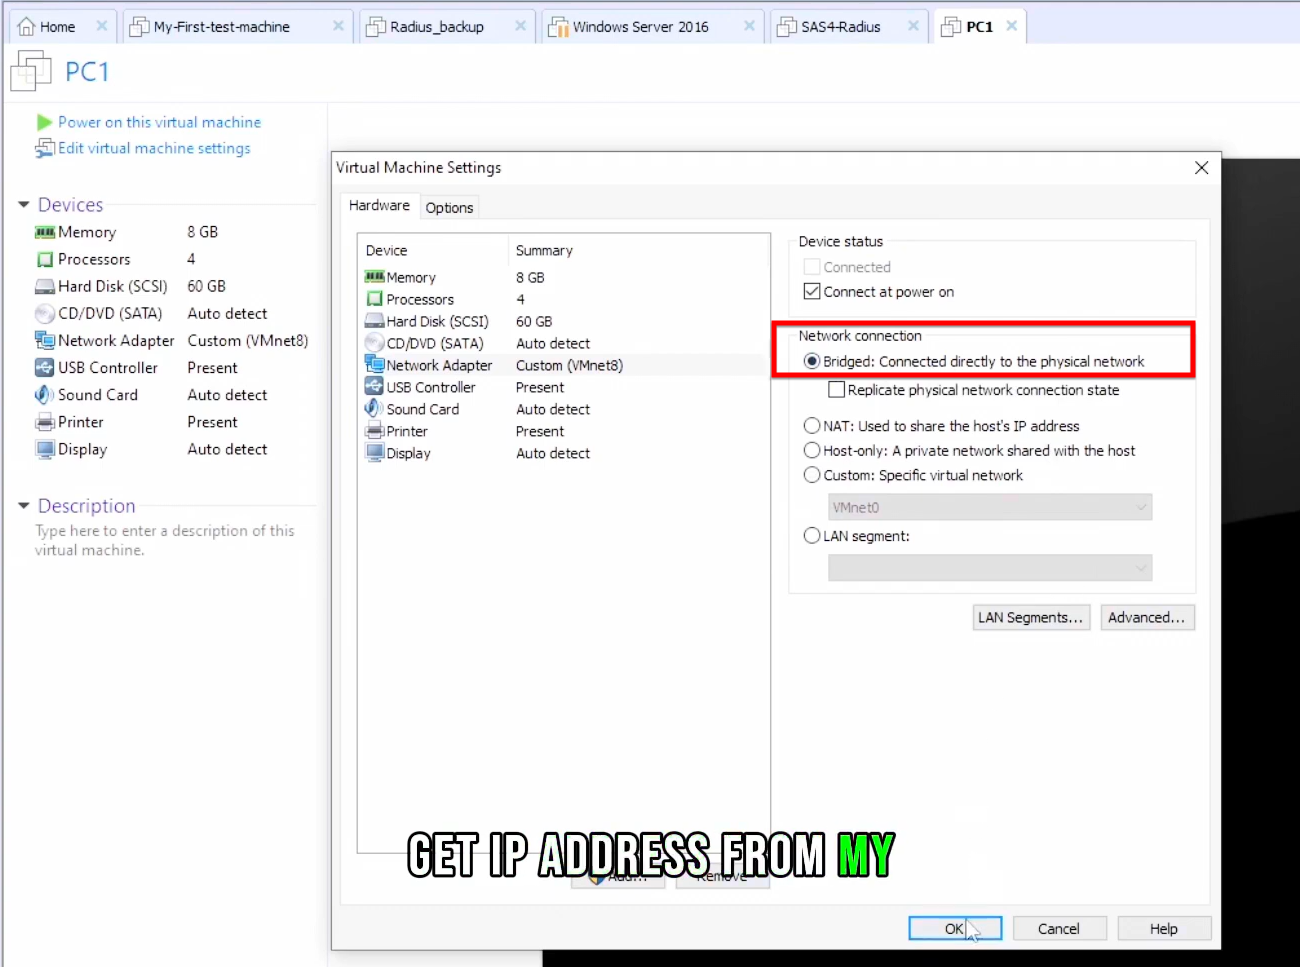 For testing Bridged, the VM pulls an IP from the host’s physical network. Think something like a 10.0.0.108 series address. It becomes reachable from the host through ping or RDP.
 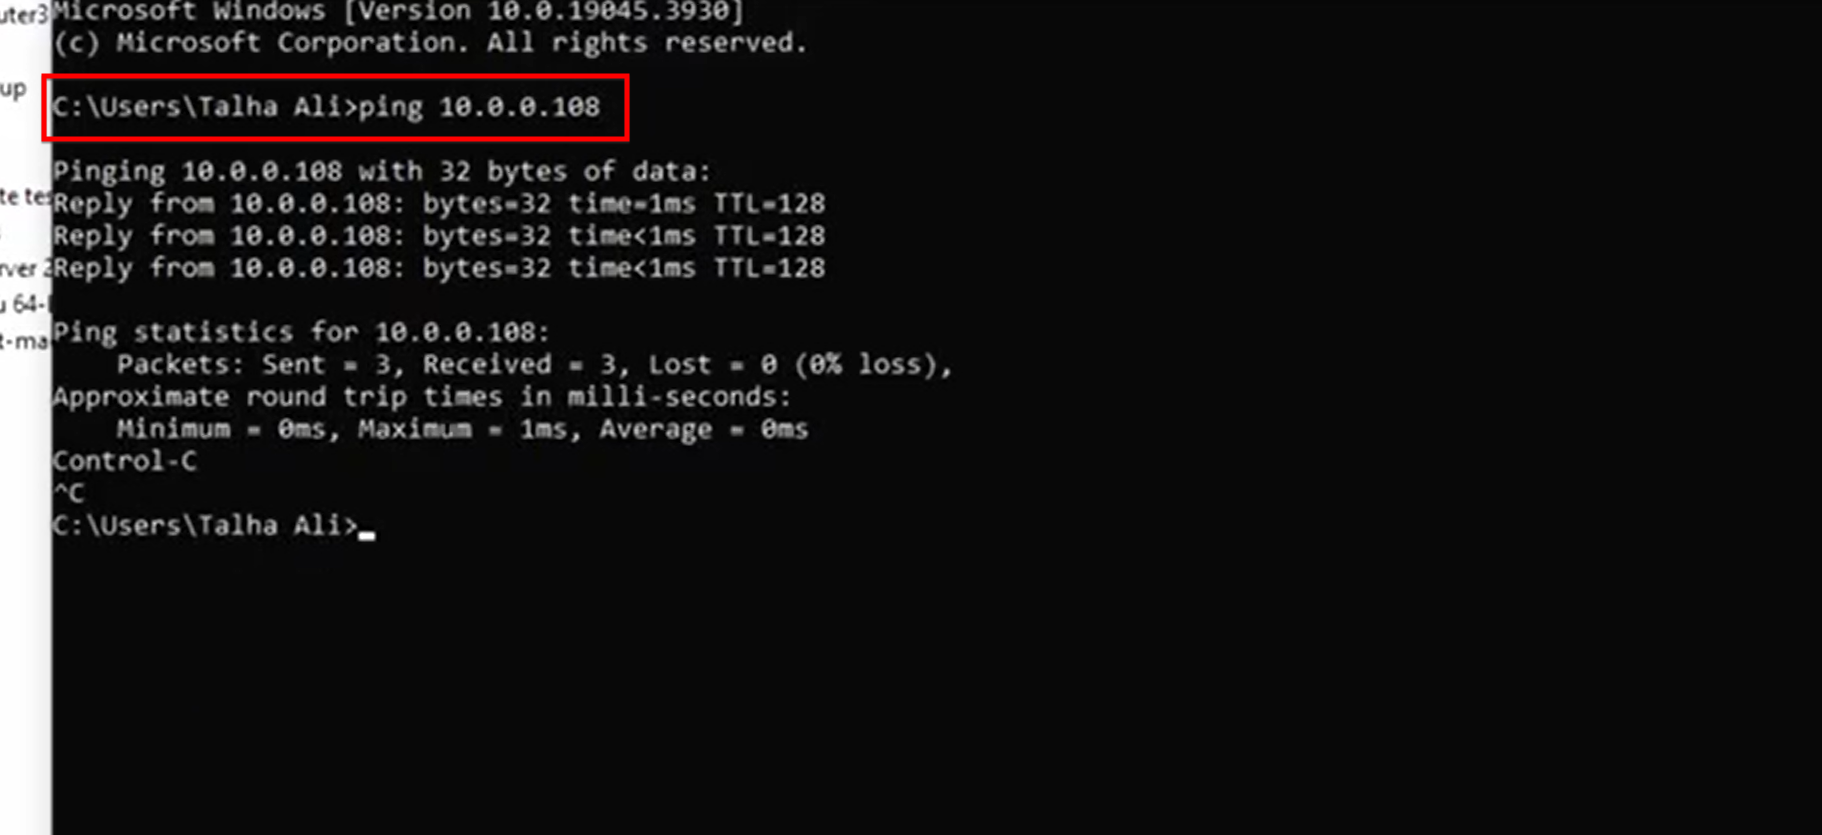 In Host-Only testing, the VM gets an IP from the dedicated subnet. For example, a 192.168.146.128 series one. Communication stays limited to the host and other VMs on that switch.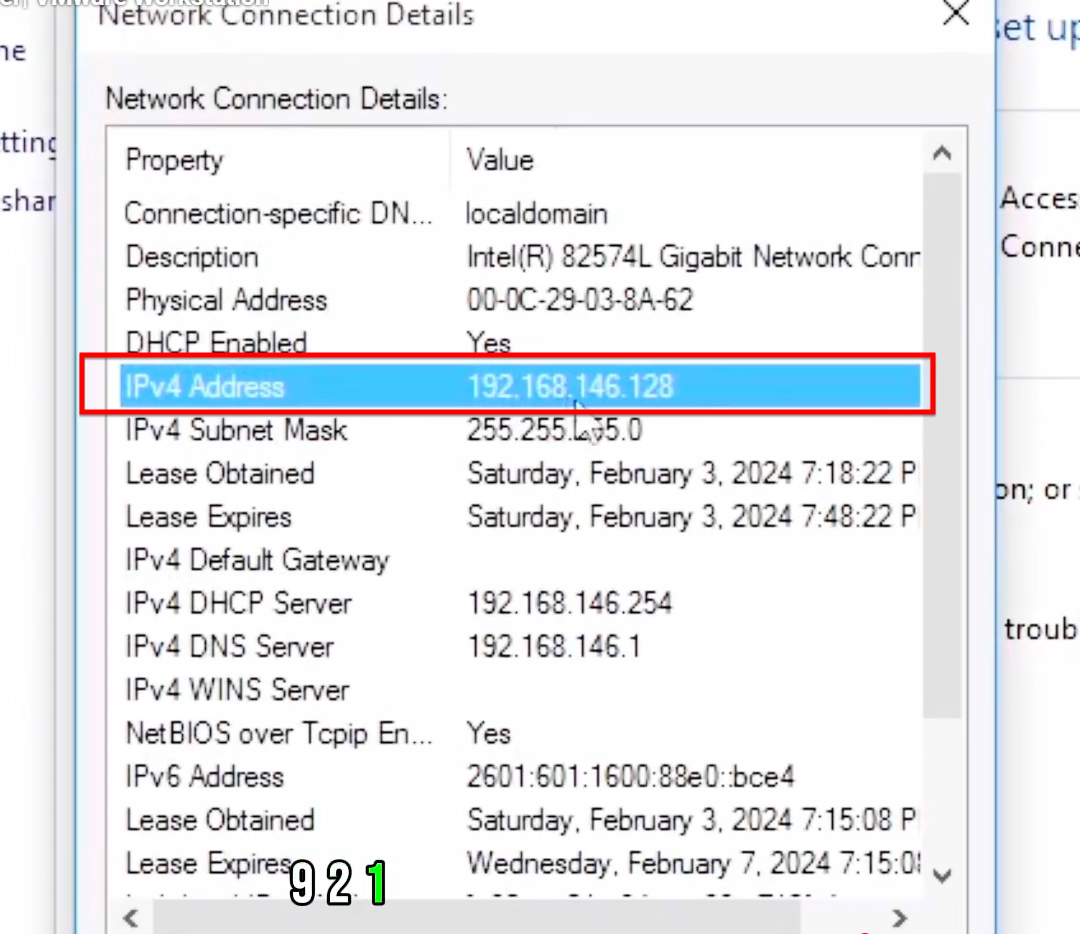
NAT testing gives the VM an IP from its own subnet, say 192.168.222.128 series. It can reach the internet fine. The host still connects via ping or RDP without issues.