
This video from the Zonat Solutions channel provides a step-by-step tutorial on how to map a virtual disk (VMDK) from a VMware Workstation virtual machine directly to your host computer’s file system. This allows you to browse and copy files without powering on the virtual machine.
VMware Workstation has this mapping feature for hard disks. It lets you assign a drive letter to a .vmdk file, which is pretty handy at times. 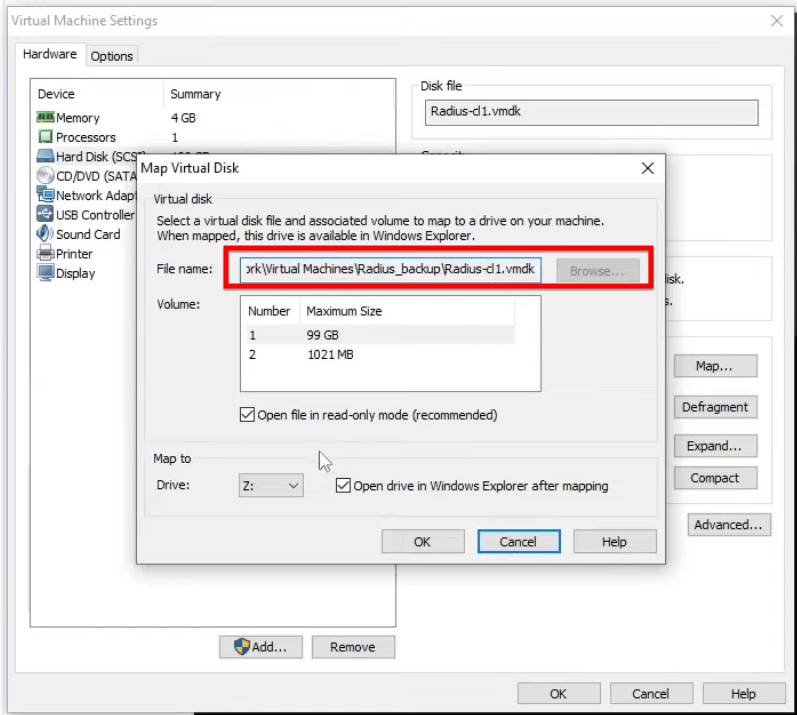
I think the virtual machine needs to be powered off first, though, before you can do any of that mapping to the host.
The steps seem straightforward enough. You go into the virtual machine settings and pick the hard disk you want. Then click on the Map button.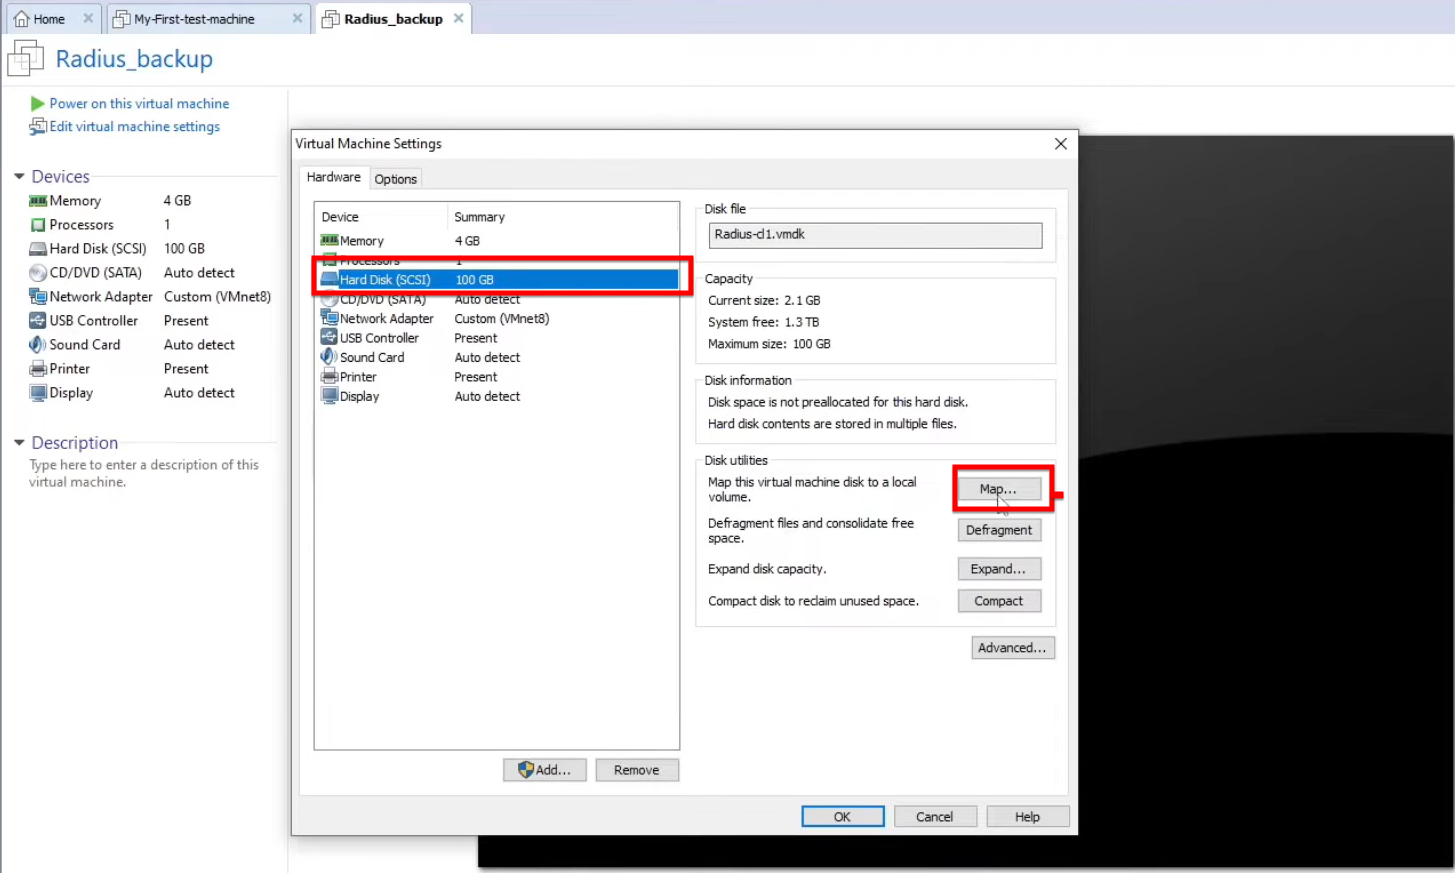 From there, you choose a drive letter like Q or maybe S, and select the volume.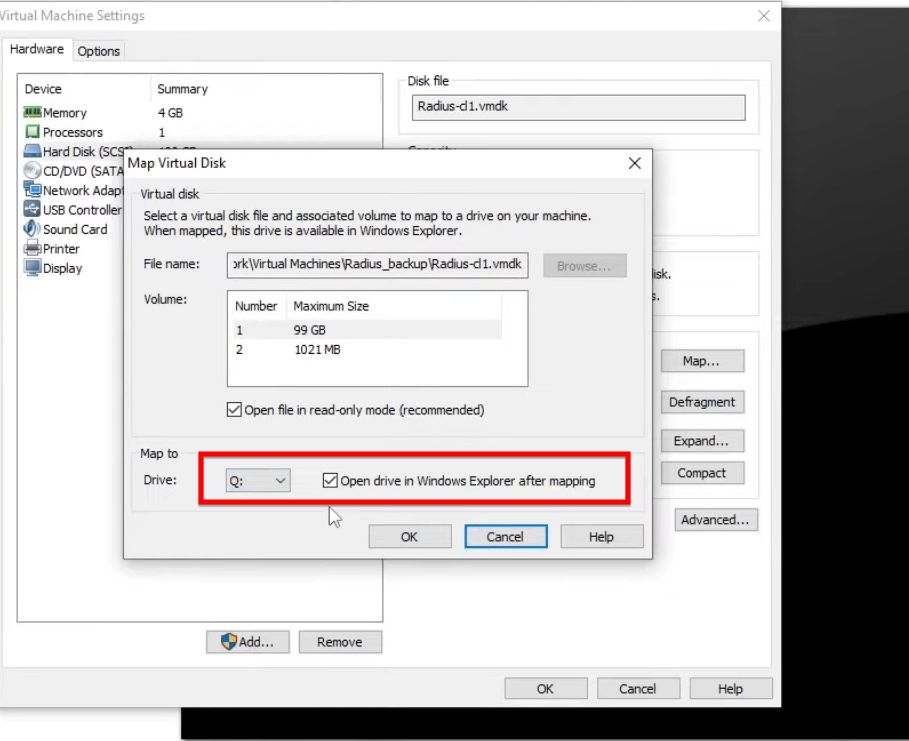
It feels like checking the option to open it in Windows Explorer right after makes sense, so you can jump in quickly. And click OK to finish. To get rid of it later, just go back and hit disconnect.
Compatibility can be tricky depending on the guest OS. For Windows guests with NTFS, it works fine, you can browse files, open them, even change stuff directly in Explorer after mapping. But Linux guests are different, say with ext4. You can map the drive, but Windows does not really support it natively, so it might not read the contents or even show the size properly. That part gets a bit messy.
Overall, this technique helps with quick file recovery or tweaking config files when the VM will not boot up. It is not perfect, especially across different file systems, but it saves time sometimes.


