VMware Workstation provides standard virtual switches like vmnet0 (Bridged), vmnet1 (Host-Only), and vmnet8 (NAT). However, there are many scenarios where you might need more isolated networks for testing and lab environments. This guide shows you how to add and customize additional virtual switches.
To get started with managing virtual networks in VMware Workstation, you have to open up the Virtual Network Editor. It is basically the main tool for that. I went to the Edit menu and picked Virtual Network Editor from there. That seemed straightforward enough.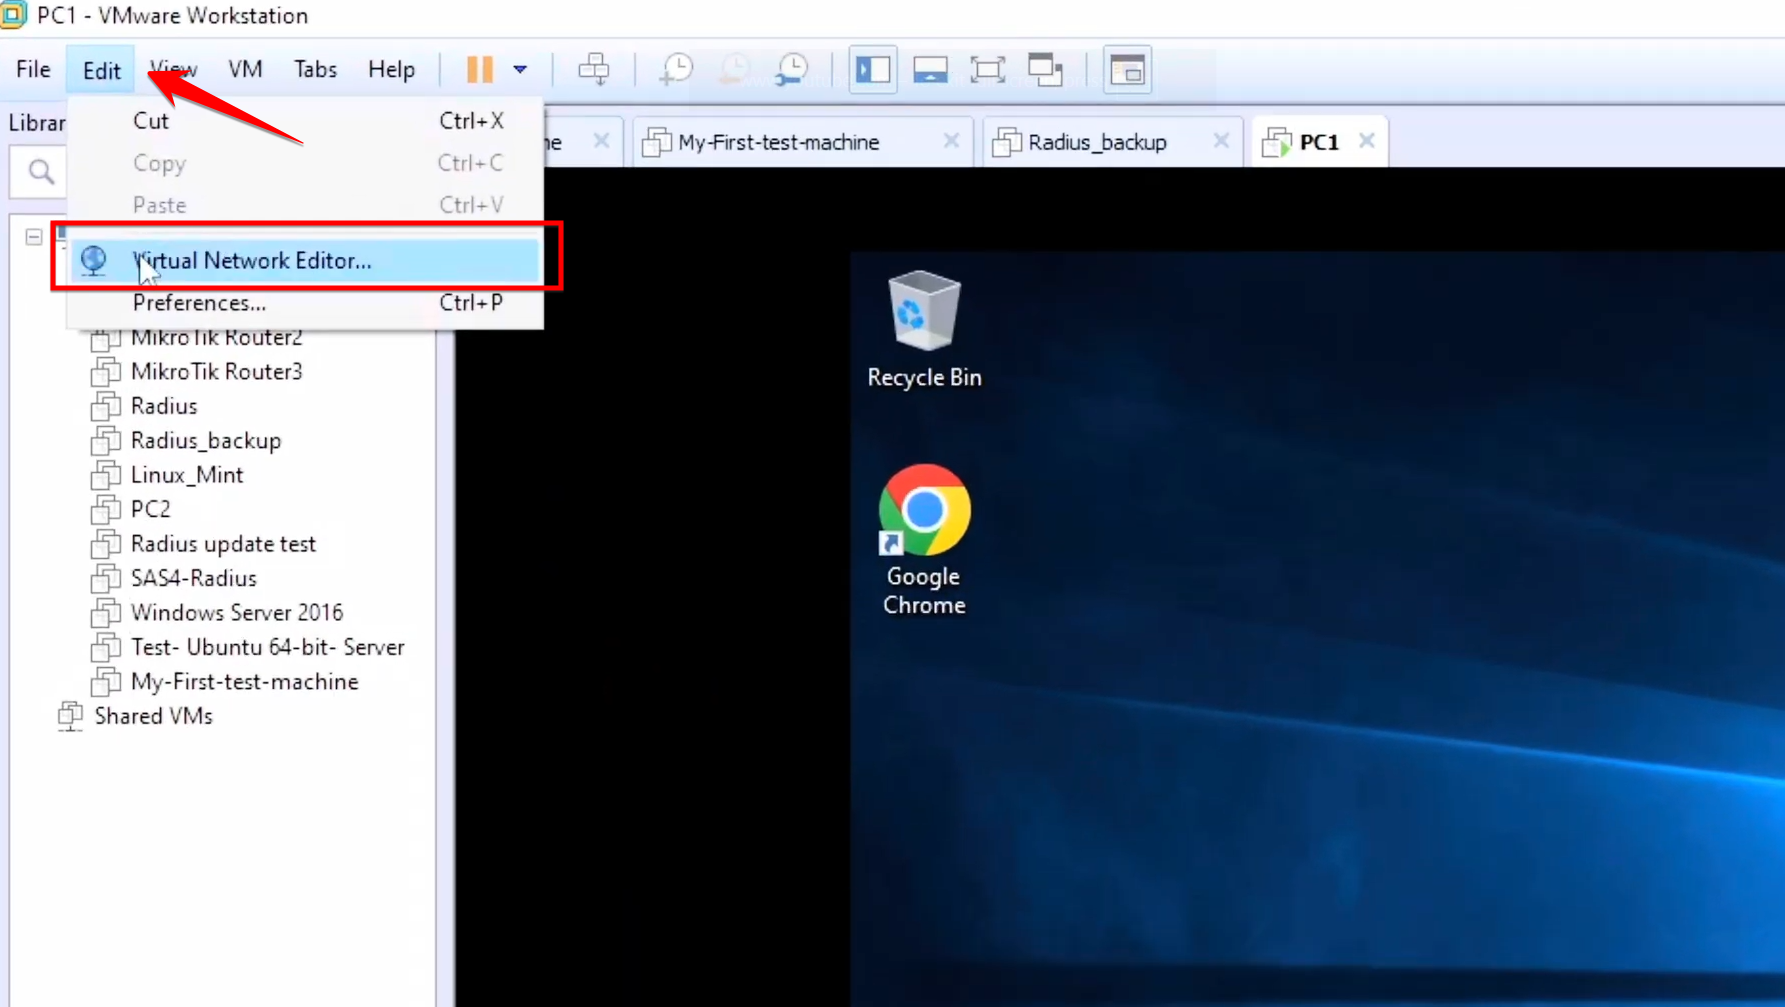
Once it is open, if you want to make changes like adding networks, you need to click on Change Settings first. This usually asks for administrator stuff, which makes sense because it is dealing with network setups. Without that, you cannot really do much.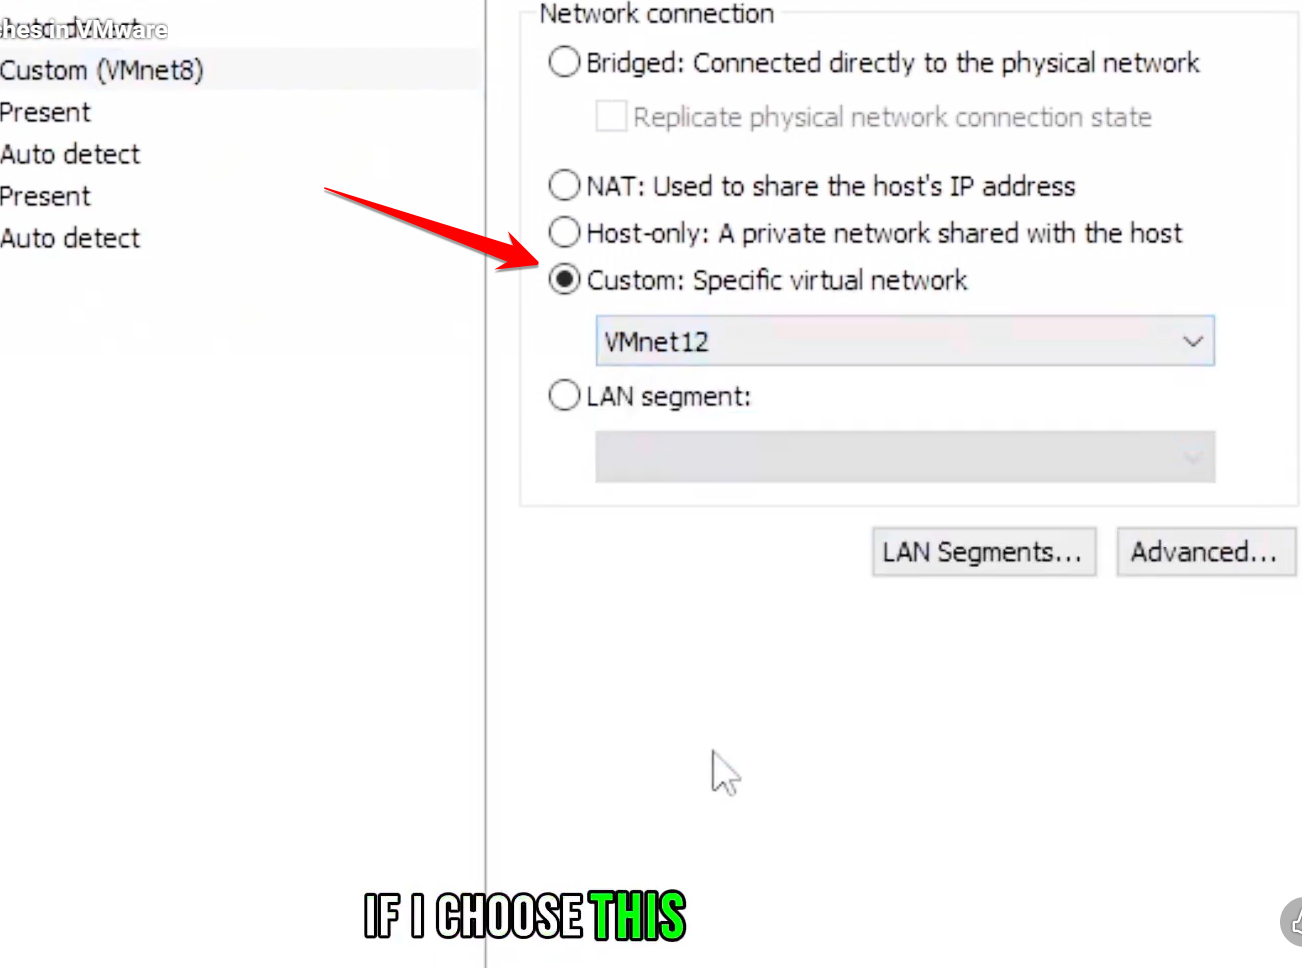
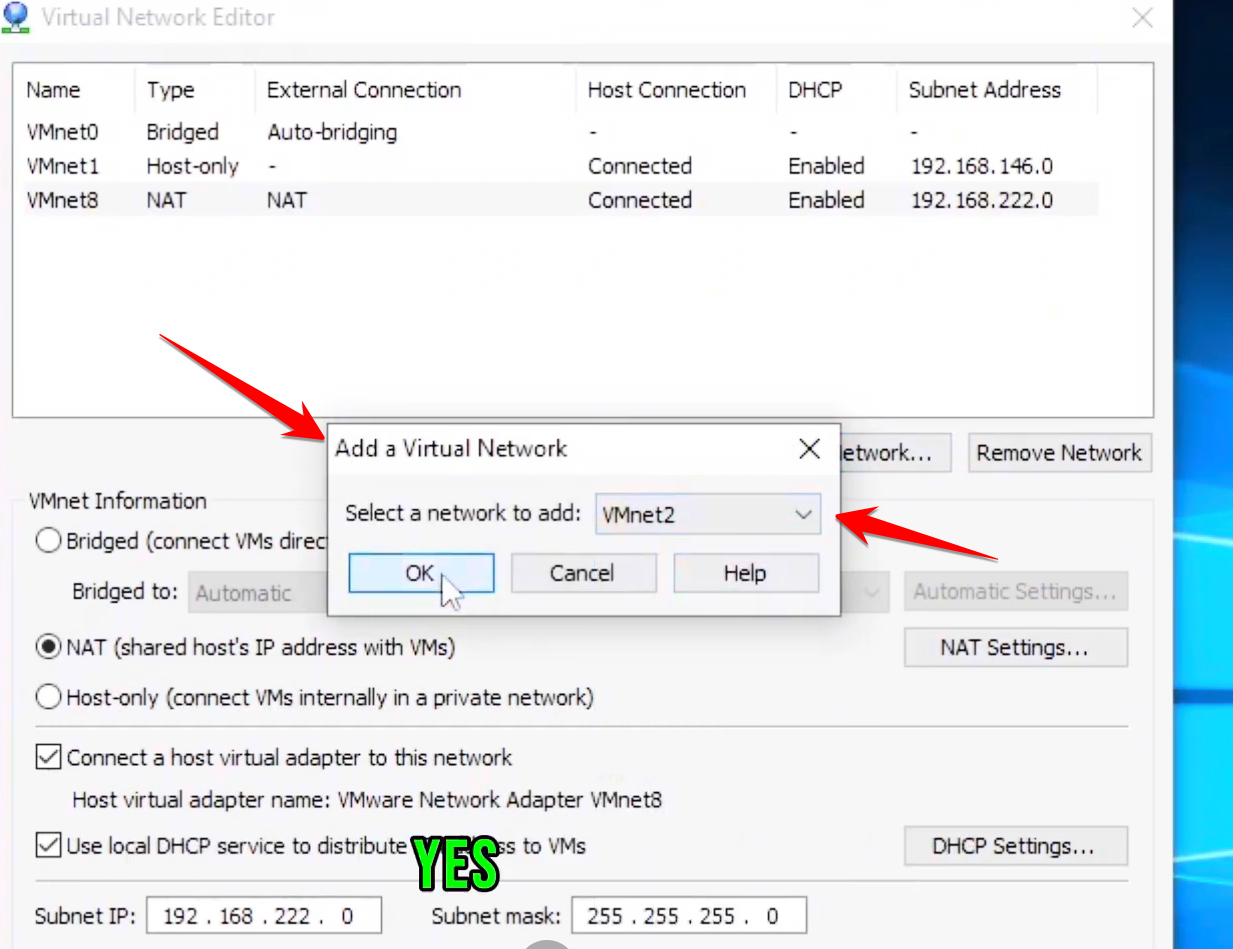
Adding a new virtual switch comes next, I think. In the editor, there is an Add Network button you can hit. Then pick a name like VMnet2 from the dropdown and say OK. VMware just assigns some random subnet automatically, but you can tweak it later if needed.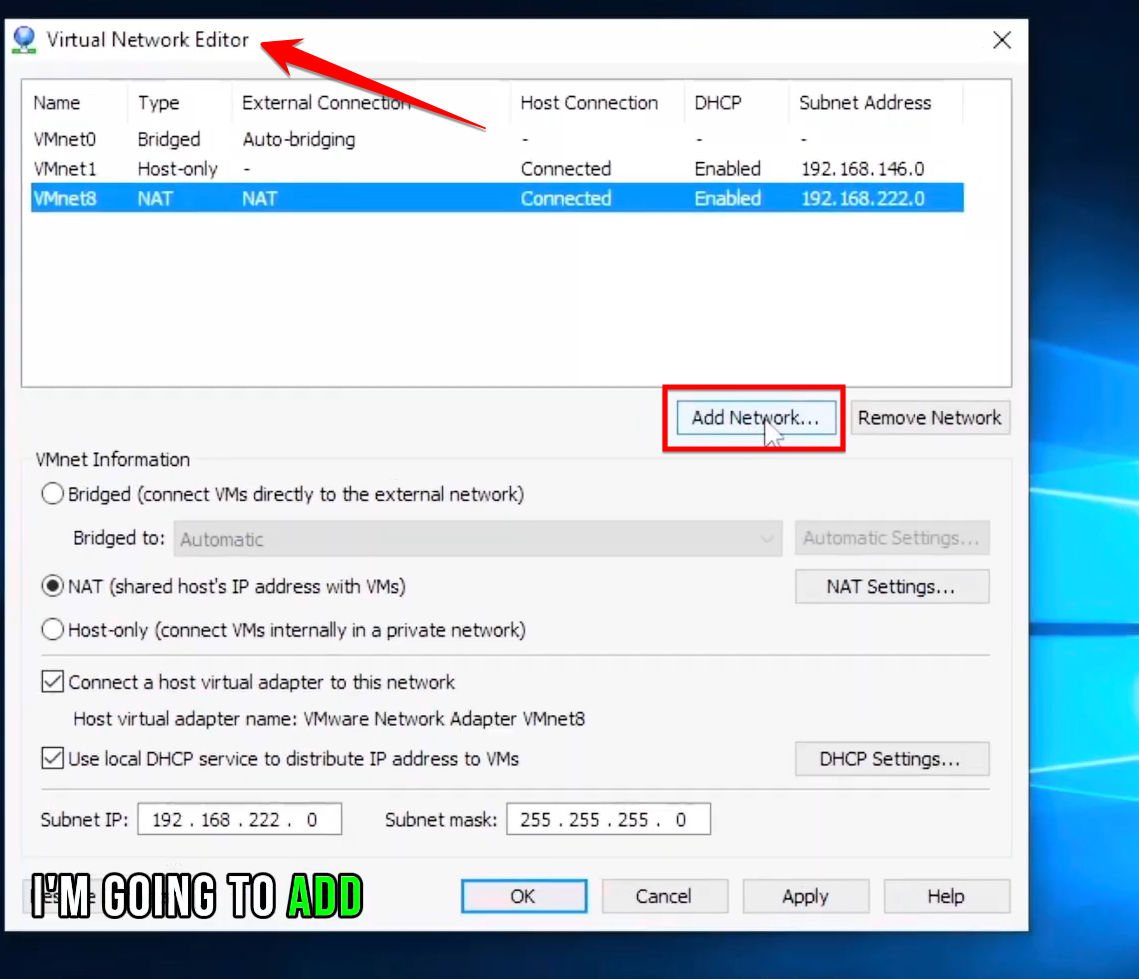
For customizing the subnet and DHCP, that is where it gets a bit more hands on. You can set the subnet IP yourself, say something like 172.16.75.0, instead of letting it be random.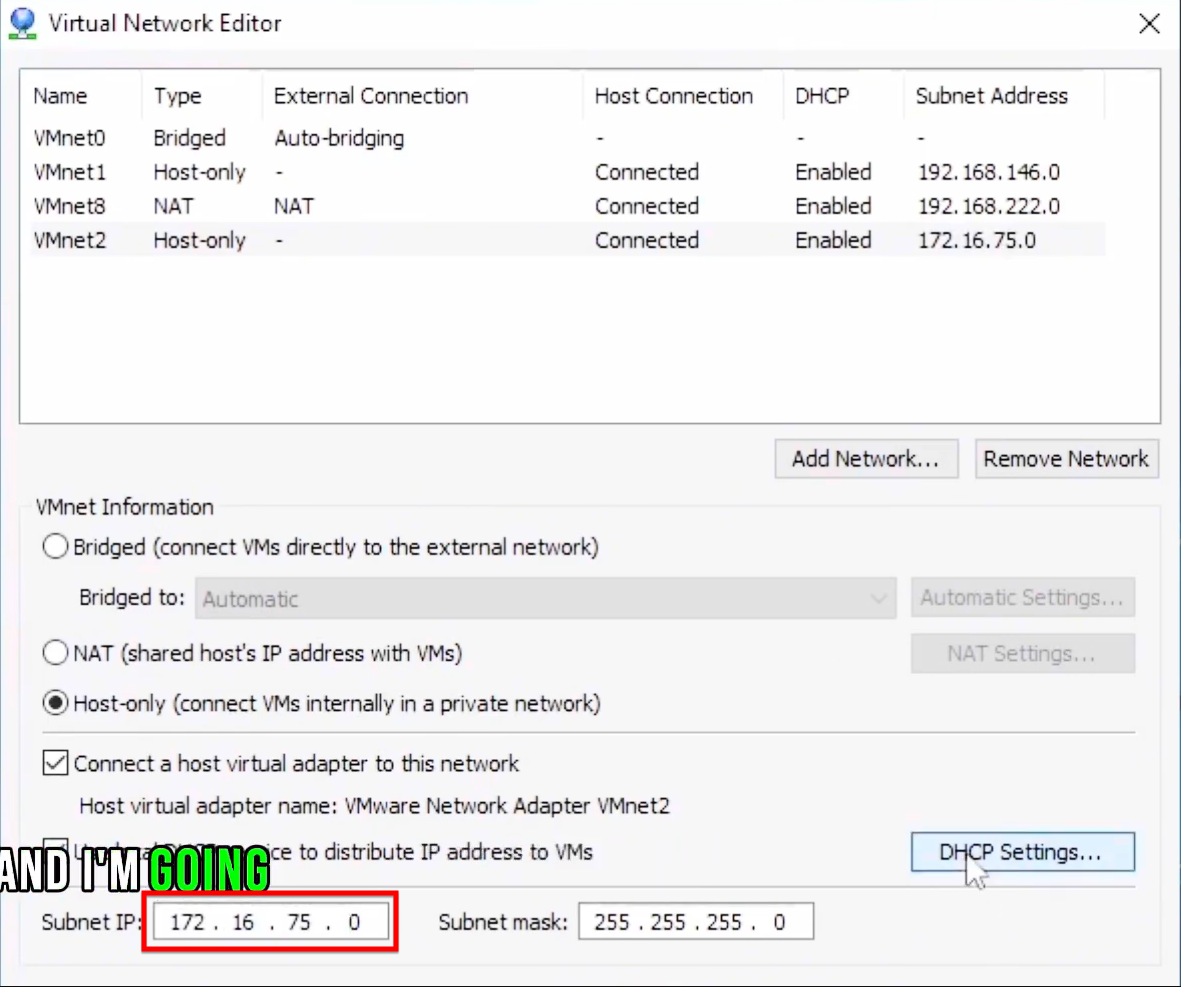
Most of the time, people set these extra switches to Host-only type, so the VMs can talk to each other internally without going outside. Note that you can only have one NAT network going at a time in Workstation, which might limit things.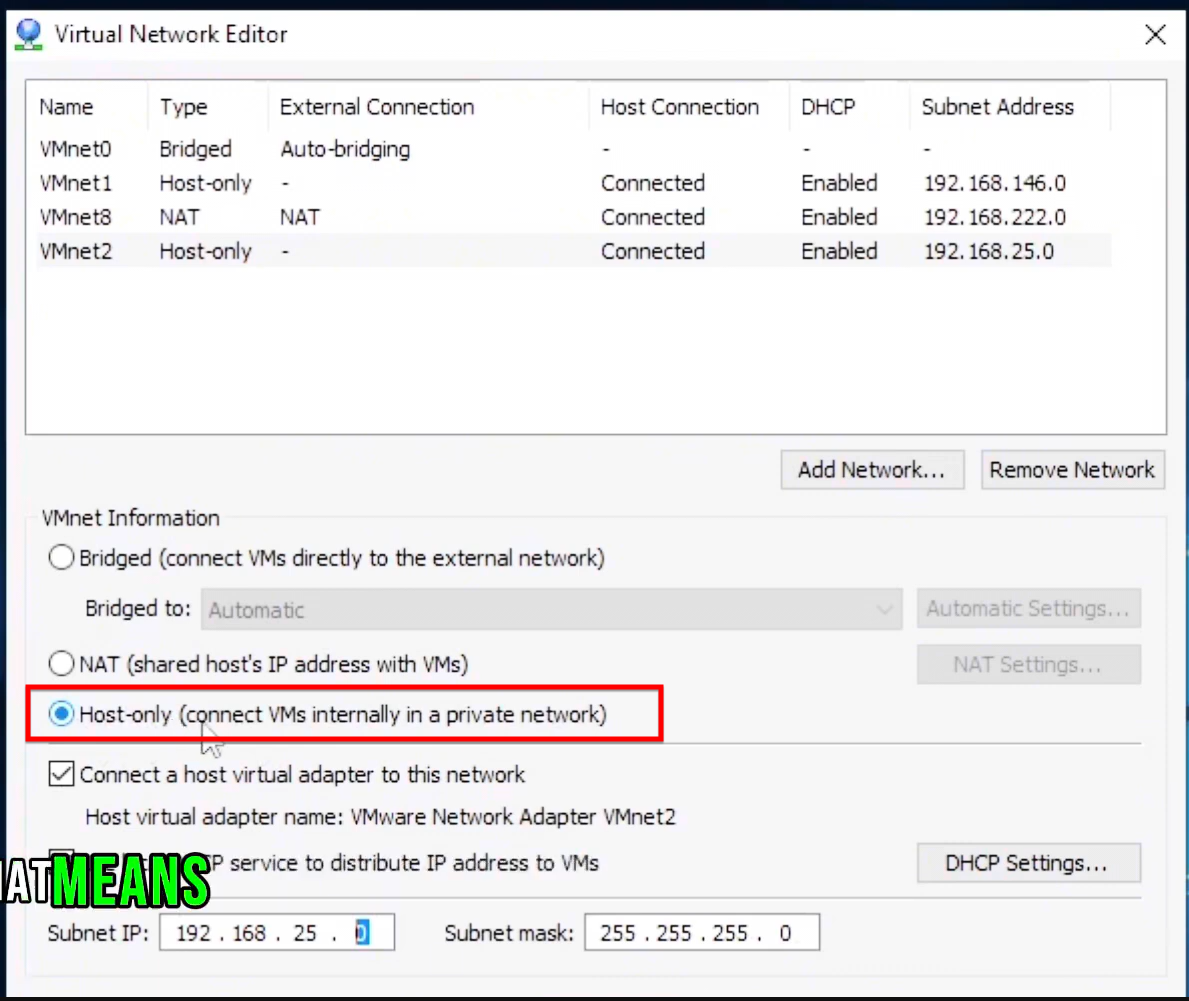
On the DHCP side, there is a checkbox to turn on or off the local DHCP service for handing out IPs to the VMs. If you enable it, click into DHCP Settings to pick the range of addresses you want, like starting from whatever fits your subnet.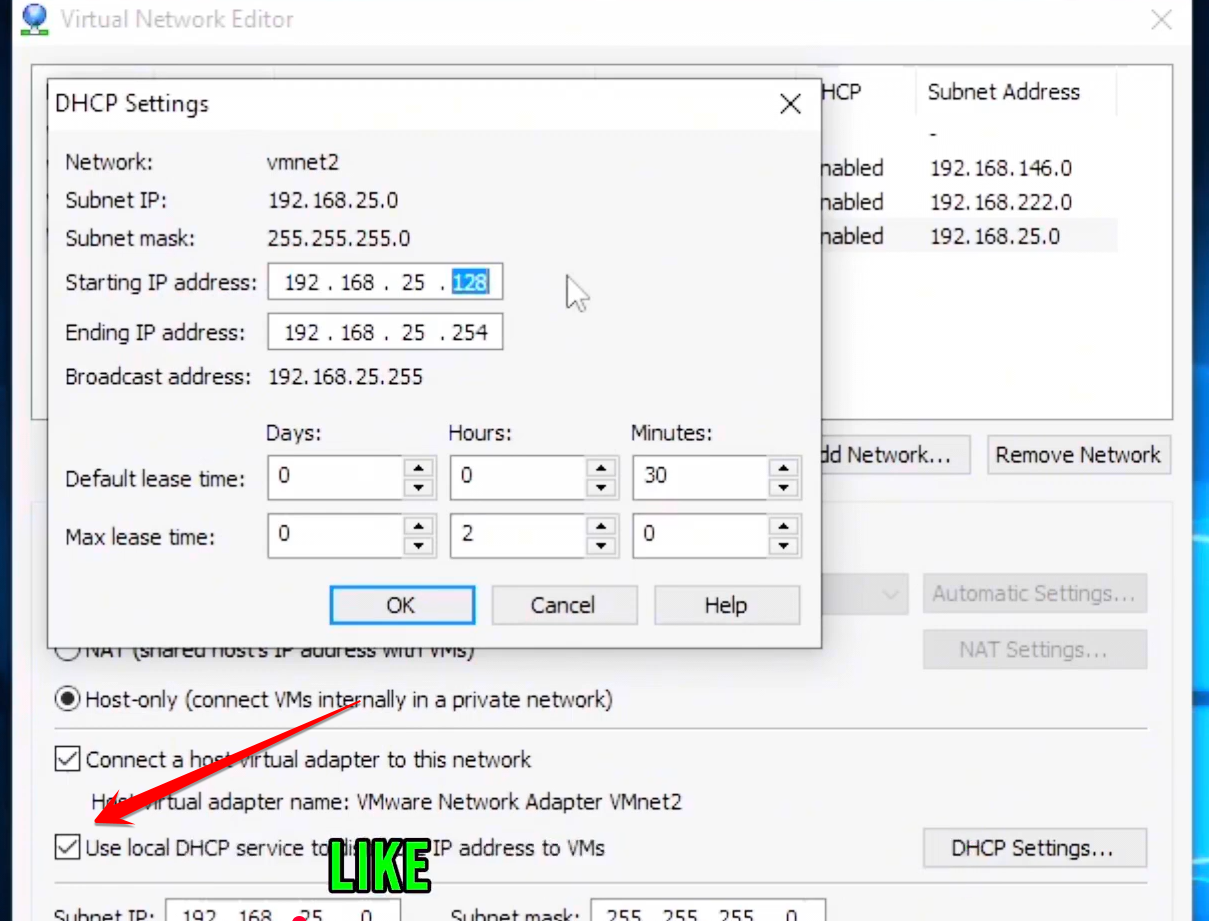
After all that setup, hit Apply to save everything. Then, for your VM, go into its Network Adapter settings and choose the new one, like VMnet2. Sometimes inside the guest OS, you have to disable and re-enable the adapter to get it to grab a new IP from DHCP. It feels kind of annoying but works.
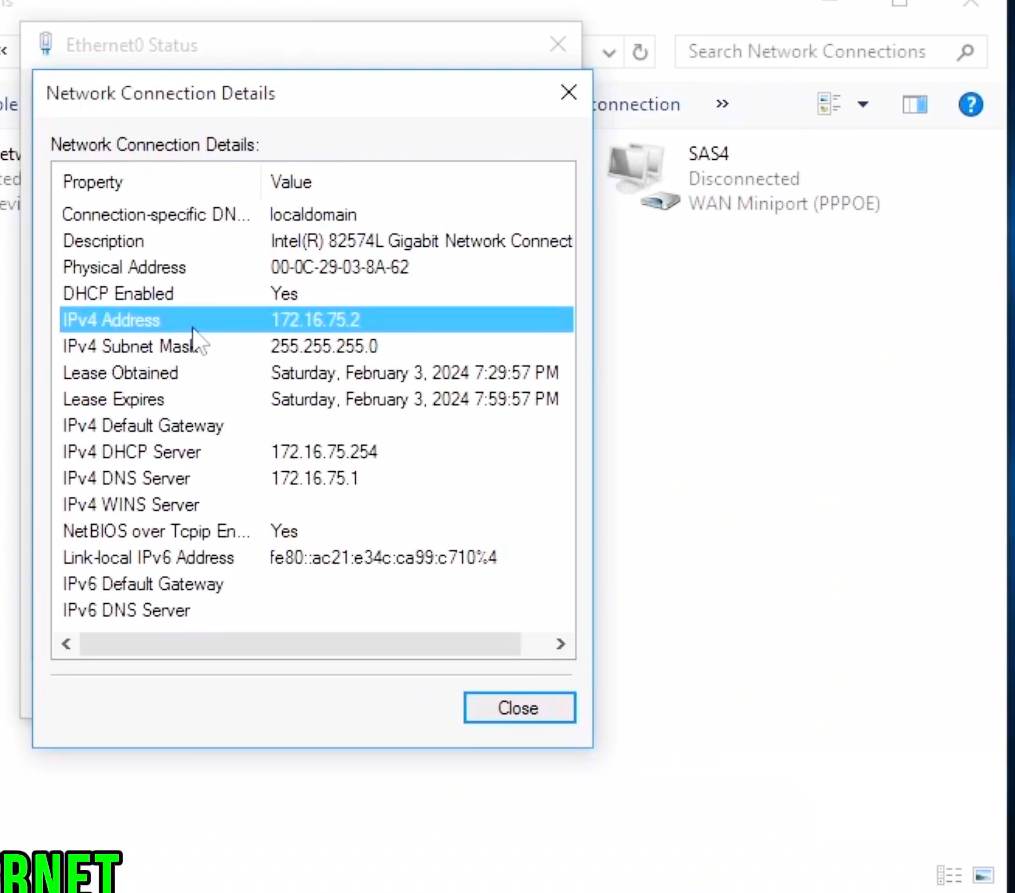
To check if it is good, look at the IP in the VM, it should be in your range, say 172.16.75.2. Since it is Host-only, the VM can connect internally but no internet unless you set up something extra for that. That part is easy to miss if you are not careful.