
In the world of system administration and virtualization, a snapshot is one of the most powerful tools at your disposal. Whether you’re testing new software or making critical configuration changes, a snapshot acts as a “save point” for your entire virtual machine.
Step 01
Taking a snapshot seems like a good first step before you mess with anything in your VMware setup. You just right-click on the virtual machine there and go to Snapshot, then Take Snapshot,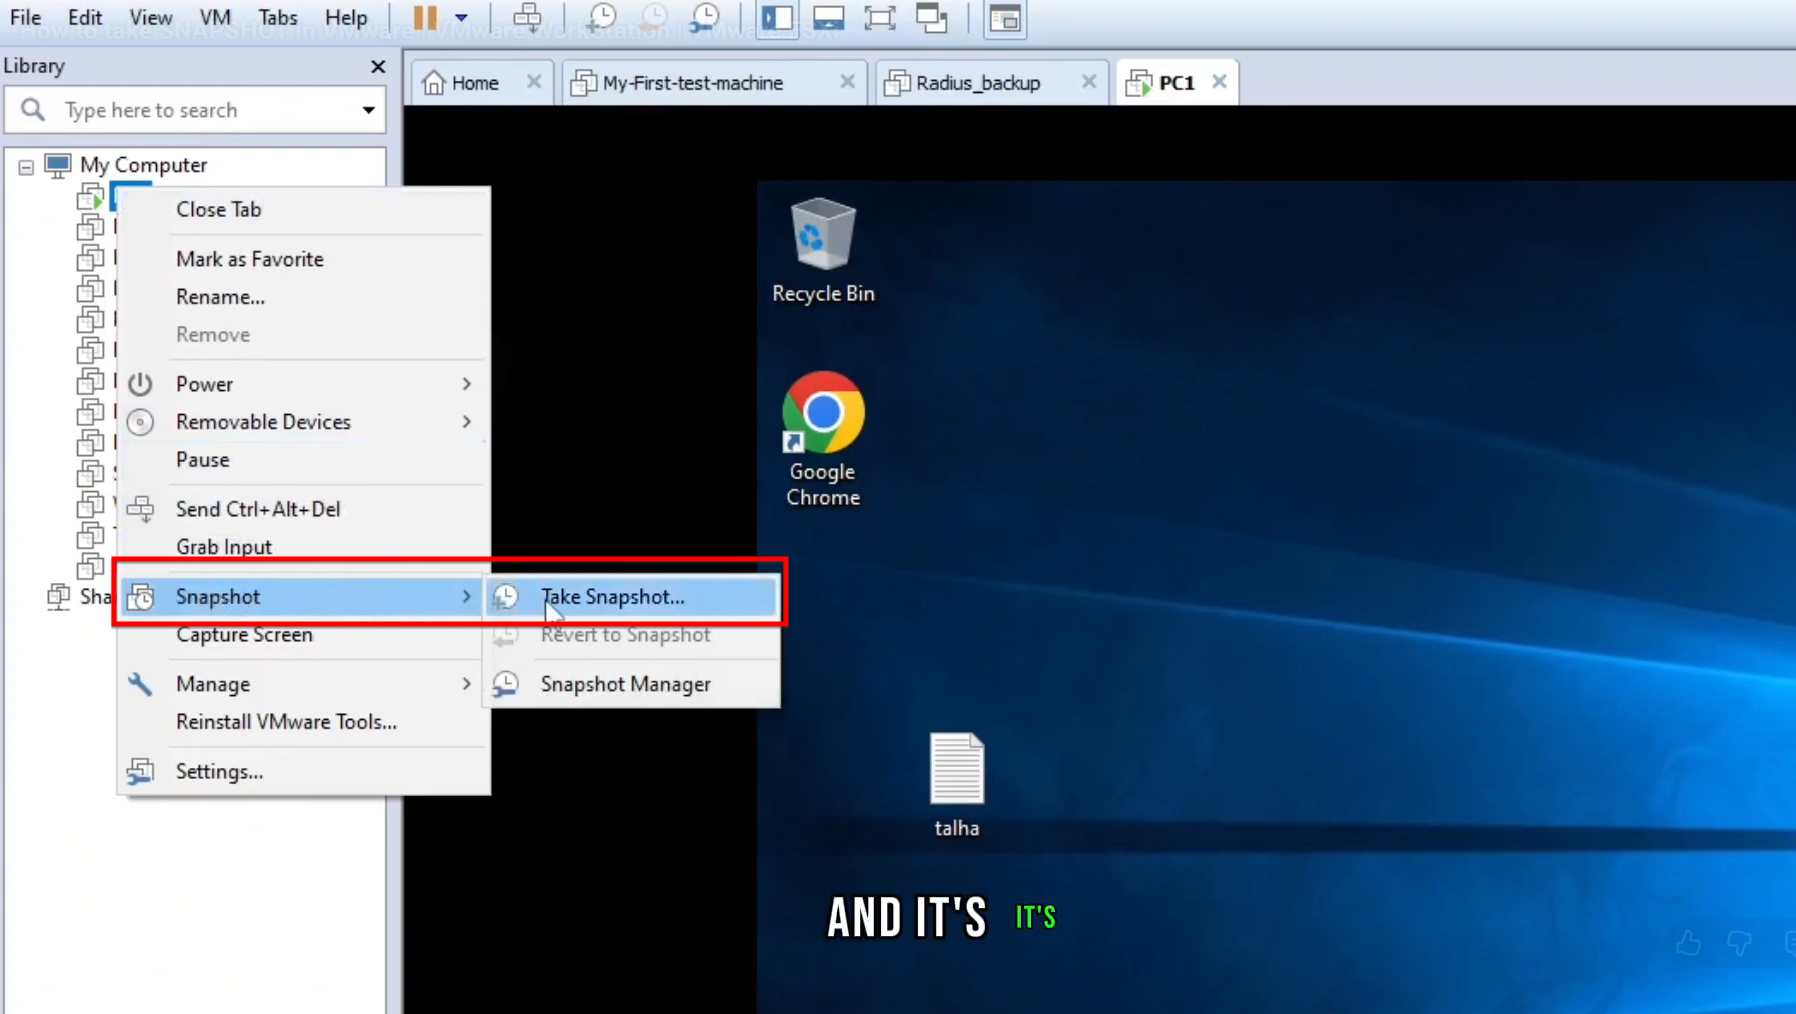 I think naming it something obvious helps, like Before Update or maybe File Storage Test if thats what youre doing.
The description part is useful too, so later you remember exactly what the VM was up to when you snapped it, Theres this dialog box that pops up for the name and description fields.
Step 02
Once you have snapshots, managing them is pretty straightforward in the Snapshot Manager, you can pull that up to see all the saved states. It shows a timeline of the VMs history, which lets you pick a point to go back to if needed. 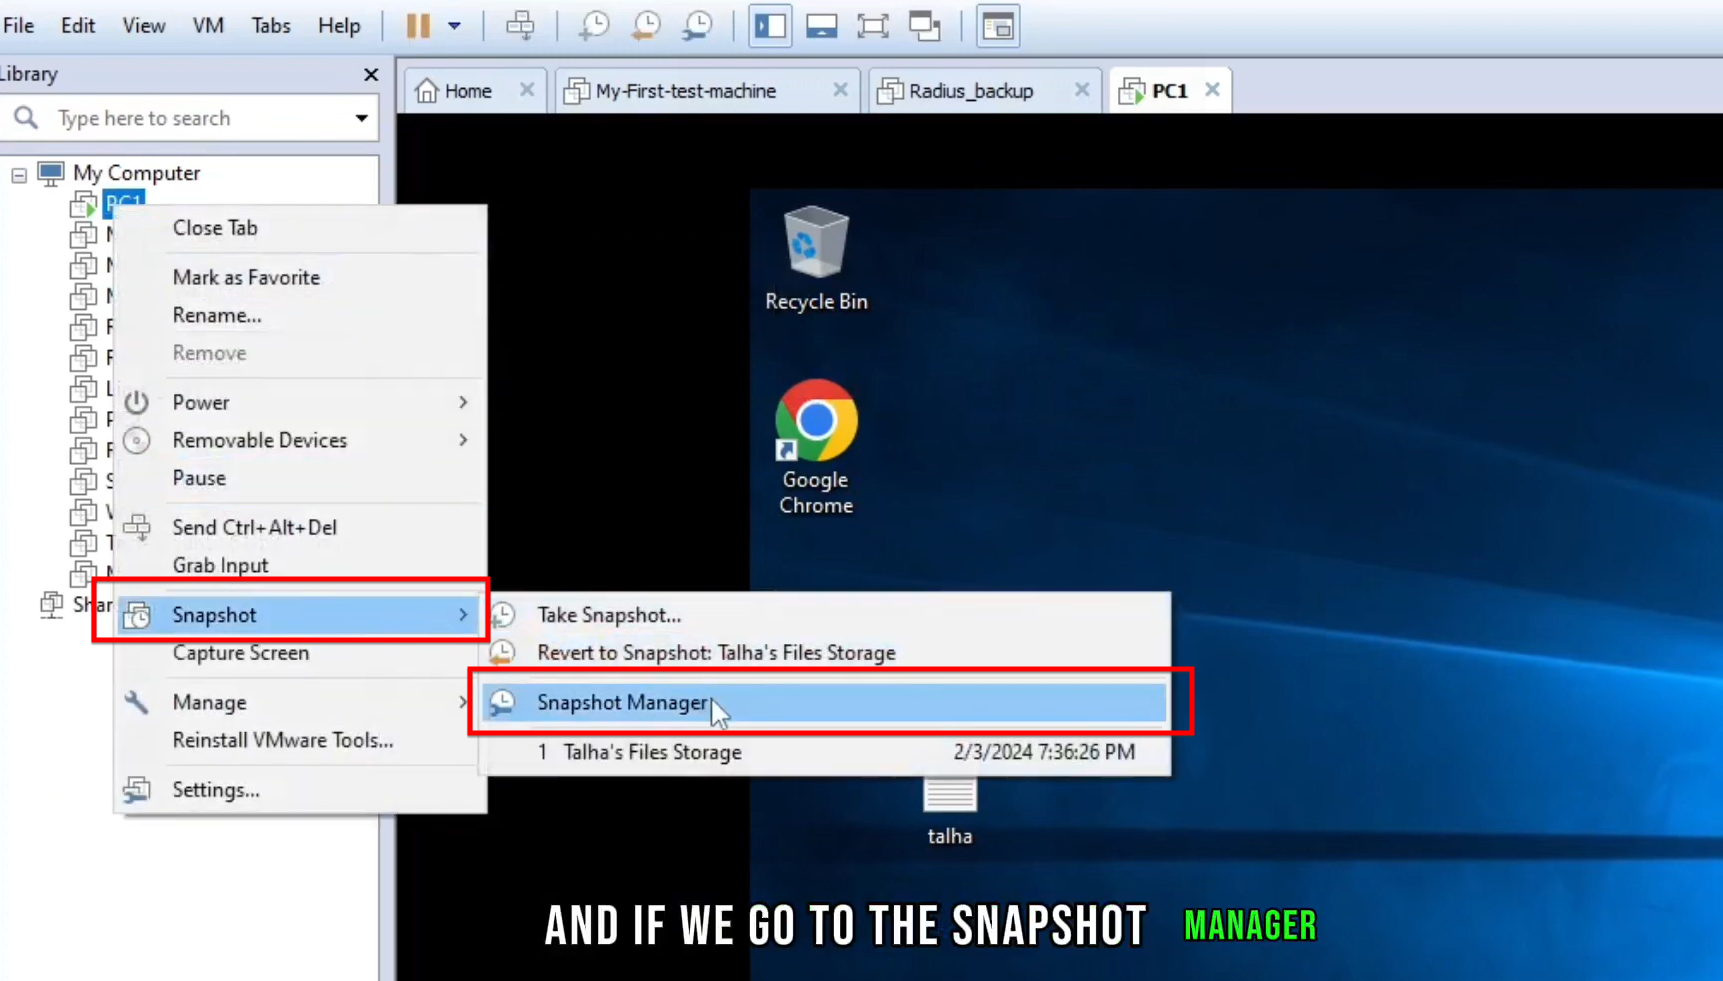
If things go wrong, like data loss or the system gets unstable, reverting to a previous state is the way to fix it. You select the snapshot you want in the manager and hit Go To or Restore. But be careful, restoring means any changes after that snapshot get wiped out.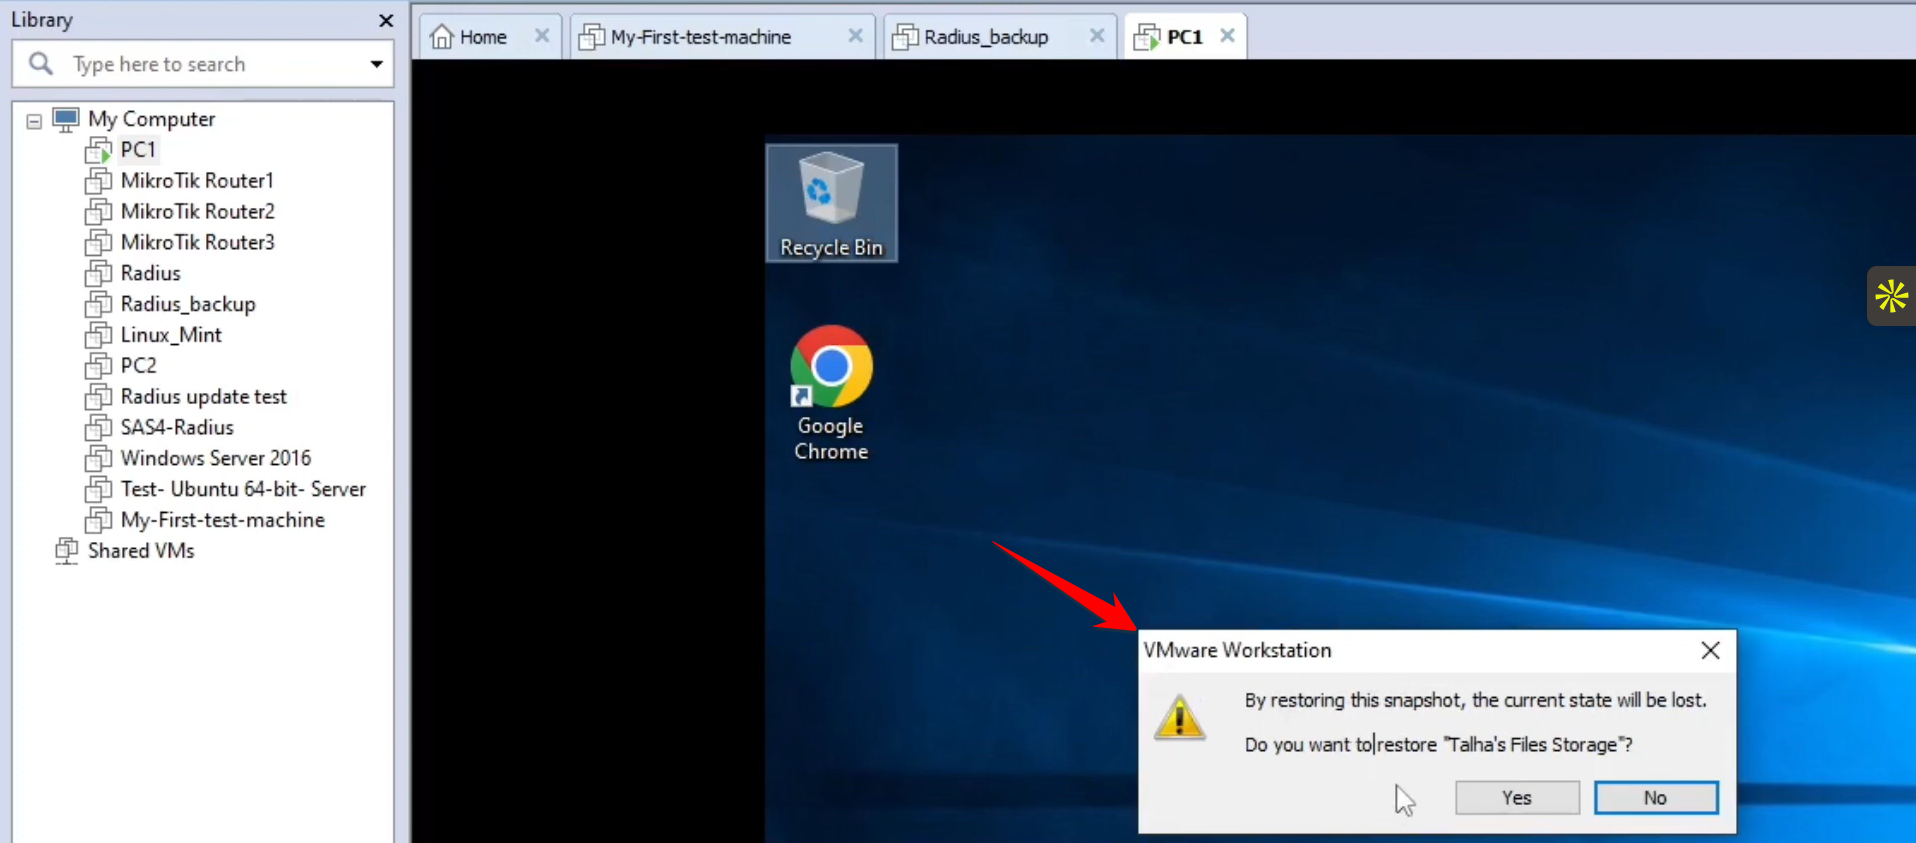
Step 03
After it loads for a bit, VMware brings the virtual machine back to how it was, files and open windows included from when you took the snapshot, It feels kind of reassuring, though sometimes the loading drags. The image of the Take Snapshot dialog is helpful to visualize the fields for name and description. Some people might skip descriptions, but I think its worth it to avoid confusion later.


