Using multiple Hotspot servers on your MikroTik allows you to create separate login experiences, user databases, and branding for different physical interfaces (like an Ethernet port vs. a Wi-Fi interface).
The process involves creating the two Hotspot servers, configuring two separate Server Profiles, and then assigning each profile a unique HTML directory.
1. Prepare Interfaces and Hotspot Files
A. Assign IP Addresses
Before starting the Hotspot setup, ensure each interface that will host a Hotspot has a unique IP address and subnet.
-
Example:
-
ether3(LAN Network):192.168.50.1/24 -
ether4(LAN Wi-Fi):192.168.51.1/24
-

B. Prepare Login Pages (HTML Files)
You need to have two separate folders containing the HTML files for your login pages.
-
In Files, you will have:
-
/hotspot(The default Hotspot page directory) -
/hotspot-wifi(A customized copy of the login page directory)
-

2. Configure Hotspot Server 1 (LAN)
Use the Hotspot Setup wizard to configure the first server on your primary interface.
-
Navigate to IP > Hotspot and go to the Servers tab.
-
Run the Hotspot Setup wizard.
-
Select the first interface (e.g.,
LAN).
-
Specify the Network address, DNS settings, and other parameters.
-
When prompted for the DNS Name, set a unique name for this server (e.g.,
zs-login.hotspot-one).
-
Complete the setup.
3. Configure Hotspot Server 2 (Wi-Fi)
Run the Hotspot Setup wizard again for the second interface.
-
Navigate to IP > Hotspot and go to the Servers tab.
-
Run the Hotspot Setup wizard.
-
Select the second interface (e.g.,
LAN WIFI).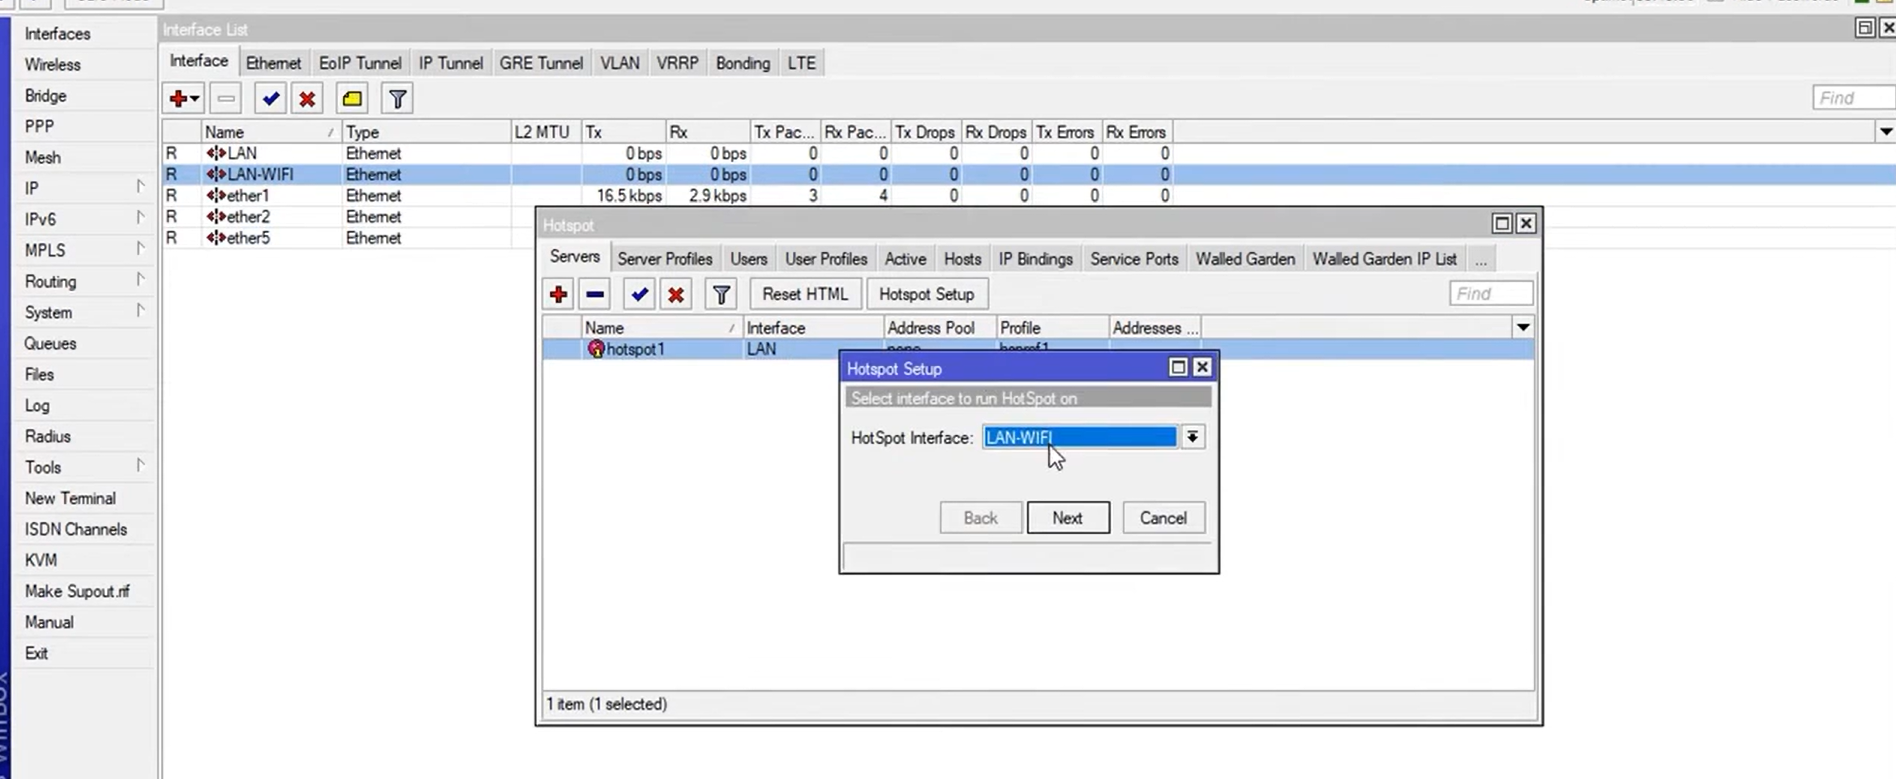
-
Specify the Network address, DNS settings, and other parameters.
-
When prompted for the DNS Name, set a unique name for this second server (e.g.,
hotspot-login-two).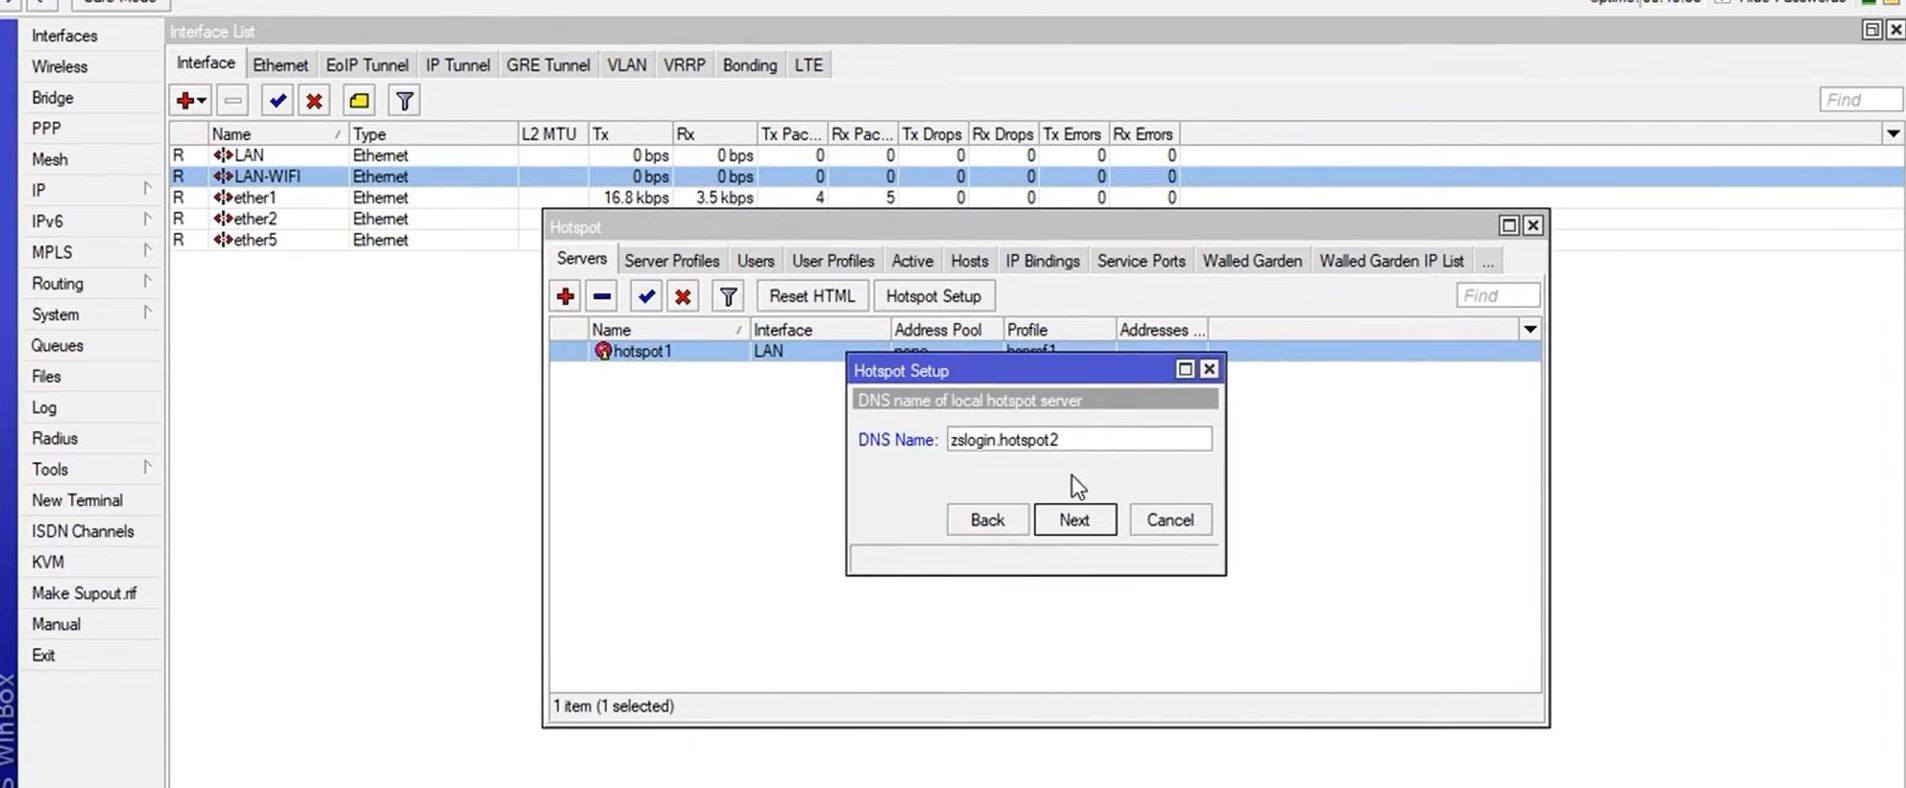
-
Complete the setup.
4. Assign Unique Login Pages (Server Profiles)
The final, critical step is to link the two Hotspot servers to their respective login page directories using the Server Profiles.
-
Go to the Server Profiles tab (IP > Hotspot > Server Profiles). You should see two profiles now (e.g.,
hsprof1andhsprof2).
A. Configure Profile 1 (LAN)
-
Double-click the first profile (
hsprof1). -
Verify the DNS Name is set correctly (
zs-login.hotspot-one).
-
On the HTML Directory field, set the path to your first login folder (e.g.,
hotspot).
B. Configure Profile 2 (Wi-Fi)
-
Double-click the second profile (
hsprof2). -
Verify the DNS Name is set correctly (
hotspot-login-two).
-
Change the HTML Directory field to the path of your second, unique login folder (e.g.,
hotspot-oneorhotspot-wifi).
By setting a different HTML Directory in each Hotspot’s Server Profile, users connecting to the LAN interface will see the first login page, and users connecting to the Wi-Fi interface will see the second.