
Policy Based Routing (PBR) is a technique that allows network administrators to override the standard routing table for specific packets, connections, or users. This is incredibly useful in a dual-WAN scenario where you want certain high-priority users to always use a dedicated, fast internet link, while other users utilize a secondary link.
This guide details the four main steps to configure PBR on your MikroTik router to separate traffic from different LAN IP ranges to different WAN interfaces.
1. Initial IP and Interface Configuration
First, ensure your interfaces are named clearly and have the correct IP addresses assigned.
-
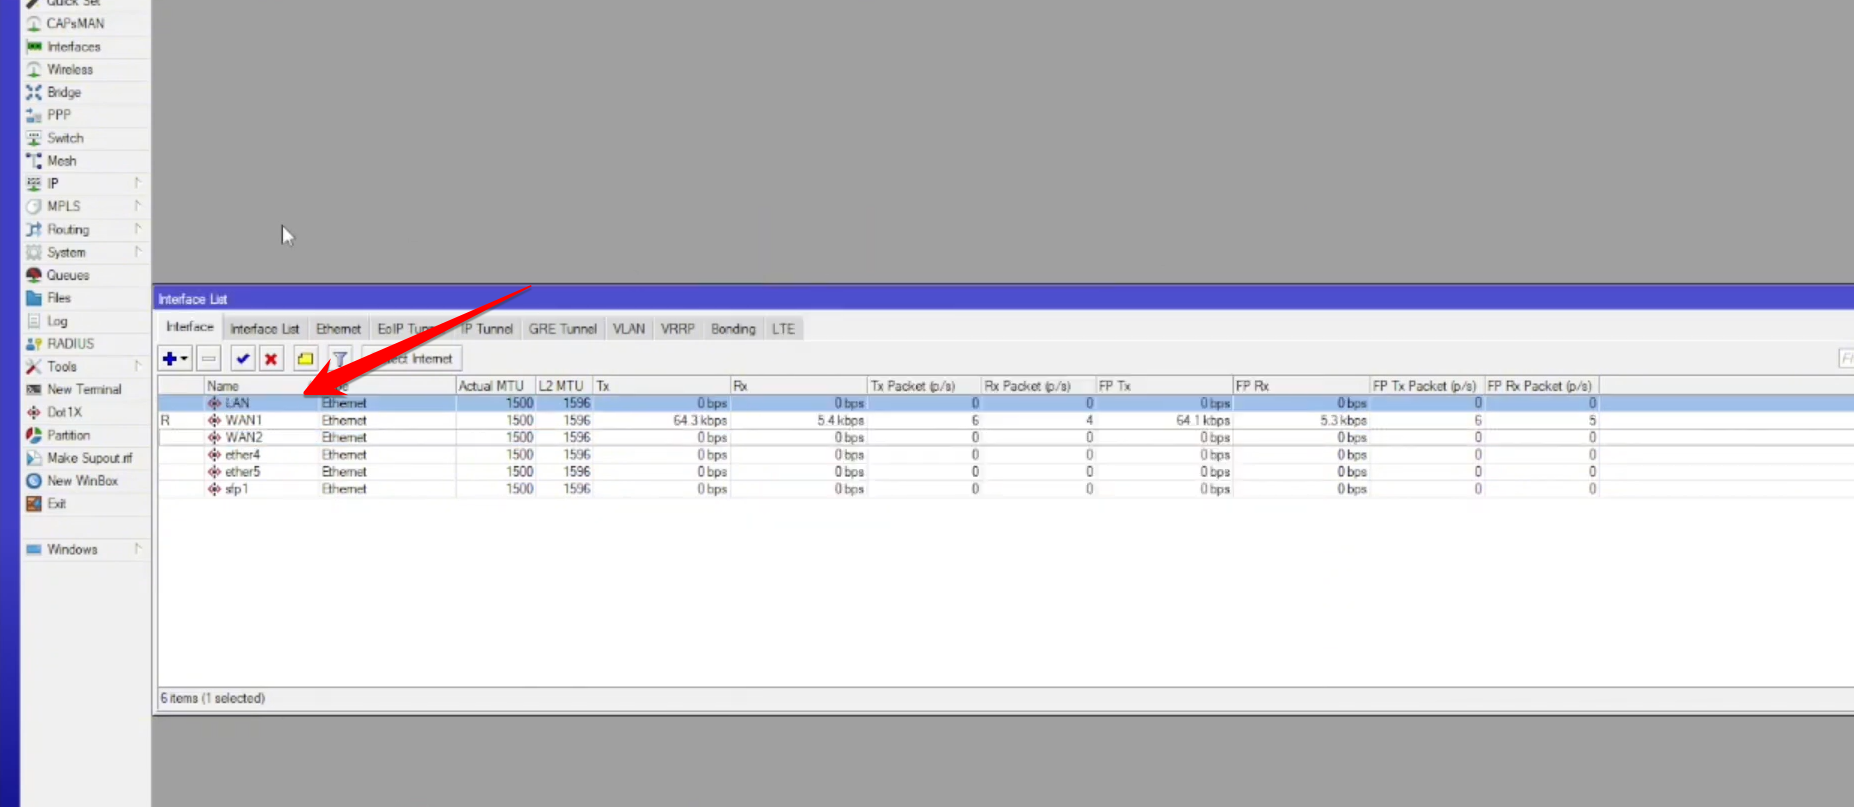
Rename Interfaces: Rename the relevant interfaces for clarity. The video suggests
wan-1,wan-2, andlan.
-
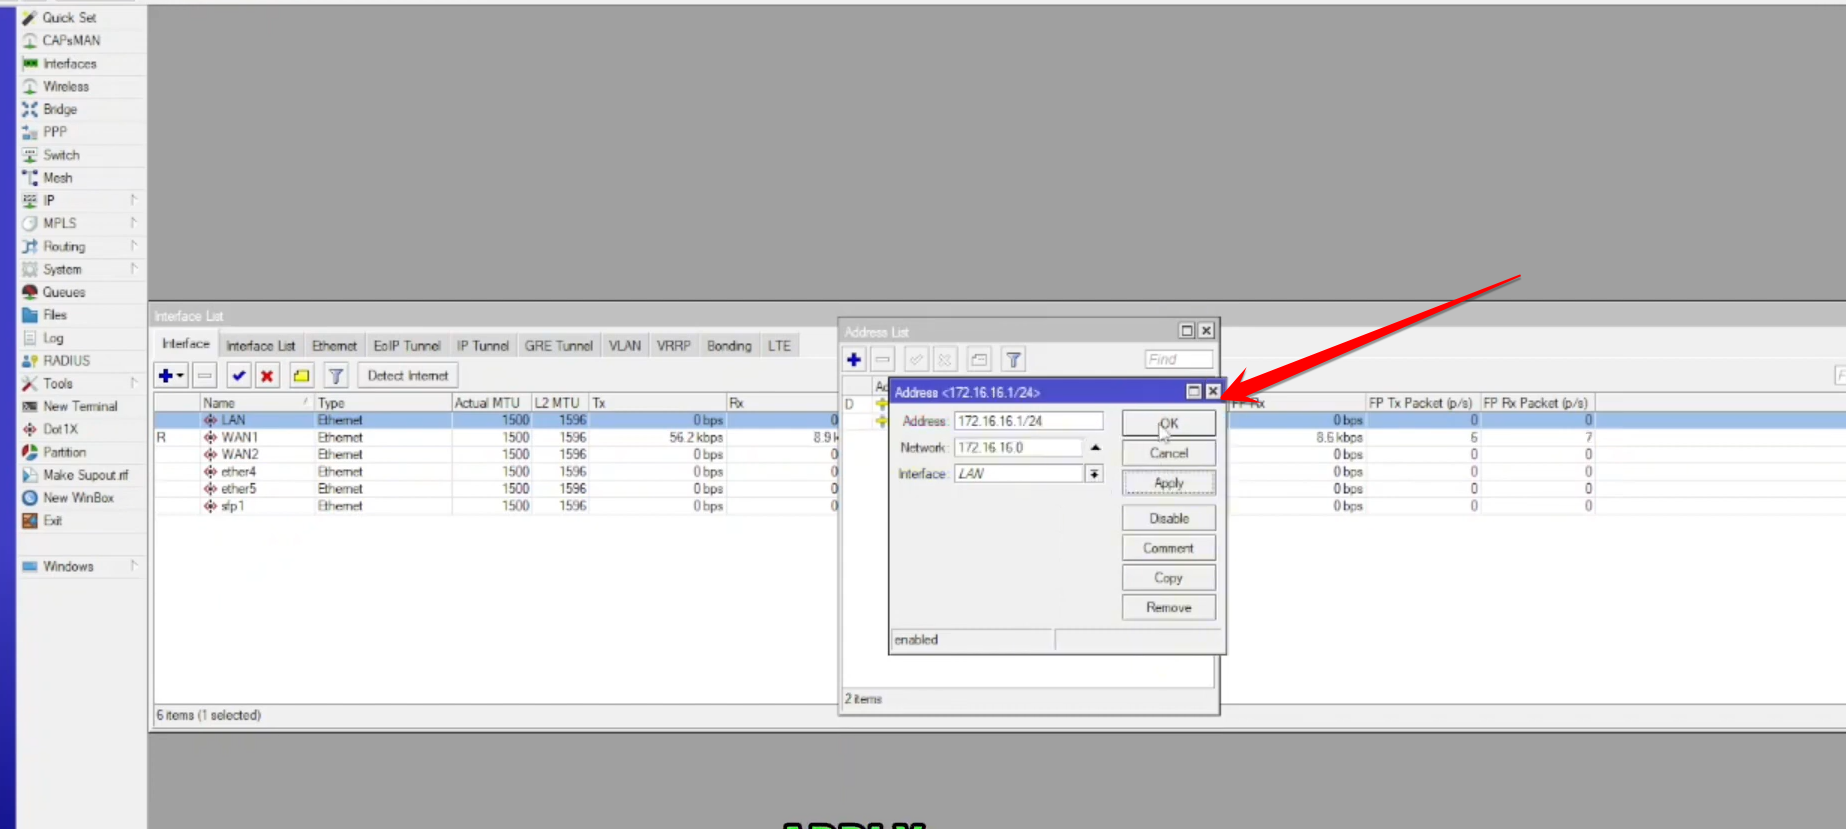
Assign LAN IP: Configure the IP address for your local network interface (e.g.,
172.16.16.1/24).
-
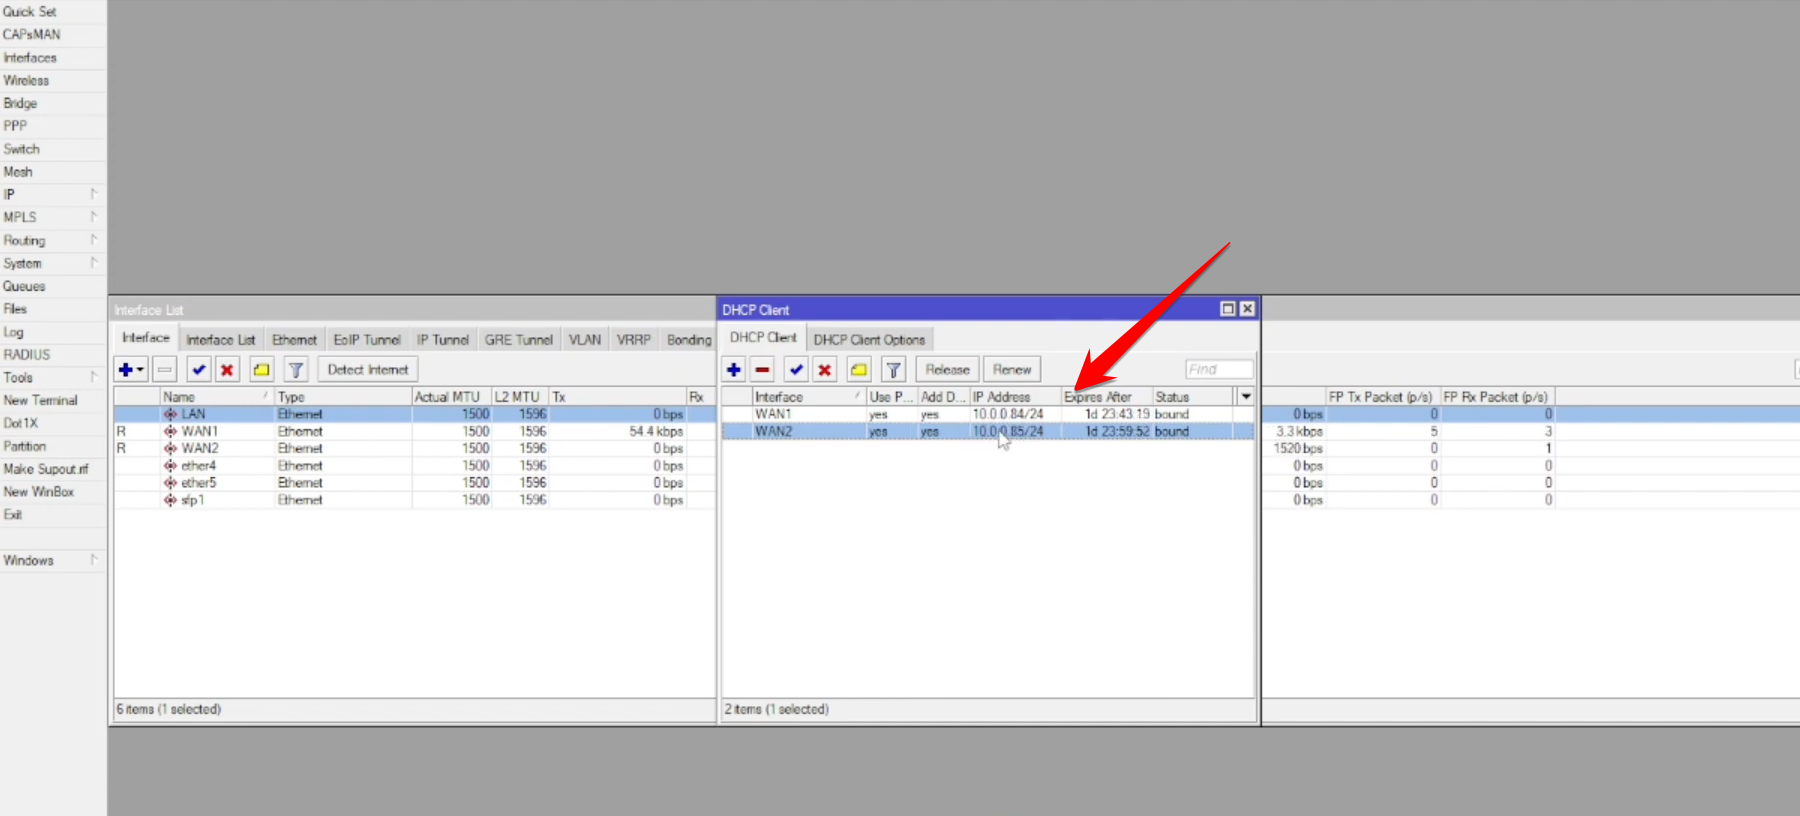
Configure WAN IPs: Use DHCP Client for both
wan-1andwan-2if your ISPs provide dynamic IPs, or manually set static IPs for each WAN port.-
Verification: Check the IP > DHCP Client menu to confirm both WAN interfaces have successfully received an IP address.
-
2. Create Address Lists for User Groups
To specify which users go to which WAN, you need to group their IP addresses into Address Lists.
-
Navigate to IP > Firewall > Address Lists.
-
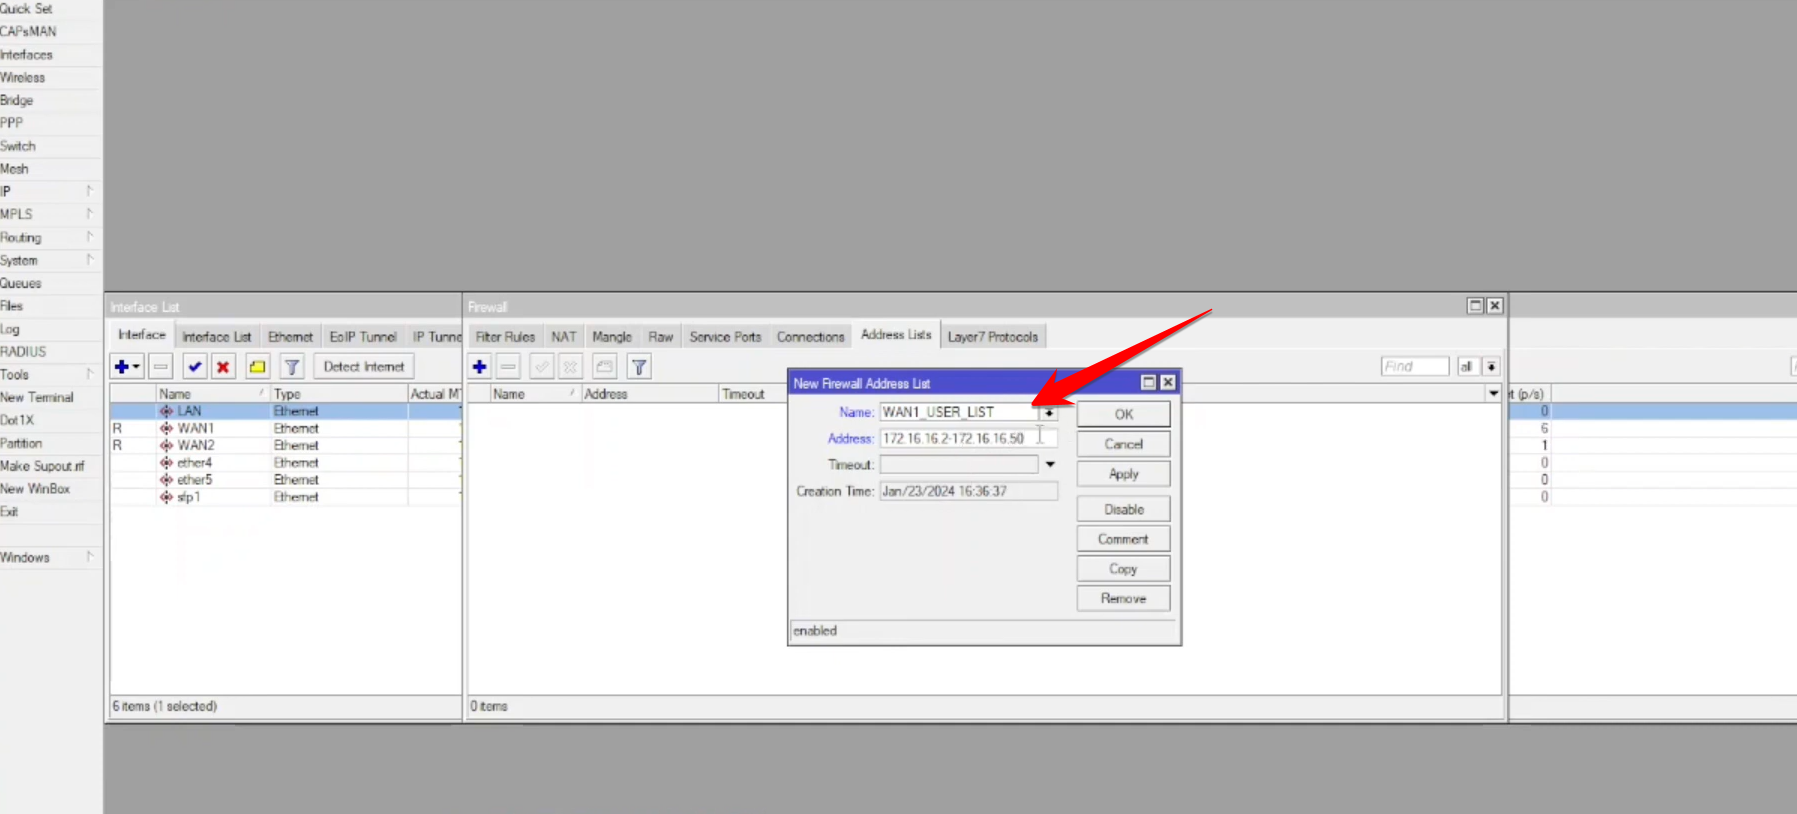
Create WAN 1 List: Create a new list (e.g.,
wan-1-user-list) and define the IP address range for the high-priority users.-
Example:
172.16.16.2-172.16.16.50will use WAN 1.
-
-
Create WAN 2 List: Create a second list (e.g.,
wan-2-user-list) for all other users.-
Example:
172.16.16.51-172.16.16.254will use WAN 2.
-
3. Create Mangle Rules for Route Marking
Mangle rules are used to “mark” connections so that the router knows which routing table to use later.
-
Navigate to IP > Firewall > Mangle.
-
Rule 1 (WAN 1 Users):
-
Chain:
prerouting -
Advanced > Src. Address List:
wan-1-user-list -
Action:
mark routing -
New Routing Mark:
wan-1-user-mark -
Passthrough: Uncheck (set to
no) to prevent further processing.
-
-
Rule 2 (WAN 2 Users):
-
Chain:
prerouting -
Advanced > Src. Address List:
wan-2-user-list -
Action:
mark routing -
New Routing Mark:
wan-2-user-mark -
Passthrough: Uncheck (set to
no) -
Verification: View your Mangle list to ensure both marking rules are present and active.
-

4. Configure Policy Based Routes
The final step is to create the actual default routes and attach the routing marks created in the Mangle step.
-
Navigate to IP > Routes.
-
Route for WAN 1:
-
Dst. Address:
0.0.0.0/0(Default route) -
Gateway:
[WAN 1 Gateway IP] -
Distance:
1(This should be the lowest distance, indicating a preference for WAN 1 for the marked traffic) -
Routing Mark:
wan-1-user-mark -
Apply: Hit apply.
-
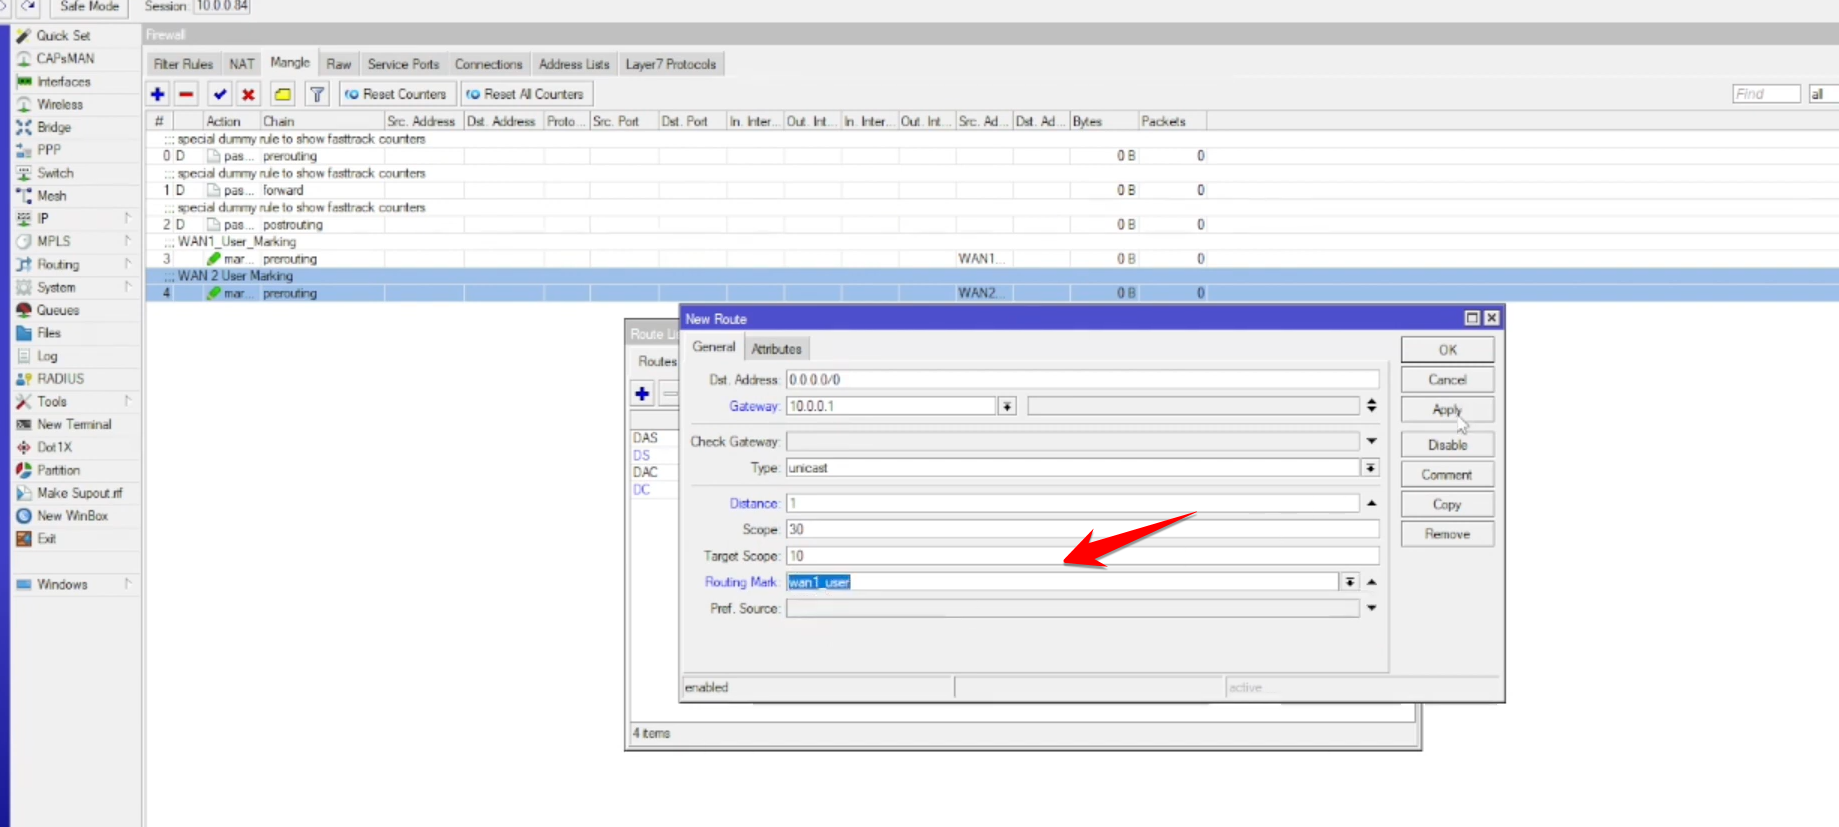
-
Route for WAN 2:
-
Dst. Address:
0.0.0.0/0(Default route) -
Gateway:
[WAN 2 Gateway IP] -
Distance:
2(A higher distance than WAN 1’s route) -
Routing Mark:
wan-2-user-mark
-
After completing these steps, users within the wan-1-user-list range will be forced to use WAN 1, and users in the wan-2-user-list range will be forced to use WAN 2. You can verify this using a traceroute command from a client PC to an external destination, where the second hop should be the corresponding WAN’s gateway IP address.


