
The Dynamic Host Configuration Protocol (DHCP) is a fundamental networking protocol that automatically assigns IP addresses and other configuration parameters (like the subnet mask and default gateway) to devices on a network. This eliminates the need for manual IP configuration, saving time and preventing address conflicts.
This guide walks you through setting up a DHCP server on a Cisco router using the Command Line Interface (CLI)
1. Initial Setup and Preparation
Before configuring the DHCP pool, ensure your router’s LAN interface is configured with a static IP address, which will serve as the Default Gateway for all clients.
-
Enter Configuration Mode:
enable
config t
2. Configure the LAN Interface:
interface fastethernet 0/1 # Use your specific interface
ip address 192.168.1.1 255.255.255.0
no shutdown

3. Client Preparation: On all client machines, switch their IP configuration from Static to DHCP.

2. Creating the DHCP Pool
The DHCP pool defines the range of IP addresses and configuration settings that the router will hand out to network clients.
-
Start the DHCP Pool Configuration: Use the
ip dhcp poolcommand followed by a unique name for your pool.
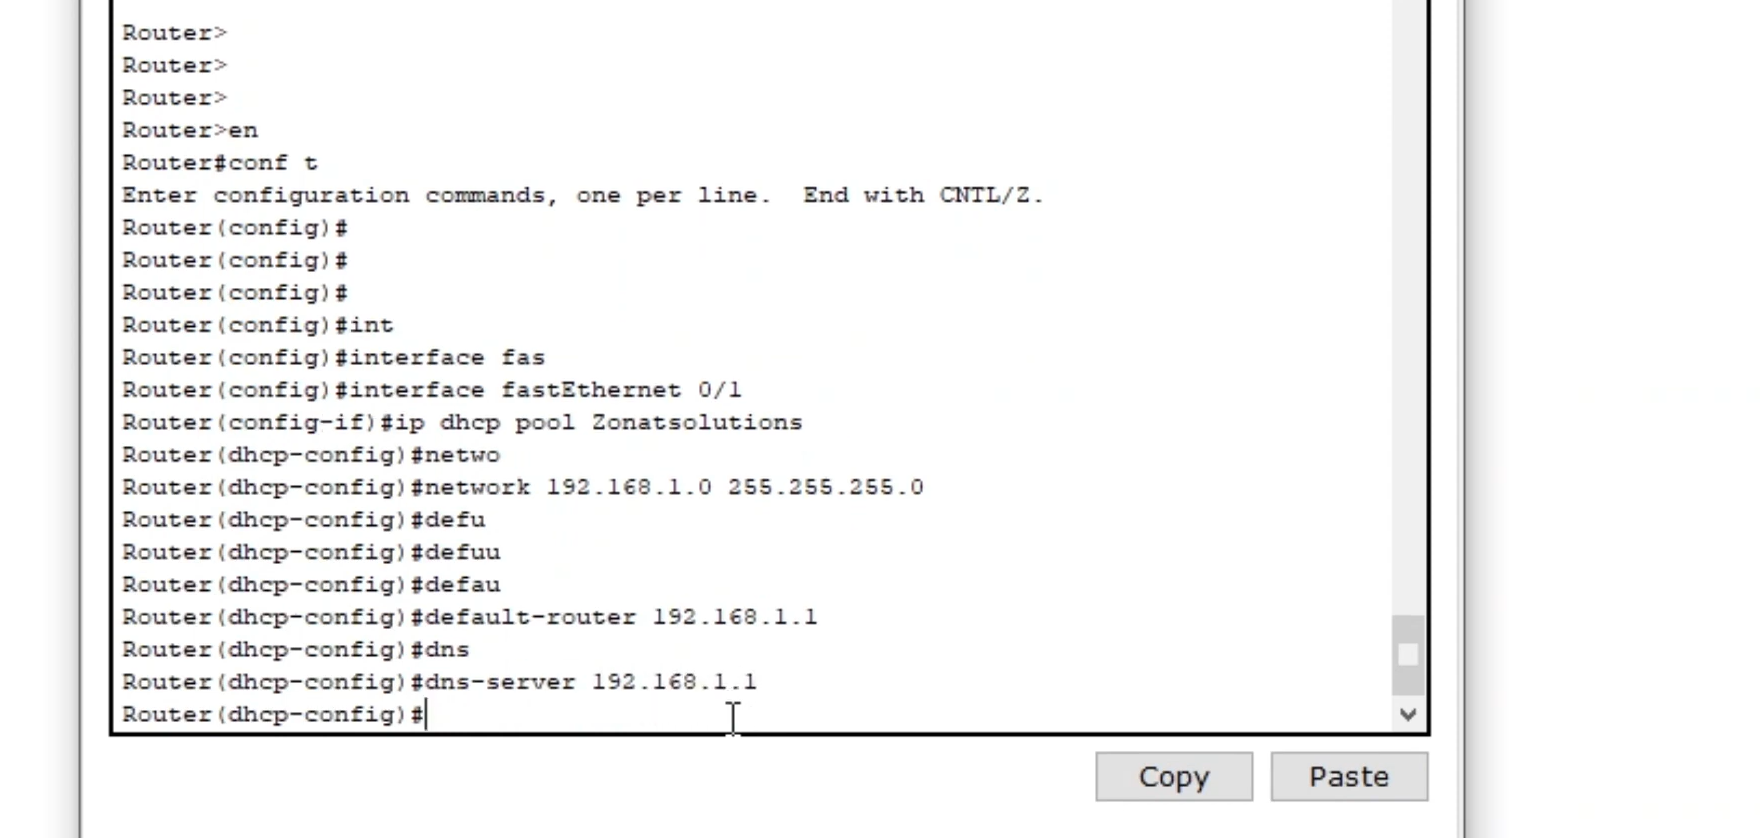
ip dhcp pool ZonatSolutions

2. Define the Network Range: Specify the network address and subnet mask that the pool belongs to.
network 192.168.1.0 255.255.255.0
3. Specify the Default Gateway: This tells clients the IP address of the router (the default gateway). Use the IP you configured on the router’s LAN interface.
default-router 192.168.1.1
4. Specify the DNS Server: For this example, the router’s IP is also used as the DNS server.
dns-server 192.168.1.1
5. Exit Configuration:
exit
3. Verification
Once the configuration is complete, your client devices should automatically receive an IP address from the pool.
-
Check Client IP: On a client machine, verify that it has received an IP address (e.g.,
192.168.1.2,192.168.1.7, etc.). -
Test Connectivity: Use the
pingcommand from a client machine to test connectivity:-
Ping the Router/Gateway: This confirms connectivity between the client and the router.
-
ping 192.168.1.1
Ping another Client: This confirms the entire local network is functional.
ping 192.168.1.8 # Example of another client IP
If all pings are successful, your Cisco DHCP server is configured and working perfectly!


