
While static routing is simple for small, fixed networks, managing routes becomes complex and time-consuming as your network grows. This is where dynamic routing protocols like the Routing Information Protocol (RIP) become essential.
RIP allows routers to automatically discover and exchange network information, eliminating the need to manually configure every remote network. This guide shows you how to quickly set up RIP on two connected MikroTik routers.
1. Initial State: Removing Static Routes
If you were previously using static routing (as shown in the prior tutorial), the first step in setting up dynamic routing is to remove those manual entries. Dynamic protocols are designed to take over this job.
-
Navigate to IP > Routes on both routers.
-
Remove any static routes you previously configured to reach the remote network.
-
Verification: After removal, attempting to ping the remote LAN interface (e.g.,
192.168.1.1) should result in a failed connection, confirming the routers no longer know the path.
2. Configuring the RIP Interface
RIP requires you to define a RIP instance on the router to manage the routing updates.
-
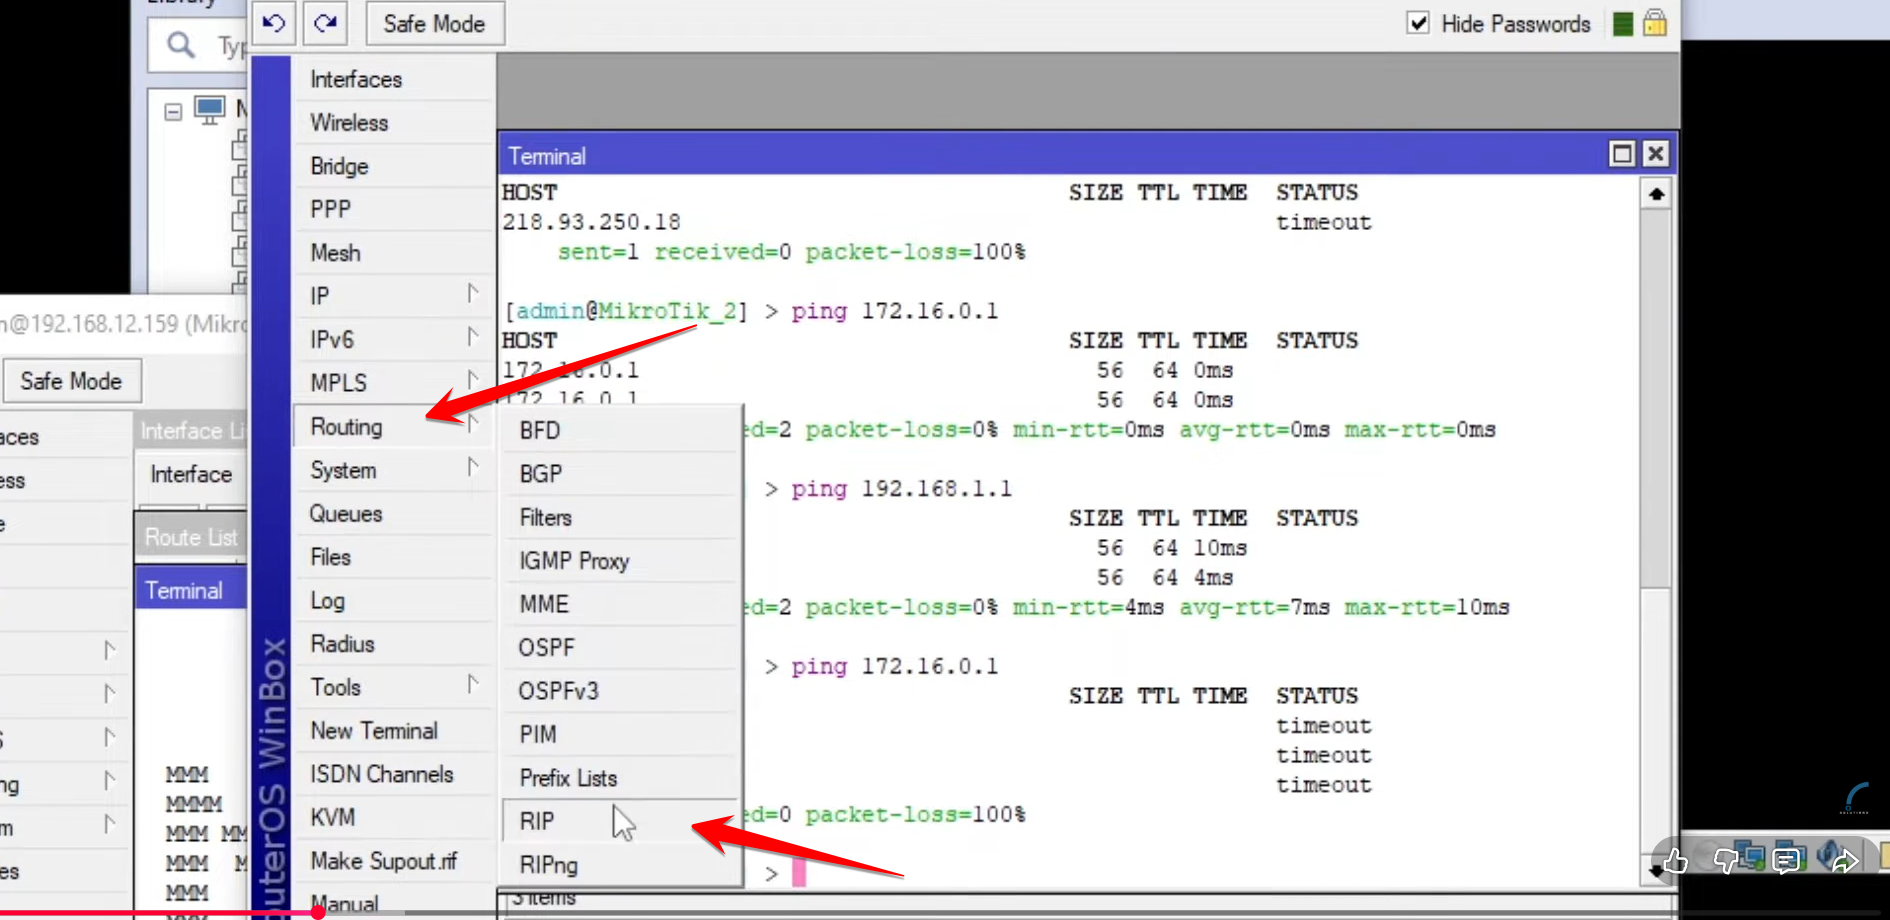
Access RIP Settings: In WinBox, go to Routing > RIP.
-
Configure Interface: Click on the Interfaces tab and click the + button.
- This creates a default RIP interface. You can set the Version to
both(RIPv1 and RIPv2). 
- Optional: For security, you can set up Authentication to ensure only trusted routers exchange information.
-
Repeat: Perform this exact configuration on the second MikroTik router as well.
3. Advertising Networks
Unlike static routing, where you define the destination network, with RIP you define (or advertise) the networks directly connected to your local router that you want to share. The connected routers will then learn these routes dynamically.
-
Access Network Tab: In the RIP window, click on the Networks tab and click the + button.
-
Add Connected Networks: Add the network addresses for all connected networks on the local router:
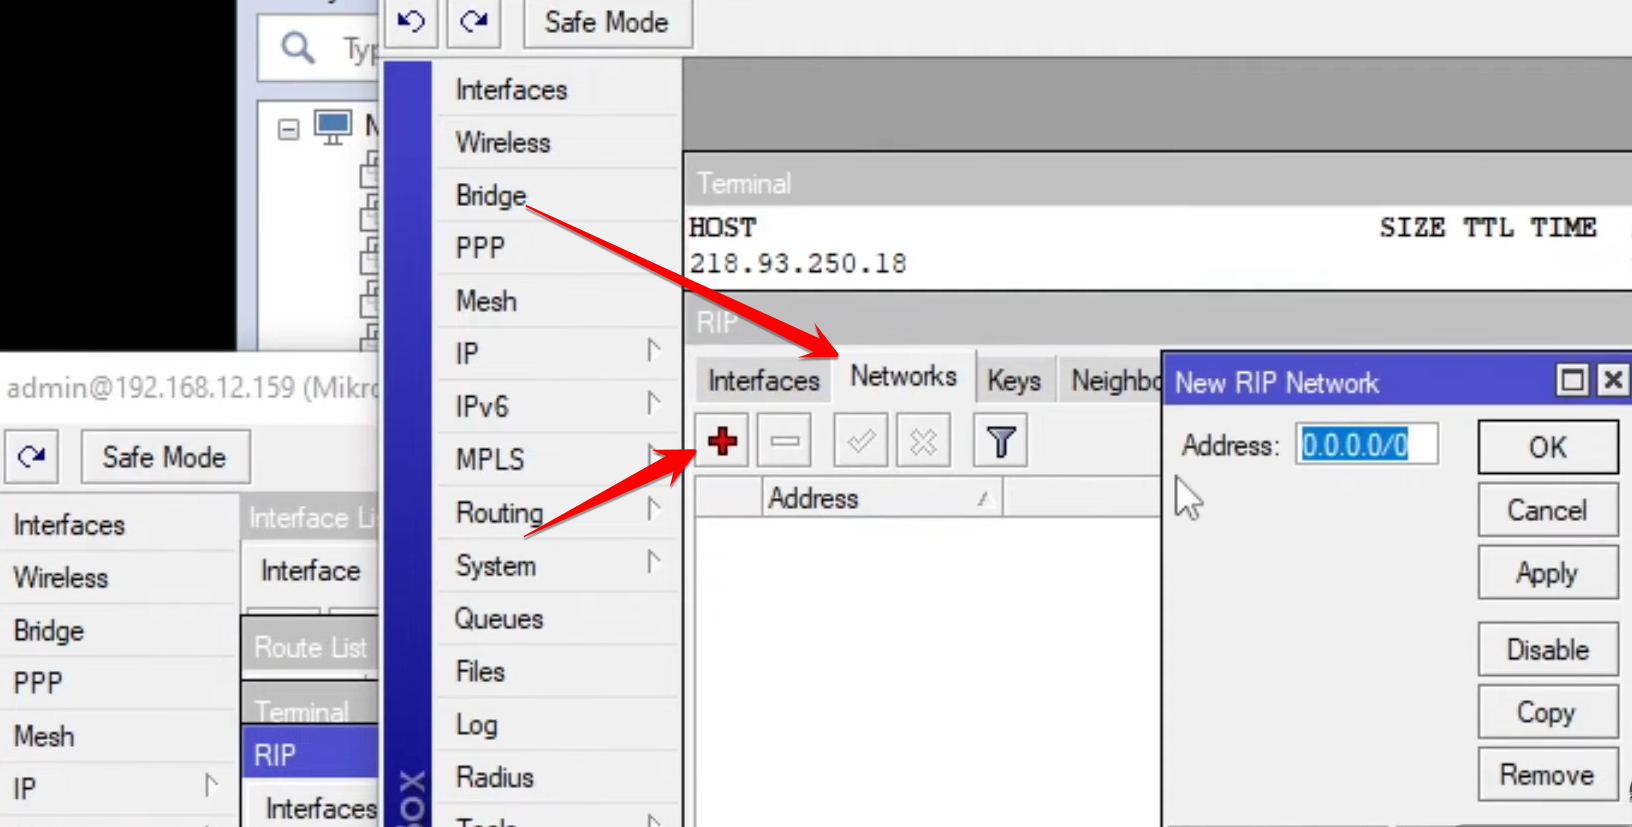
- Local LAN Network: The internal network you want the remote router to access (e.g.,
172.16.0.0/16) 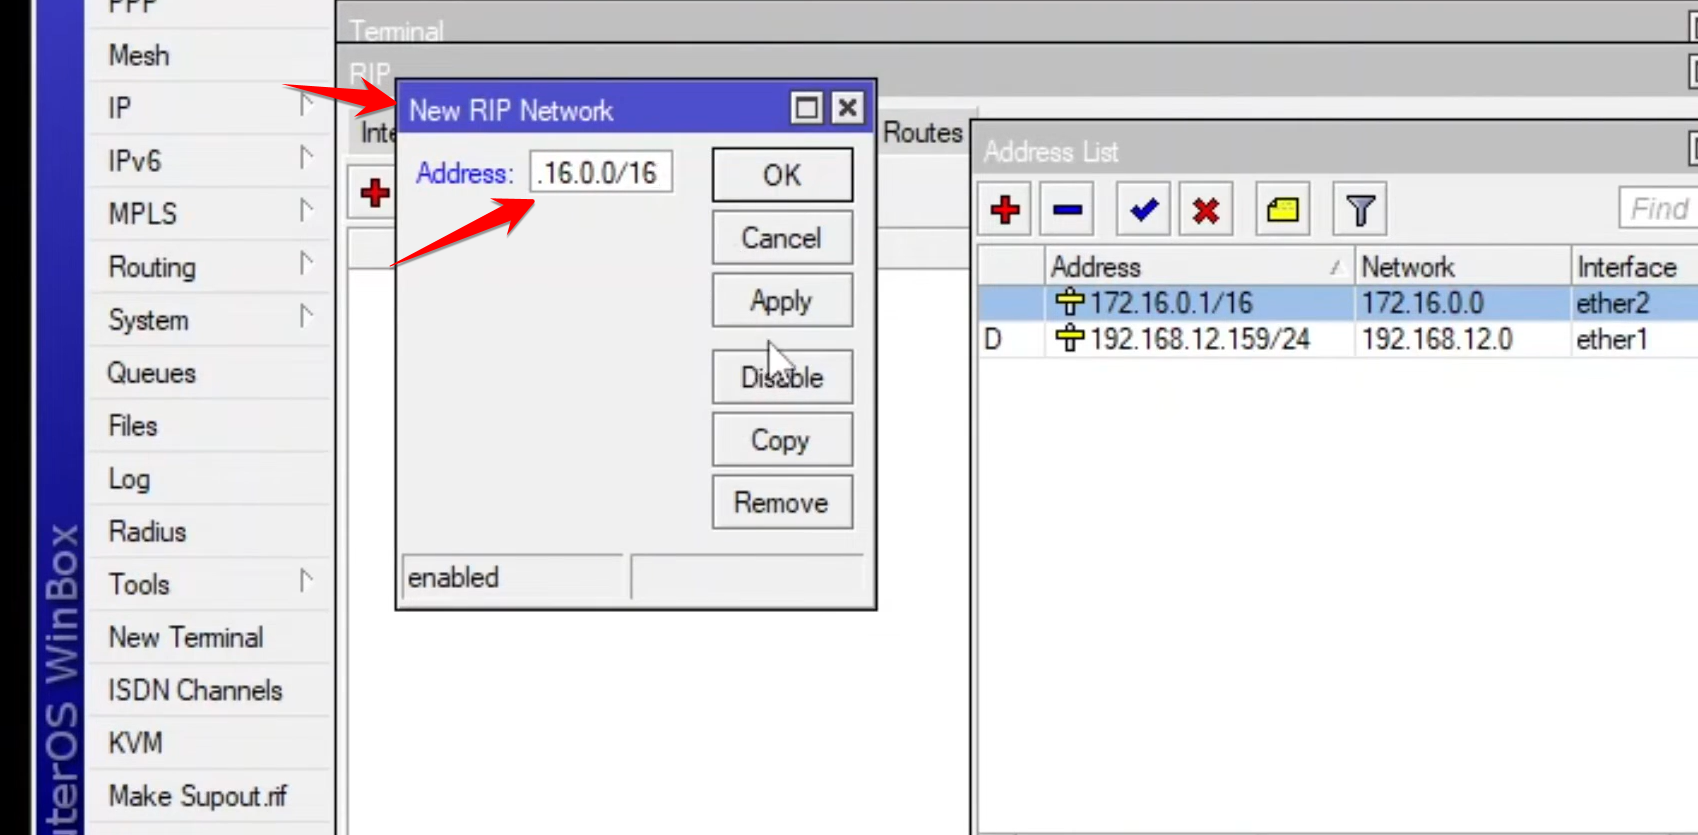
- .
- Interconnect Network: The common network that links the two routers (e.g.,
192.168.12.0/24).
Crucial Note: You must use the network address (e.g., 172.16.0.0/16), not the router’s interface IP (e.g., 172.16.0.1).
Repeat: Ensure both routers advertise their respective LAN and interconnect networks.
4. Verification
Within about 30 seconds (RIP’s default update timer), the routers will exchange network information and populate their routing tables dynamically.
-
Check IP Routes: Go to IP > Routes. You should see a new entry for the remote LAN (e.g.,
192.168.1.0/24) with an indicator letter ofr(for RIP) next to the route.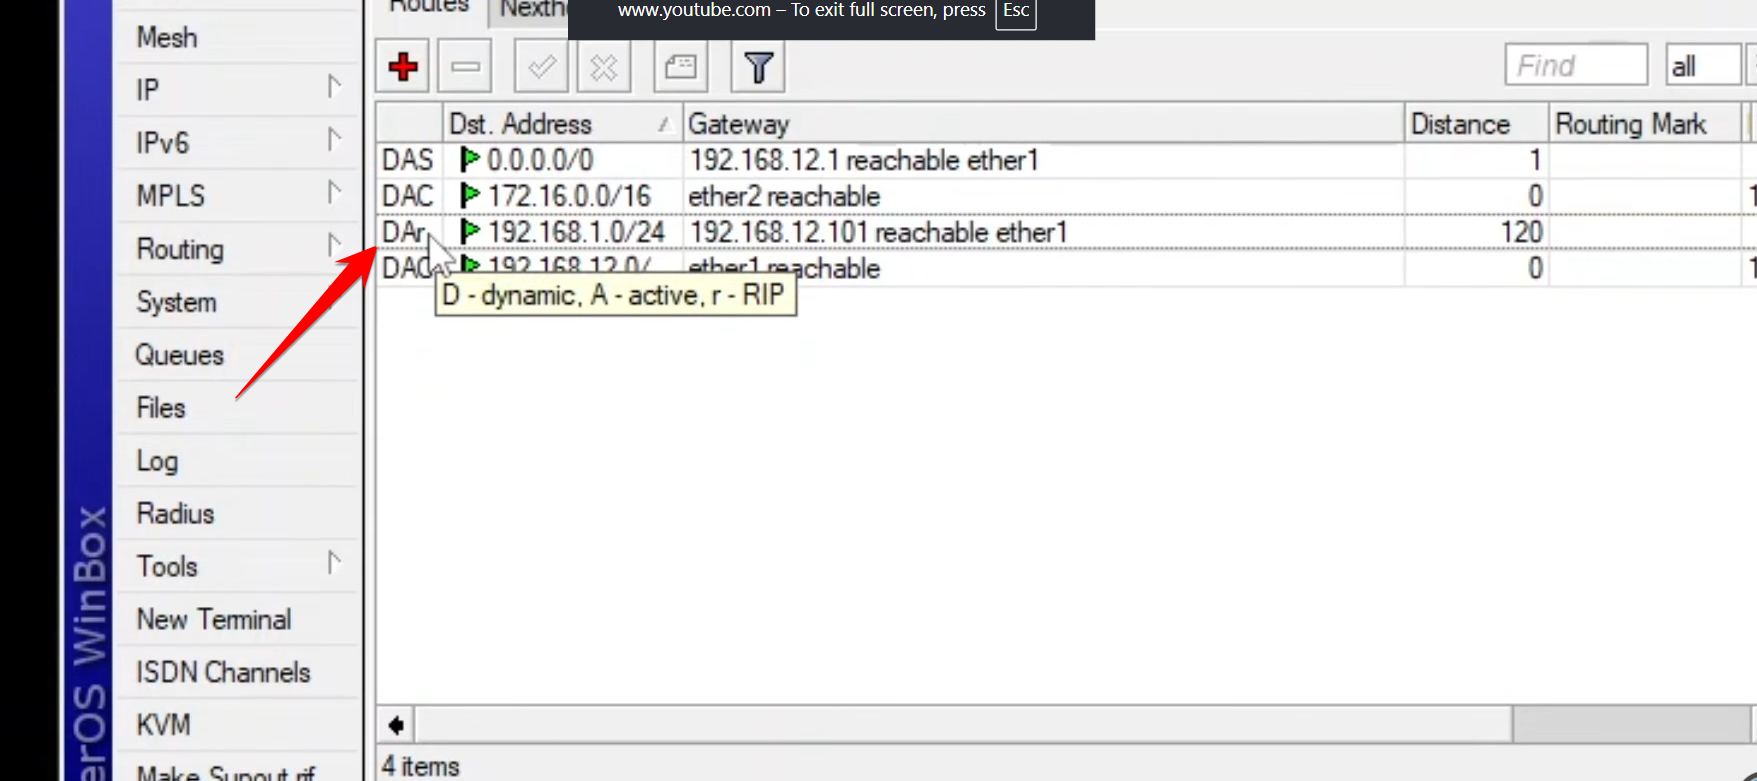
- The route status should read
DAr(Dynamic, Active, RIP). - Test Connectivity: Open the terminal on your MikroTik and ping the remote LAN interface (e.g.,
192.168.1.1).
-
Success: The ping should now work, confirming that the RIP protocol is successfully exchanging routes and enabling communication.
By configuring RIP, you’ve established dynamic routing, which is much more scalable and resilient than manual static routes.


