This guide will walk you through the essential steps to configure NTH load balancing on your MikroTik router, ensuring both efficient traffic distribution and seamless failover
Step 1: Configure Your WAN Interfaces & DNS
First, set up your basic internet connectivity for both WAN links.
-
IP Addresses: Assign IP addresses to your WAN interfaces (
ether1/WAN 1 andether2/WAN 2).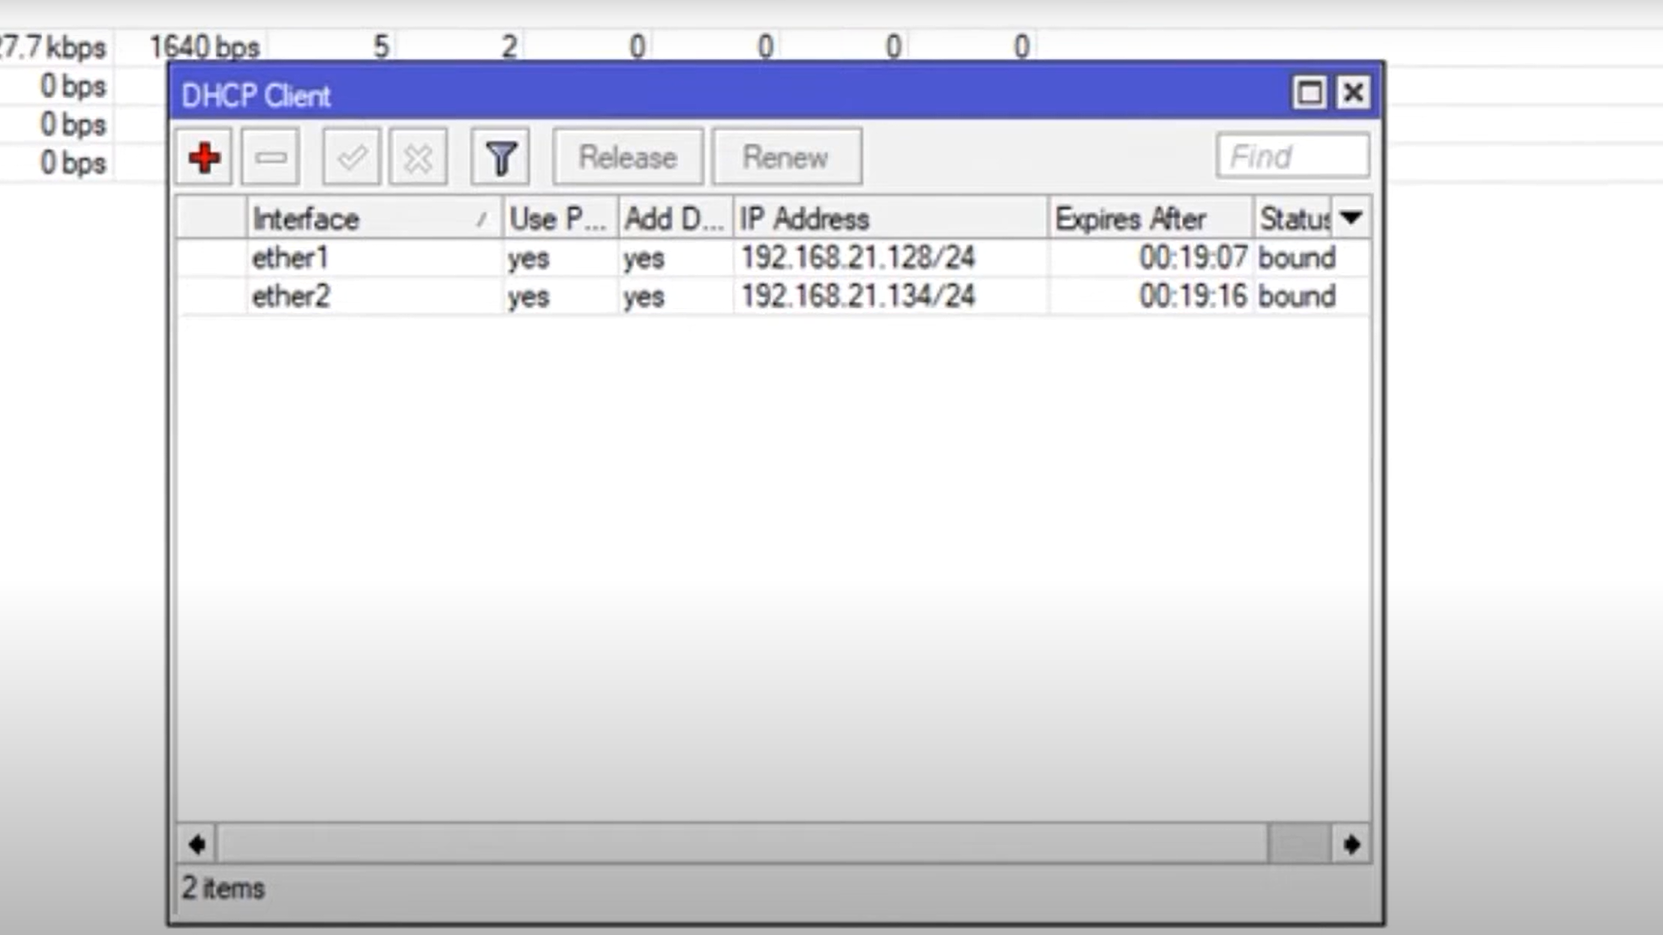
-
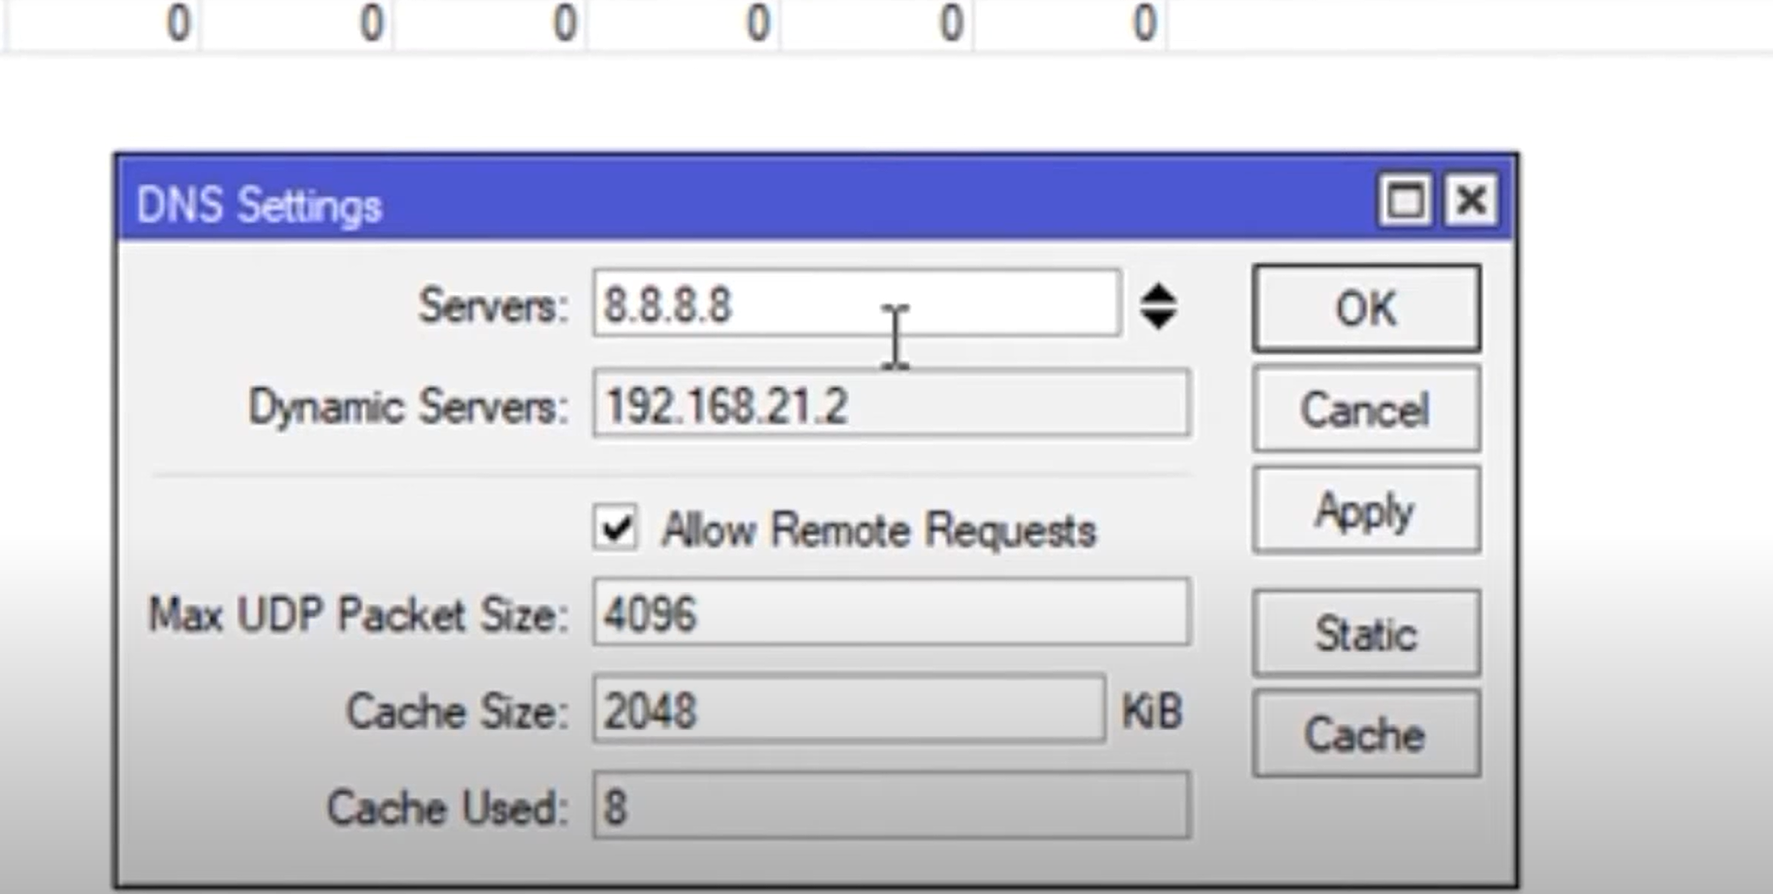
DNS Servers: Go to IP > DNS and add your preferred DNS servers (e.g., your ISP’s DNS or public options like 8.8.8.8 and 1.1.1.1).
Step 2: Create NAT Masquerade Rules
You need a NAT rule for each outgoing WAN interface.
-
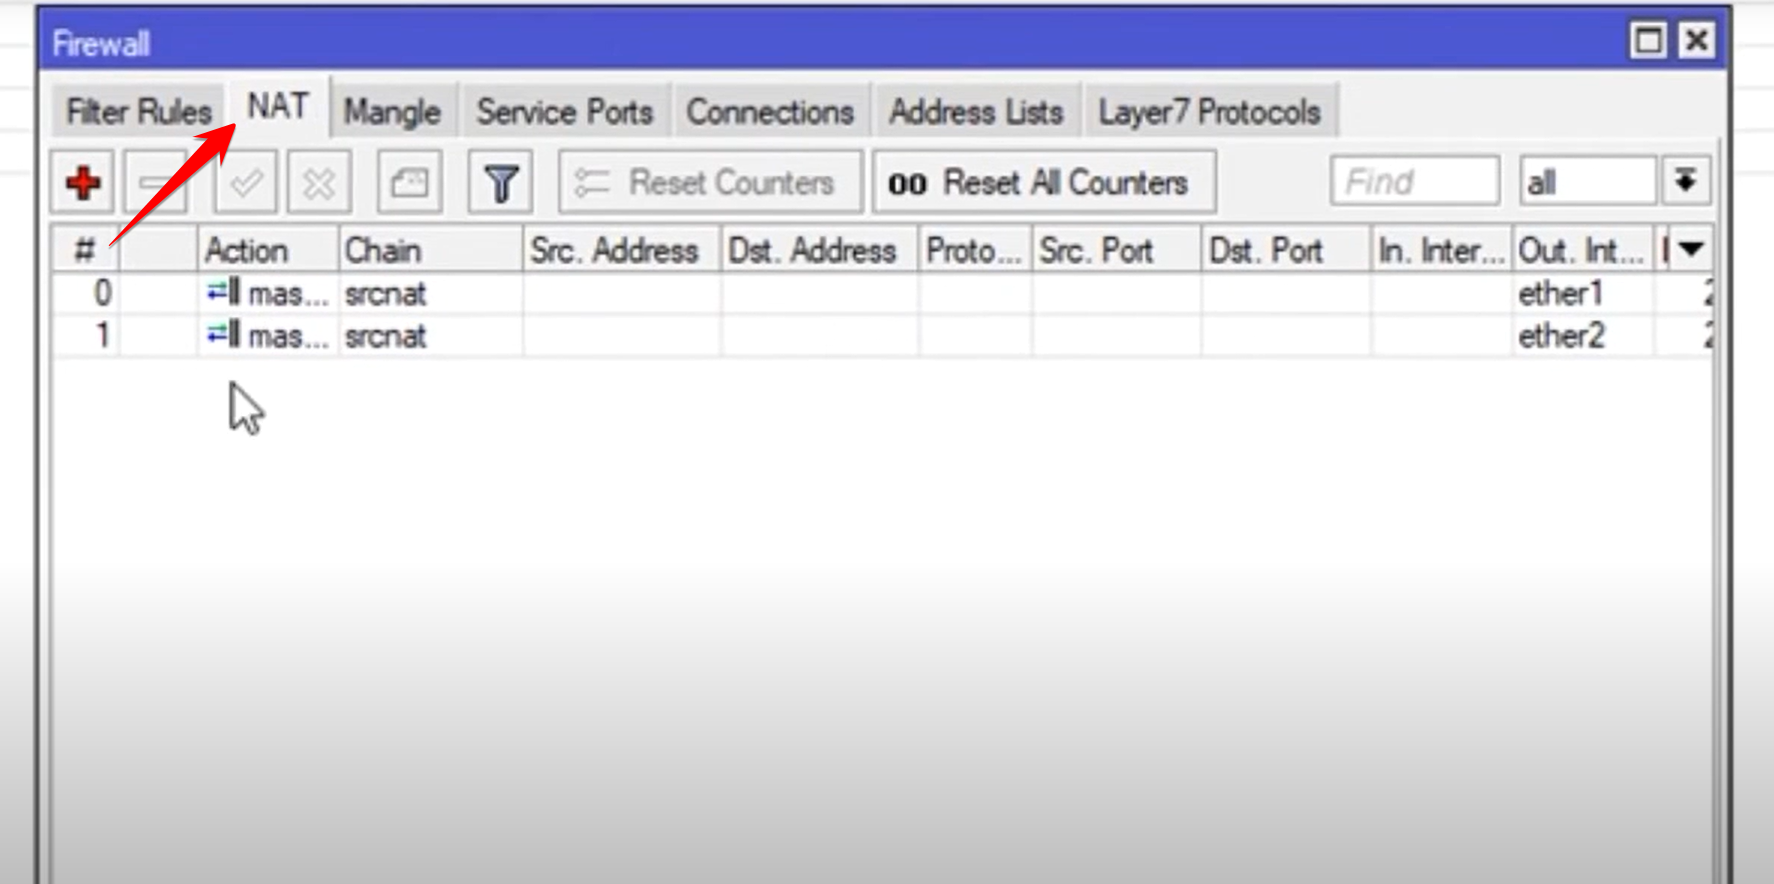
Go to IP > Firewall > NAT.
-
Create two
srcnatrules:-
Rule 1:
Chain: srcnat,Out. Interface: WAN 1,Action: masquerade. -
Rule 2:
Chain: srcnat,Out. Interface: WAN 2,Action: masquerade.
-
Step 3: Implement the NTH Mangle Rules (The Core of Load Balancing)
This is the most critical step, where you create four Mangle rules under IP > Firewall > Mangle.
Rules 1 & 2: Mark Connections (Distribution)
These rules use the NTH parameter to split incoming traffic into two logical connection groups (con-wan1 and con-wan2).
-
Rule for
conn-wan1(Packet 1 of 2):-
General Tab:
Chain: prerouting,In. Interface: [LAN Interface],Connection State: new. -
Extra Tab:
NTH: 2,1. -
Action Tab:
Action: mark connection,New Connection Mark: conn-wan1,Passthrough: yes.

-
-
Rule for
con-wan2(Packet 2 of 2): Copy the first rule, but change Extra Tab > NTH to2,2and Action Tab > New Connection Mark tocon-wan2.
Rules 3 & 4: Mark Routes (Routing)
These rules assign a routing mark to packets based on their connection mark.
-
Rule for
route-wan1:-
General Tab:
Chain: prerouting,Connection Mark: con-wan1. -
Action Tab:
Action: mark routing,New Routing Mark: route-wan1,Passthrough: yes.

-
-
Rule for
route-wan2: Copy the third rule, changing the Connection Mark tocon-wan2and the New Routing Mark toroute-wan2.
Step 4: Add Routes for NTH Load Balancing
You need four default routes under IP > Routes.
Routes 1 & 2: Primary Marked Routes
These routes use the marks created in Step 3 to direct traffic down the designated WAN link.
-
Route to WAN 1:
Dst. Address: 0.0.0.0/0,Gateway: [WAN 1 Gateway IP],Routing Mark: route-wan1. -
Route to WAN 2:
Dst. Address: 0.0.0.0/0,Gateway: [WAN 2 Gateway IP],Routing Mark: route-wan2.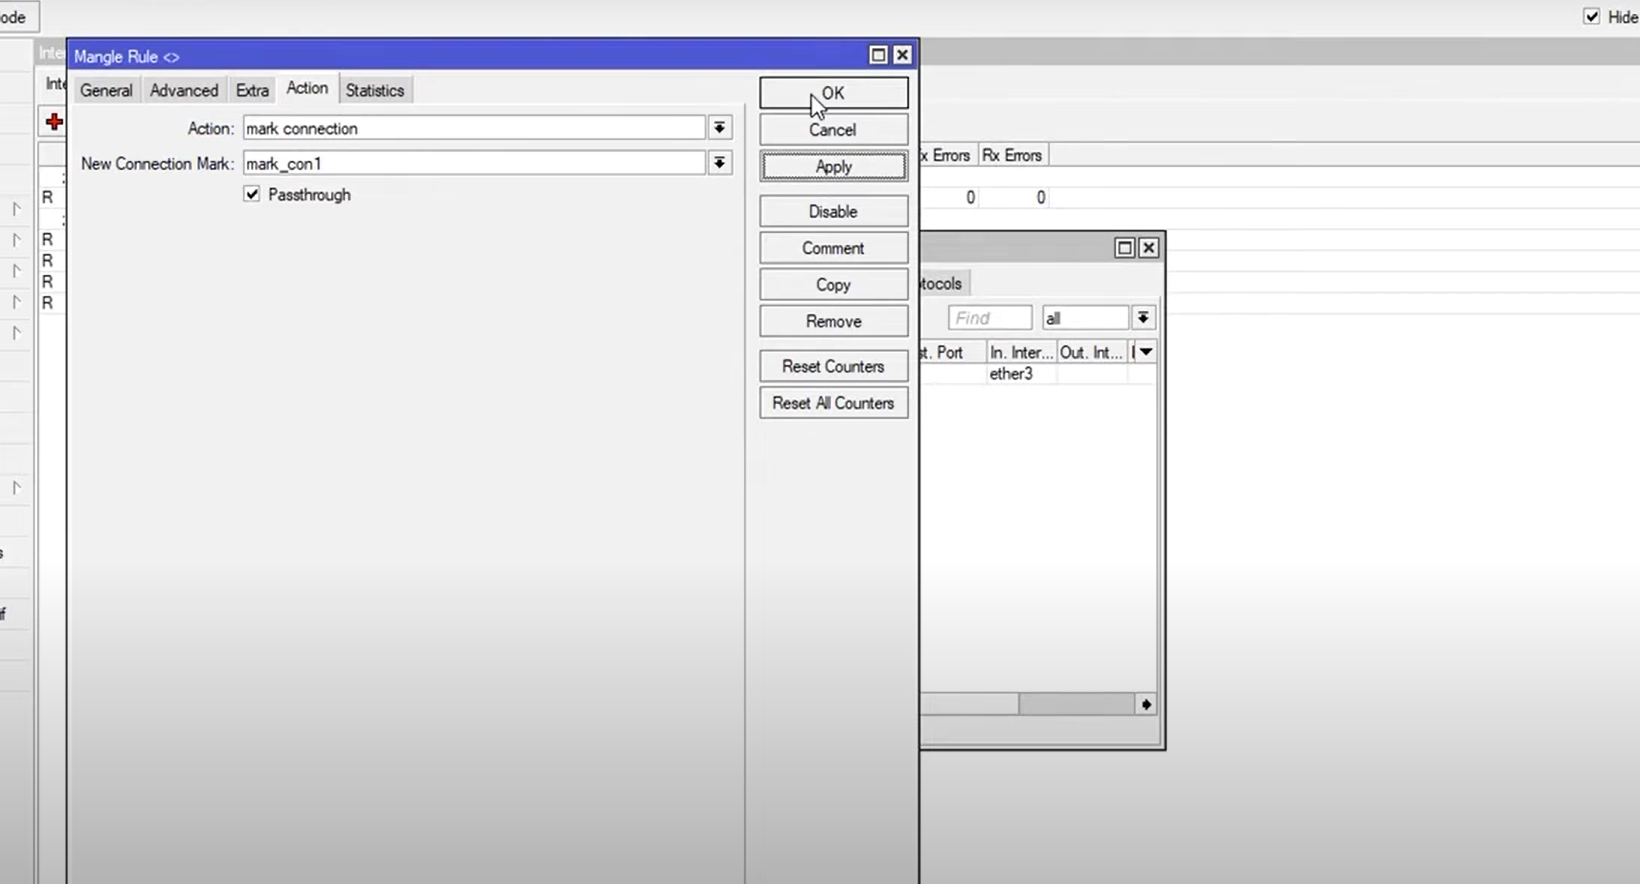
Testing Your NTH Configuration
Check Live Traffic: Monitor Interfaces to see traffic on both WAN links.