VMware Workstation stands out as a robust tool for running various operating systems. These come in the form of virtual machines, or just VMs, all on one physical computer setup. This guide covers the basics of getting it installed, handling registration, and taking those first steps to build a custom virtual machine.
STEP 01:
People often find the installation for VMware Workstation pretty direct. It leads right into a simple registration that opens up all the main features.
Download the setup file (link typically in the video description) and run the installer. Follow the prompts through the standard installation process
After the installation is complete, you must restart your system for the configuration changes to take effect
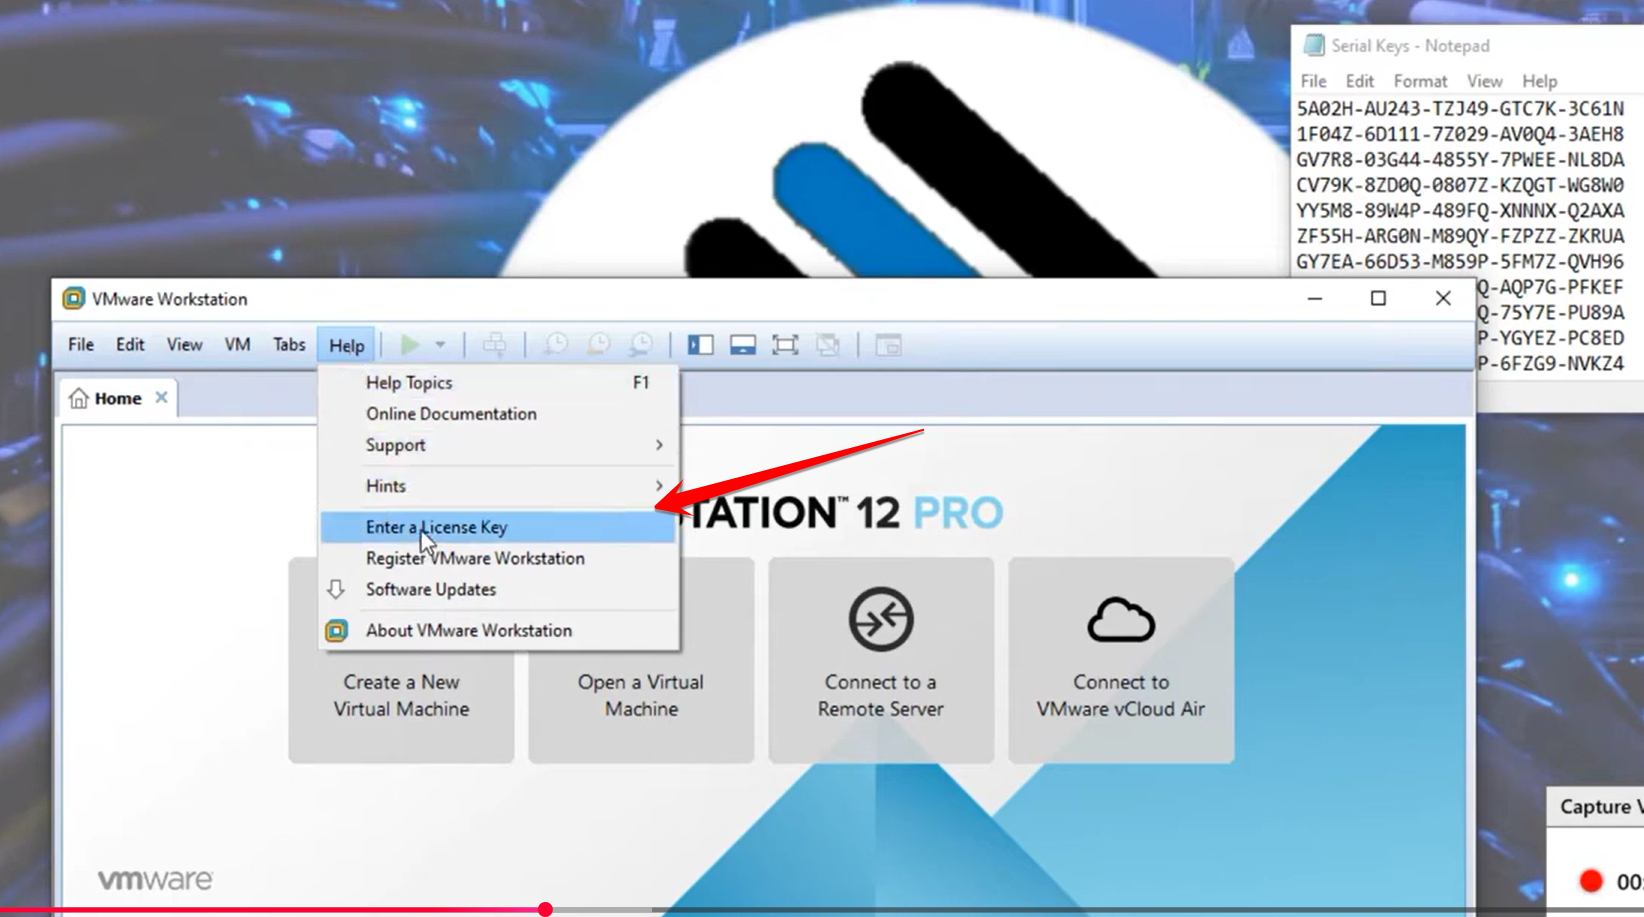
Registration: Once the system is back up and you open VMware Workstation:
-
Click the Help menu.
-
Select Enter License Key.
-
Paste the license key into the field to register the software.
STEP 02:
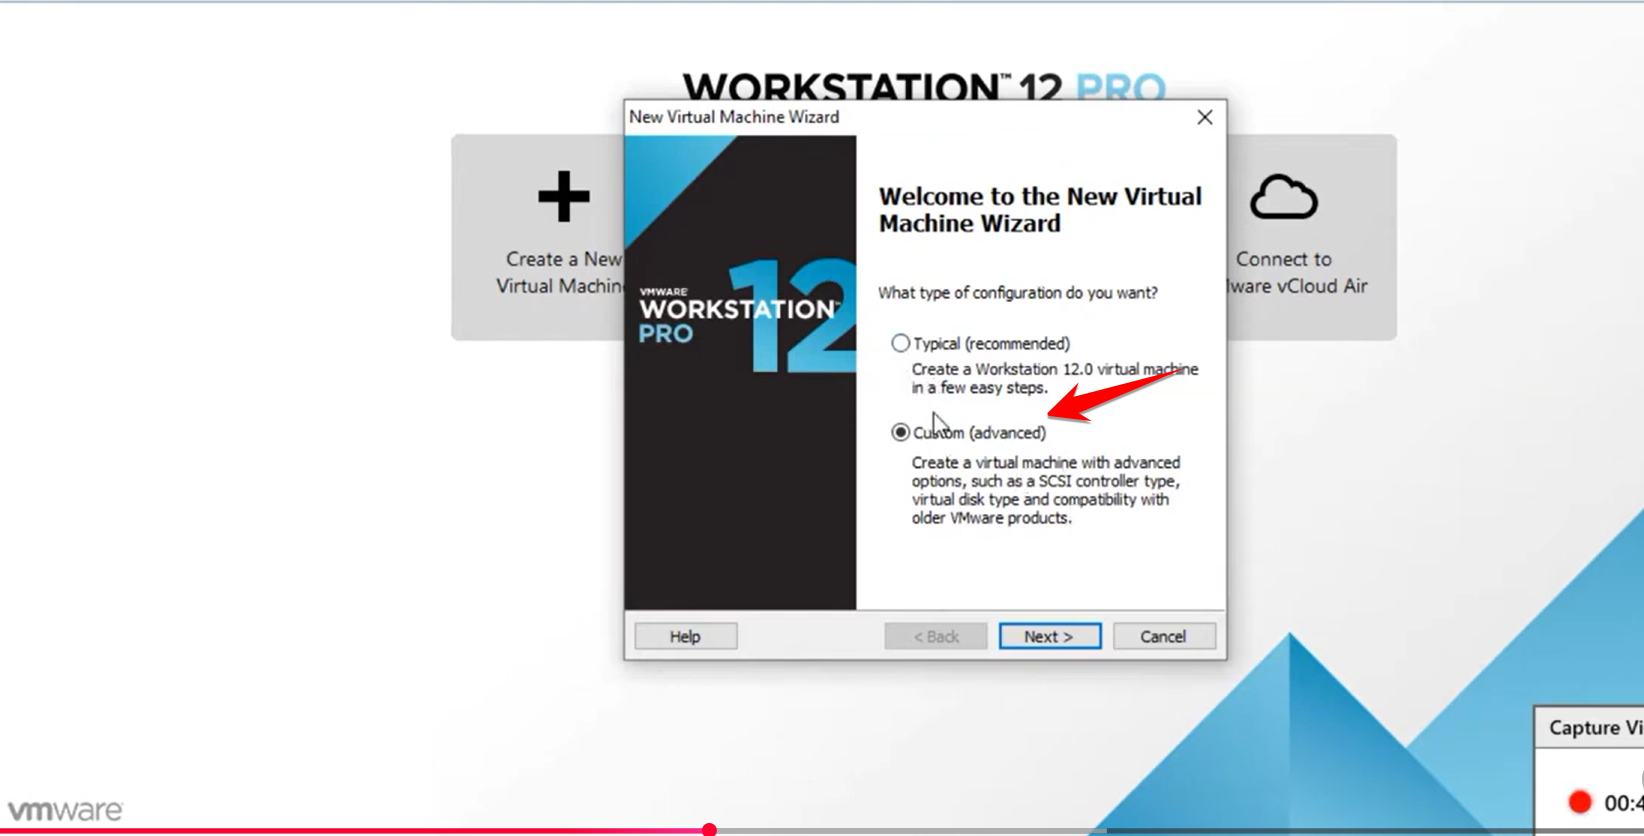
To begin, click on the choice for creating a new virtual machine. Then select the custom advanced option to keep going.
When it asks about installer media, go with the option for an installer disk image file. That means an ISO file. Browse and pick the one for your operating system, like the ISO for MicroTik RouterOS.
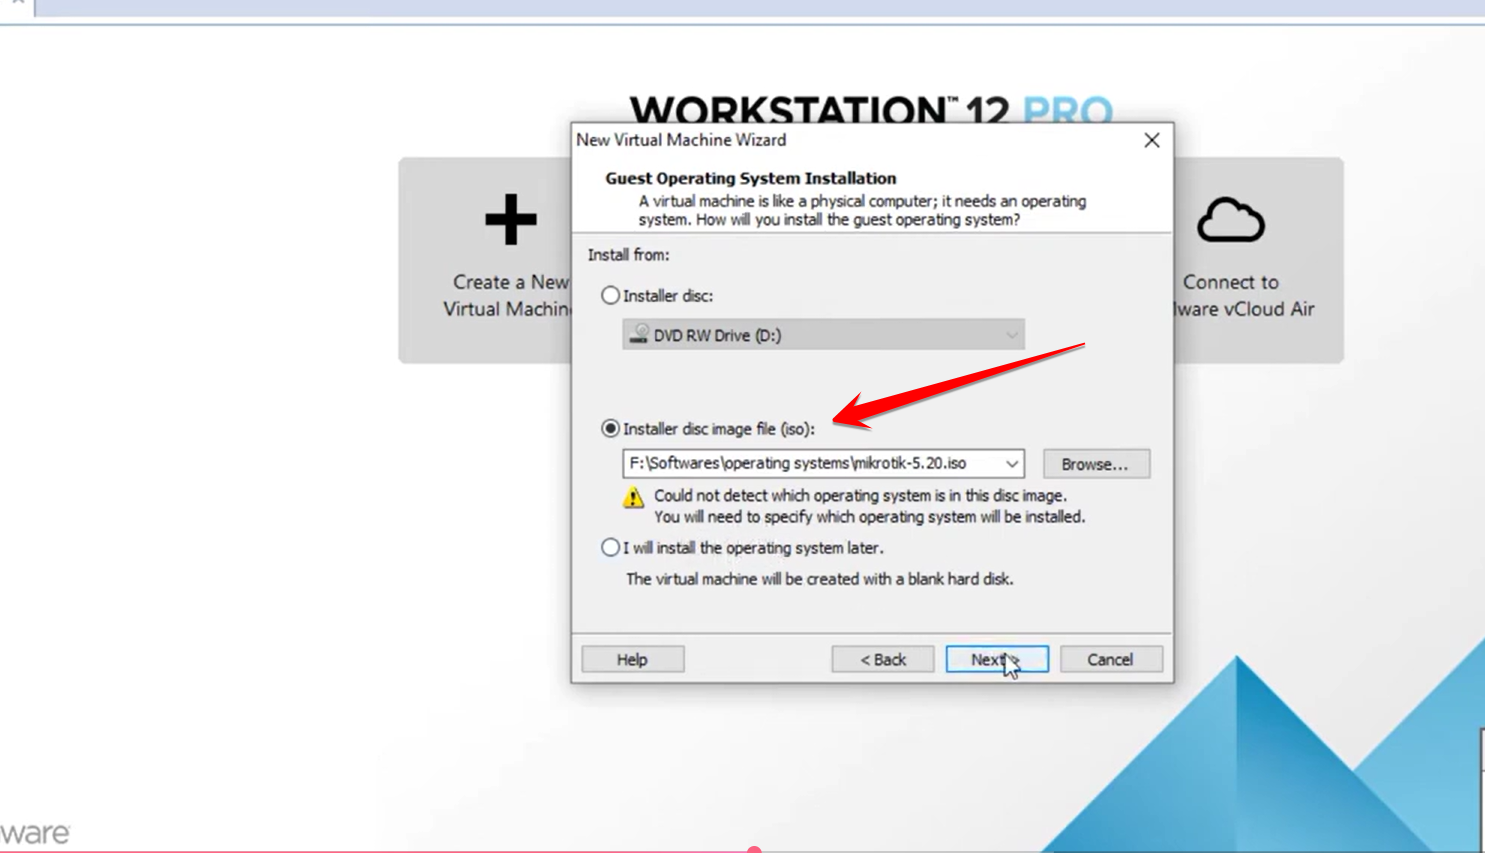
VMware sometimes displays a warning here. It might not detect the operating system type from the ISO automatically. Simply click next and enter the operating system type and version by hand.
Now for the hardware setup details. First, set the processors by choosing how many processors and cores each one gets. For example, try one processor with two cores.
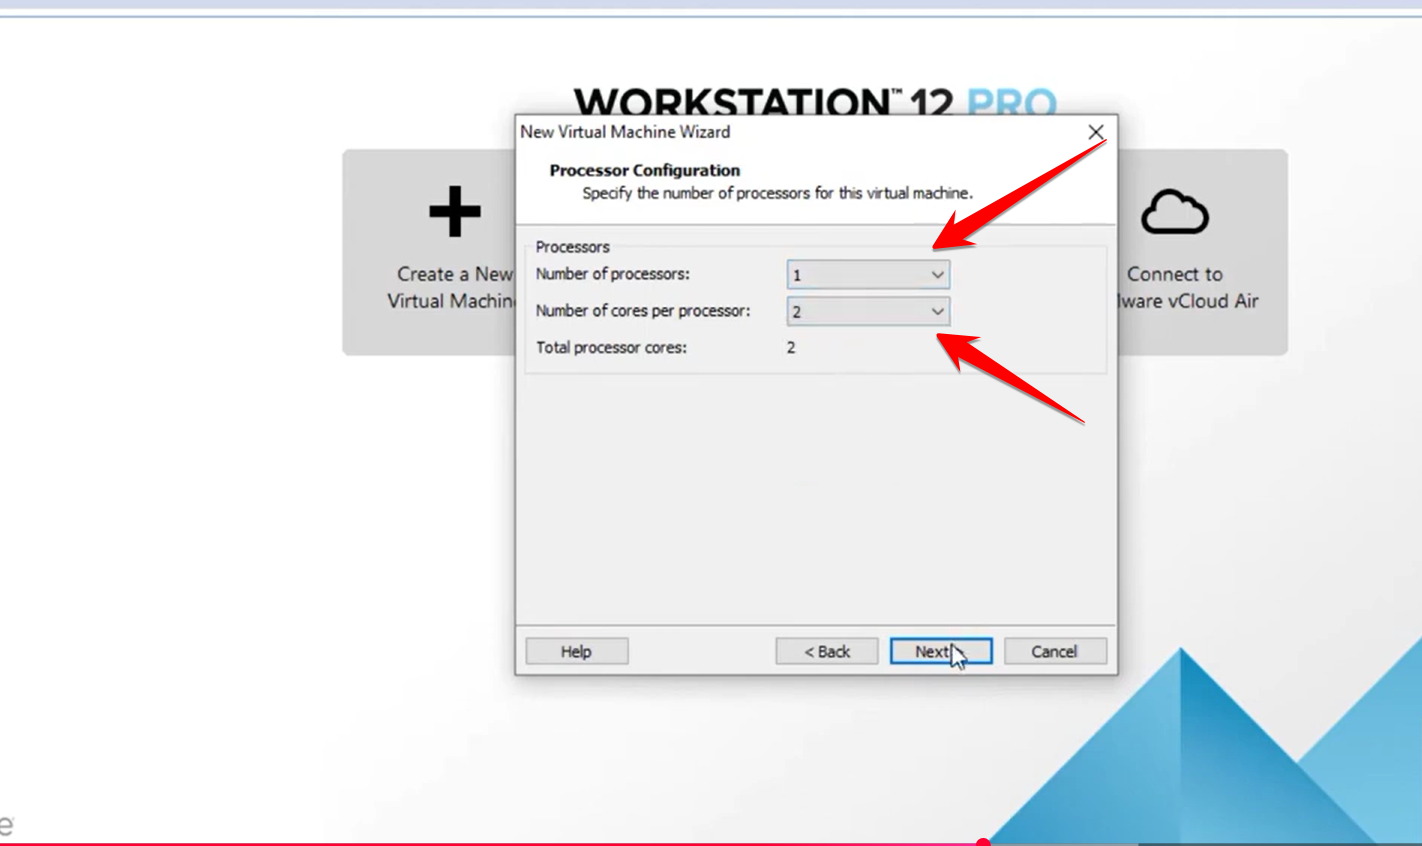
Next up is memory, or RAM allocation. Decide how much RAM the virtual machine should have. Something like five hundred twelve megabytes works well for a lightweight system such as MicroTik.
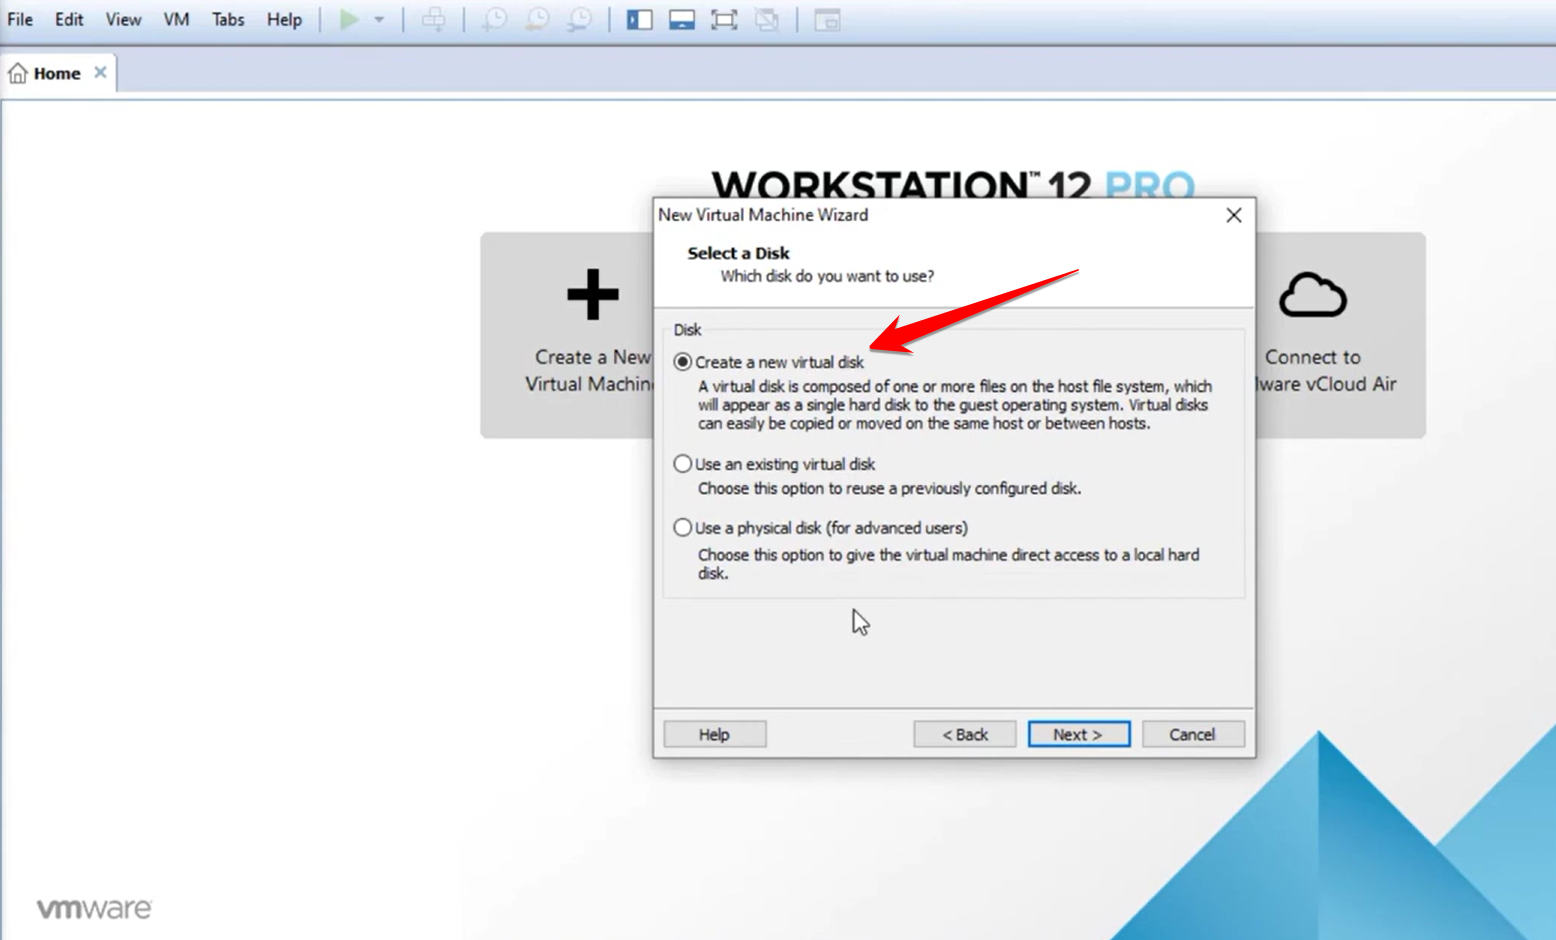
For storage, opt to create a new virtual disk. Set the maximum size for that disk, say ten gigabytes. Also choose where to save the virtual disk file, which ends in .vmdk.
Finally, look over the summary of everything. Click finish to wrap it up. At this point, the virtual machine exists and stands ready to power on. That begins the installation of the operating system itself.