
A MikroTik Hotspot is a powerful way to manage user access, but the default login page is basic. This guide shows you how to use the Hotspot Setup Wizard and then swap the default page with a custom HTML theme.
1. Prerequisites: Basic Network Setup
Before configuring the Hotspot service, ensure your router has the necessary IP and DNS settings.
-
IP Addresses: Configure your WAN interface (e.g.,
ether1) and your LAN interface (e.g.,ether3) with the correct IP addresses.
-
DNS Servers: Configure your DNS settings under IP > DNS.

-
Default Route: If you are using a static IP on your WAN, you must manually add a default route (
0.0.0.0/0) under IP > Routes. If using DHCP Client, the route is added automatically.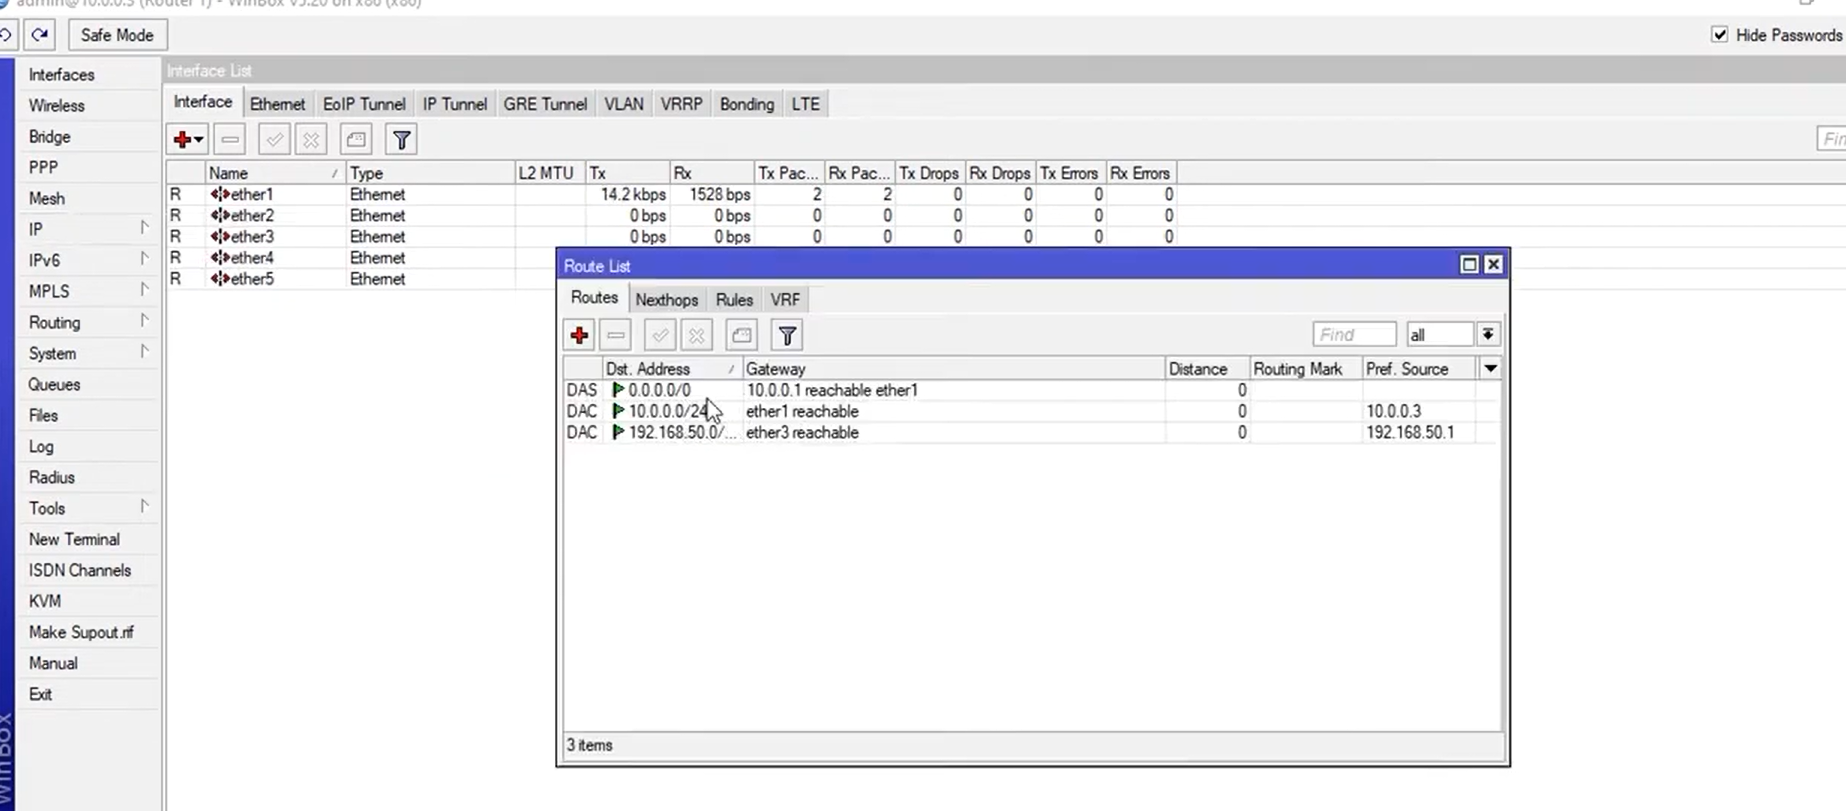
2. Hotspot Server Setup (Wizard)
The easiest way to set up the Hotspot is by using the built-in wizard.
-
Navigate to IP > Hotspot.
-
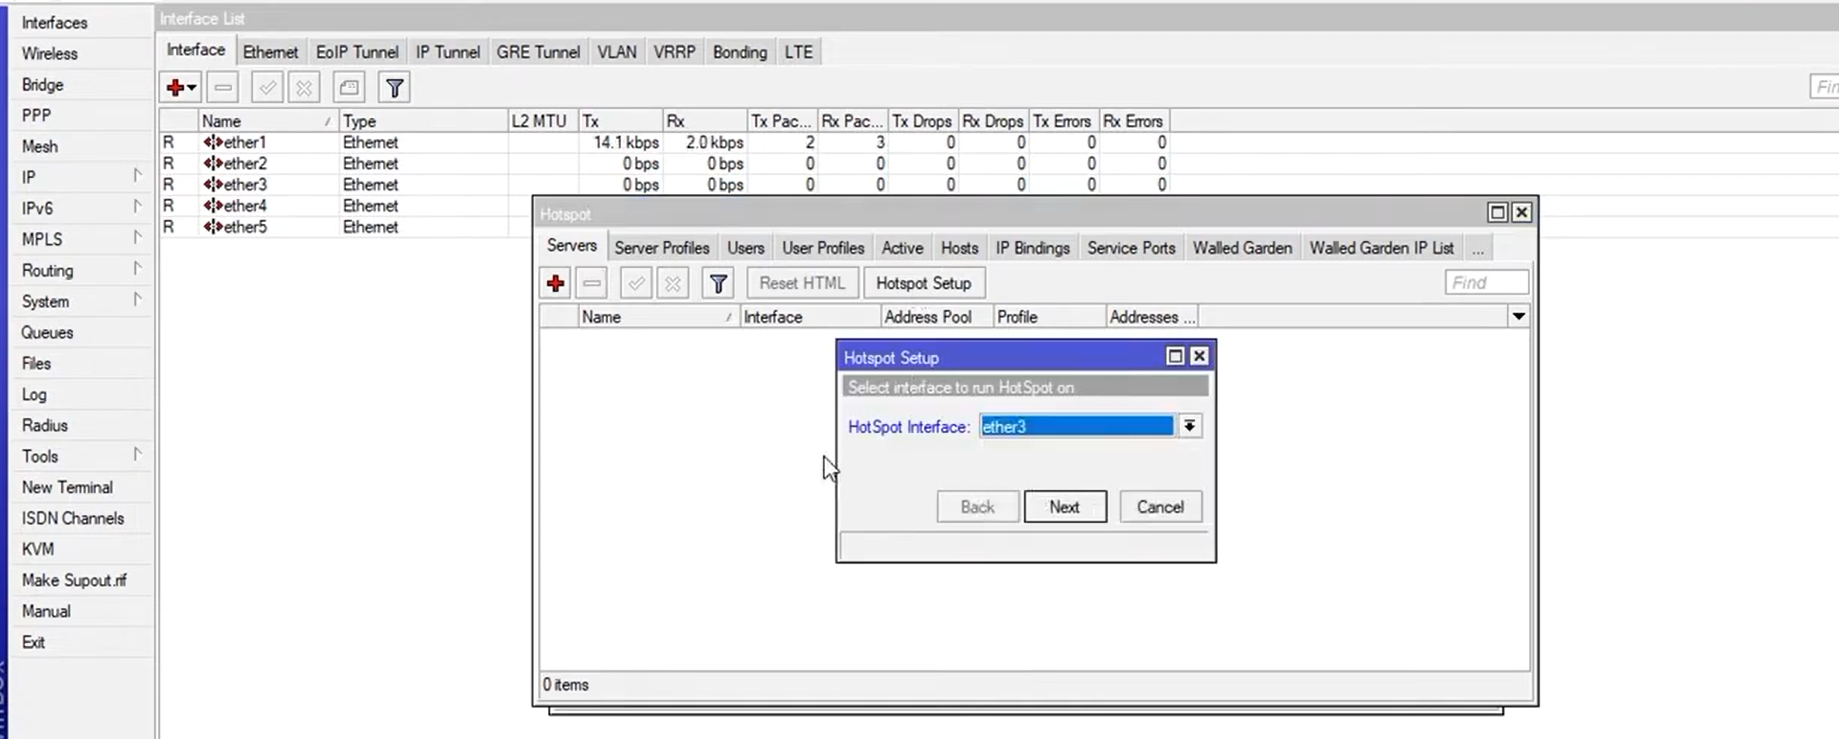
Click the “Hotspot Setup” button.
-
Hotspot Interface: Select the local interface where users will connect (e.g.,
ether3or a Bridge interface). -
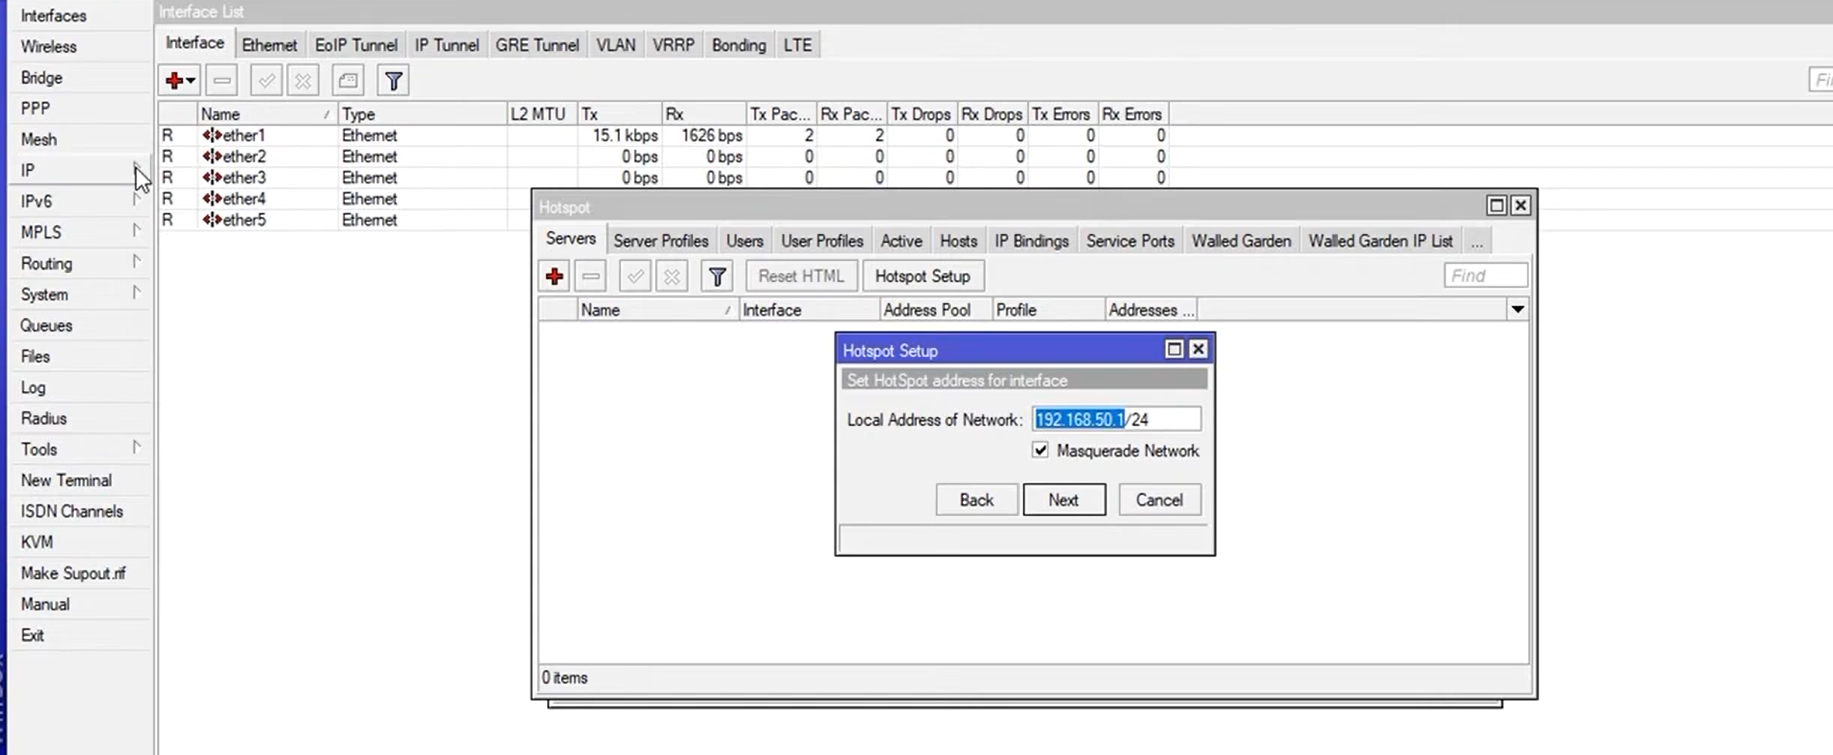
Local Address: The wizard automatically detects the interface’s IP address and network.
-
Address Pool: Define the range of IP addresses users will receive.
-
Certificates & SMTP: Skip these steps for a basic setup.
-
DNS Name: Set a custom DNS name for your login page (e.g.,
zonetsolutions.one23). This is what users will see in their browser.
-
Local User: Create the first default user (e.g.,
admin).
Your basic Hotspot service is now running, and users connecting to the selected interface will be redirected to the default login page.
3. Upload and Apply Custom Login Page
After the server is active, you can replace the default look with your customized HTML theme.
-
Obtain Theme: Download or design your custom Hotspot HTML theme. The theme files must be contained within a single folder.
-
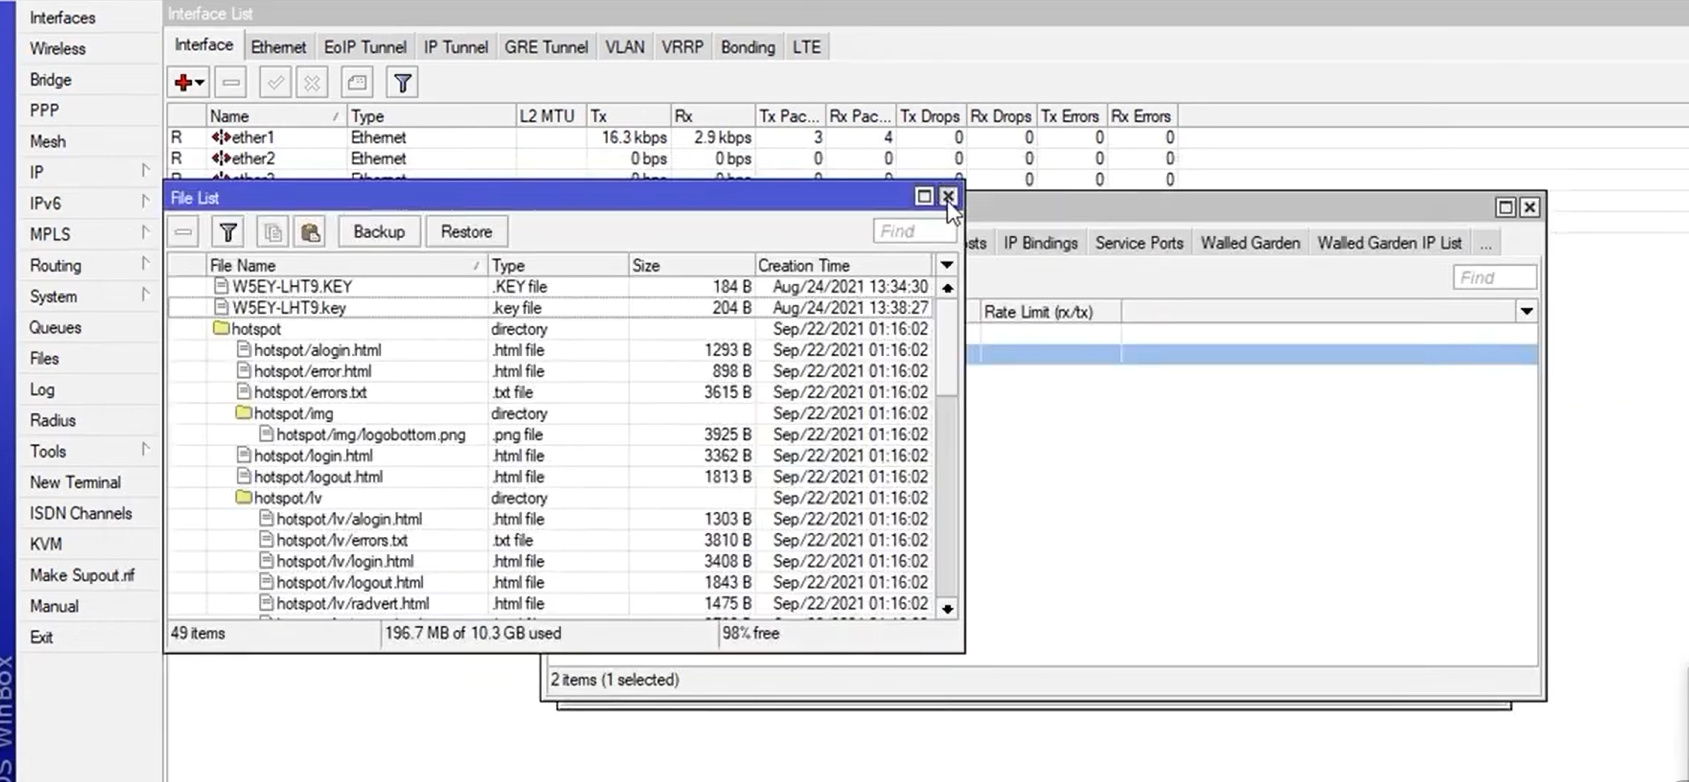
Upload to Router: In WinBox, navigate to Files. Drag-and-drop your custom theme folder directly into the root directory of the router’s file list.
-
Example: The video uploads a folder named
hotspot-custom.
-
-
Assign Theme to Profile: Go to IP > Hotspot and click the “Server Profiles” tab.
-
Double-click your Hotspot server profile (e.g.,
hsprof1). -
In the HTML Directory field, enter the exact name of the folder you just uploaded (e.g.,
hotspot-custom).
-
Click Apply and OK.
The next time a user attempts to connect, they will be redirected to your custom-designed login page.
-


