To get a new MikroTik router working, you need to configure three main components: WAN (Internet access), LAN (Local Network), and NAT (Network Address Translation). This guide uses a static IP address method for the WAN and a DHCP Server for the LAN.
1. WAN Configuration (Internet Access)
Your WAN setup depends on your ISP, but using a static IP involves configuring the IP, DNS, and a default route.
A. IP Address and DNS
-
Navigate to IP > Addresses and ensure the WAN interface (e.g.,
ether1) is configured with the static IP provided by your ISP.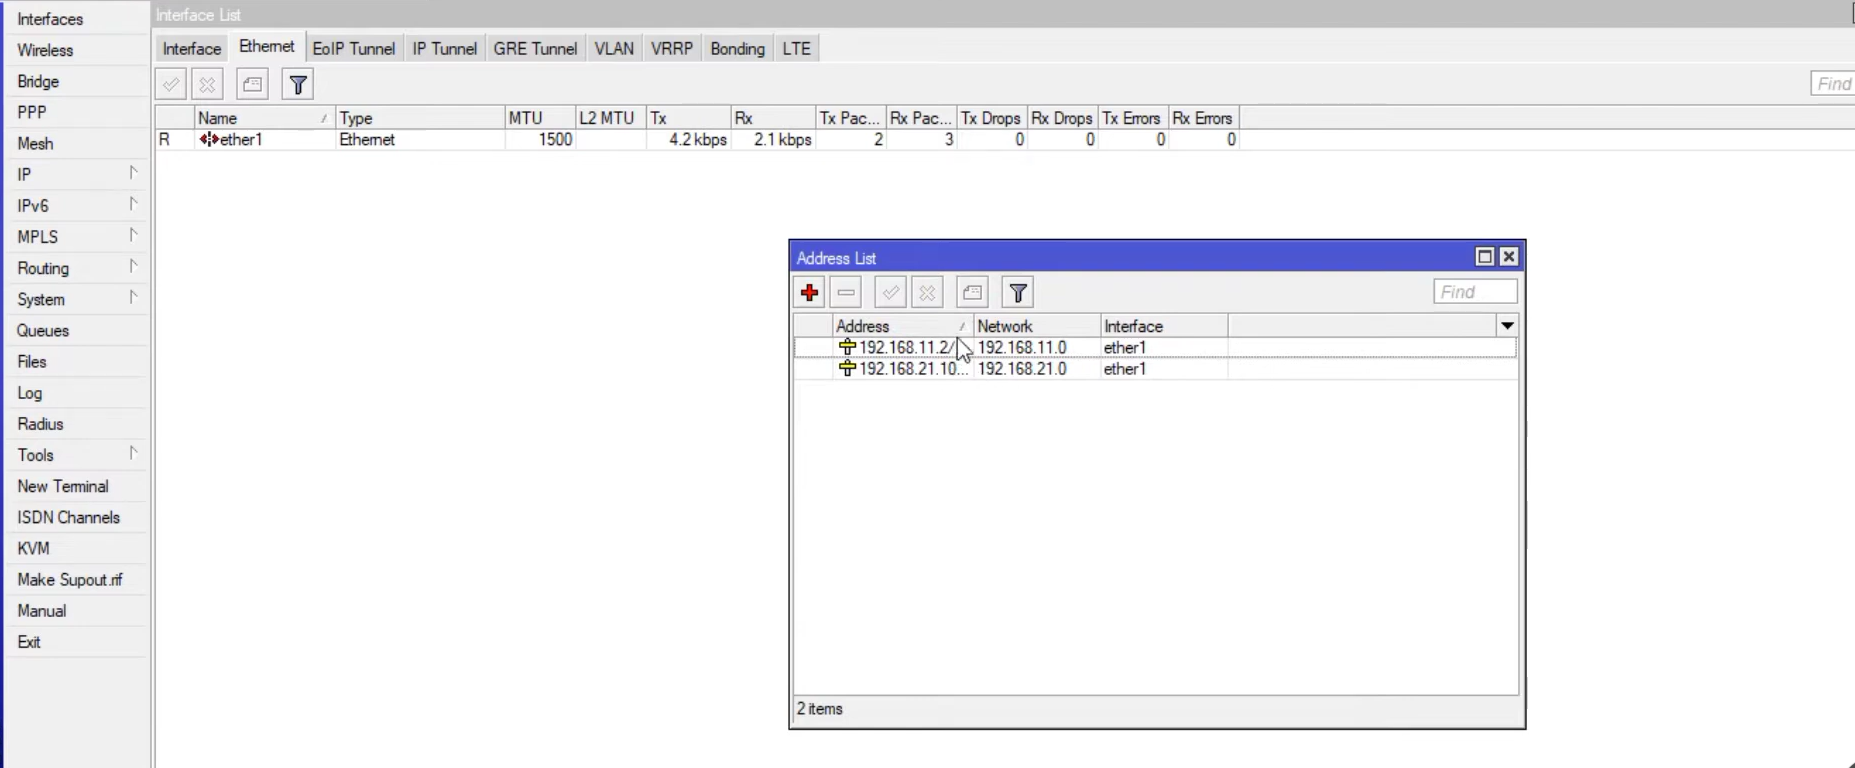
-
Navigate to IP > DNS. Add your DNS servers, such as the public Google DNS (
8.8.8.8).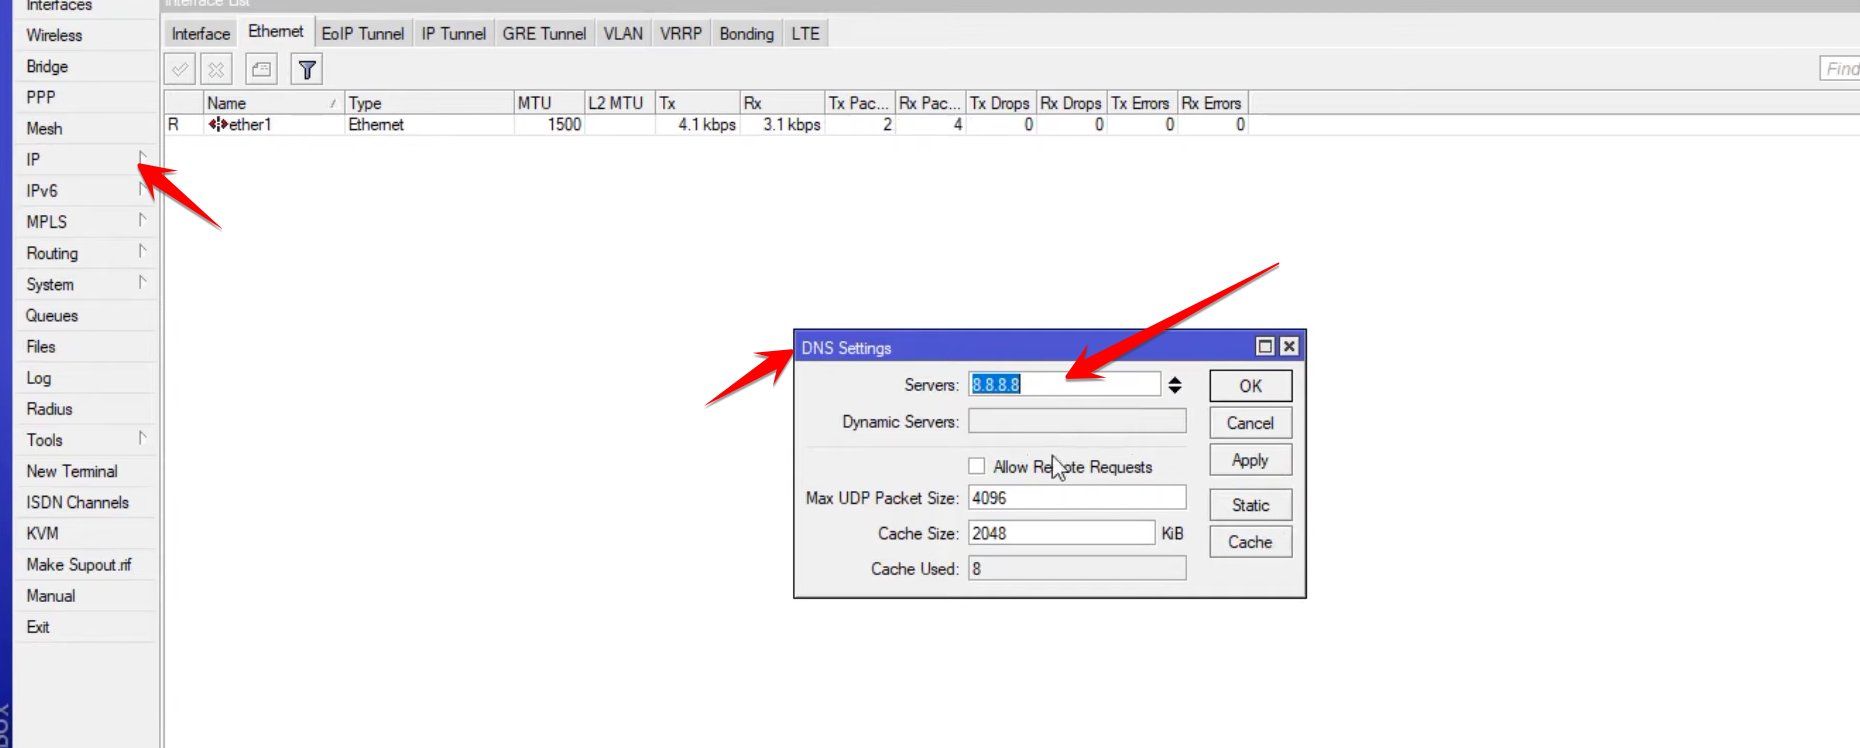
B. Default Route
Without a route, your router doesn’t know where to send traffic for the internet.
-
Navigate to IP > Routes.
-
Add a new rule (
+):-
Dst. Address:
0.0.0.0/0(This means “traffic to anywhere”). -
Gateway: Enter the Gateway IP address provided by your ISP.

-
-
Click Apply and OK. Your router should now be able to ping external addresses like
google.com
2. LAN Configuration (Local Network)
The LAN requires its own IP address and a DHCP Server to automatically assign IPs to your connected devices.
A. Assign IP to LAN Interface
-
Navigate to IP > Addresses.
-
Add a new rule (
+). -
Address: Assign a private IP for your LAN interface (e.g.,
10.0.0.1/8). -
Interface: Select your LAN interface (e.g.,
ether2).
B. Configure DHCP Server
The DHCP Setup Wizard is the fastest way to set up the service.
-
Navigate to IP > DHCP Server.
-
Click the DHCP Setup button.
-
DHCP Server Interface: Select your LAN interface (e.g.,
ether2).
-
Follow the wizard to define the address space, gateway, DNS servers, and lease time.
3. Configure NAT (Masquerade)
The final step is crucial: Network Address Translation (NAT). This allows devices on your private LAN to share the single public IP of your WAN interface. Without this rule, your clients cannot access the internet.
-
Navigate to IP > Firewall.
-
Select the NAT tab.
-
Add a new rule (
+).
-
General Tab:
-
Chain: Select
srcnat(Source NAT). -
Src. Address: Enter your LAN subnet (e.g.,
10.0.0.0/8).
-
-
Action Tab:
-
Action: Select
masquerade.
-
-
Click Apply and OK.
-