
Proxmox VE is a powerful open-source platform for virtualization, allowing you to manage virtual machines (VMs) and containers from a single web interface. If you’re using the free (non-enterprise) license, you still have access to a robust set of features. This guide covers the essential management and configuration points within the Proxmox environment.
1. Data Center and Node Overview
After logging in, the interface is organized around the Data Center and the Host Node.
-
Data Center: This view allows you to manage multiple physical servers (Nodes) collectively. While clustering and replication features are unlocked with multiple nodes, the Data Center view is your central management hub.

-
Node (Your Server): Clicking on your host node reveals several key information and management sections:
-
Summary: Provides detailed information on CPU usage (cores, clock speed), RAM usage (installed vs. used), and disk space utilization.
-

-
-
Shell: Offers direct command-line access to the underlying Debian operating system running Proxmox, allowing you to run standard Linux commands.
-

2. Storage and ISO Management
Proxmox typically splits your storage into different data stores (e.g., local and local-lvm). It’s crucial to understand where to place your installation files.
-
ISO Images: To install an OS in a VM, you need an ISO image. Use the
localstorage area to manage these.-
You can Upload a file from your PC or use the preferred method: Download from URL, which is faster as the server downloads the file directly from the internet.
-

-
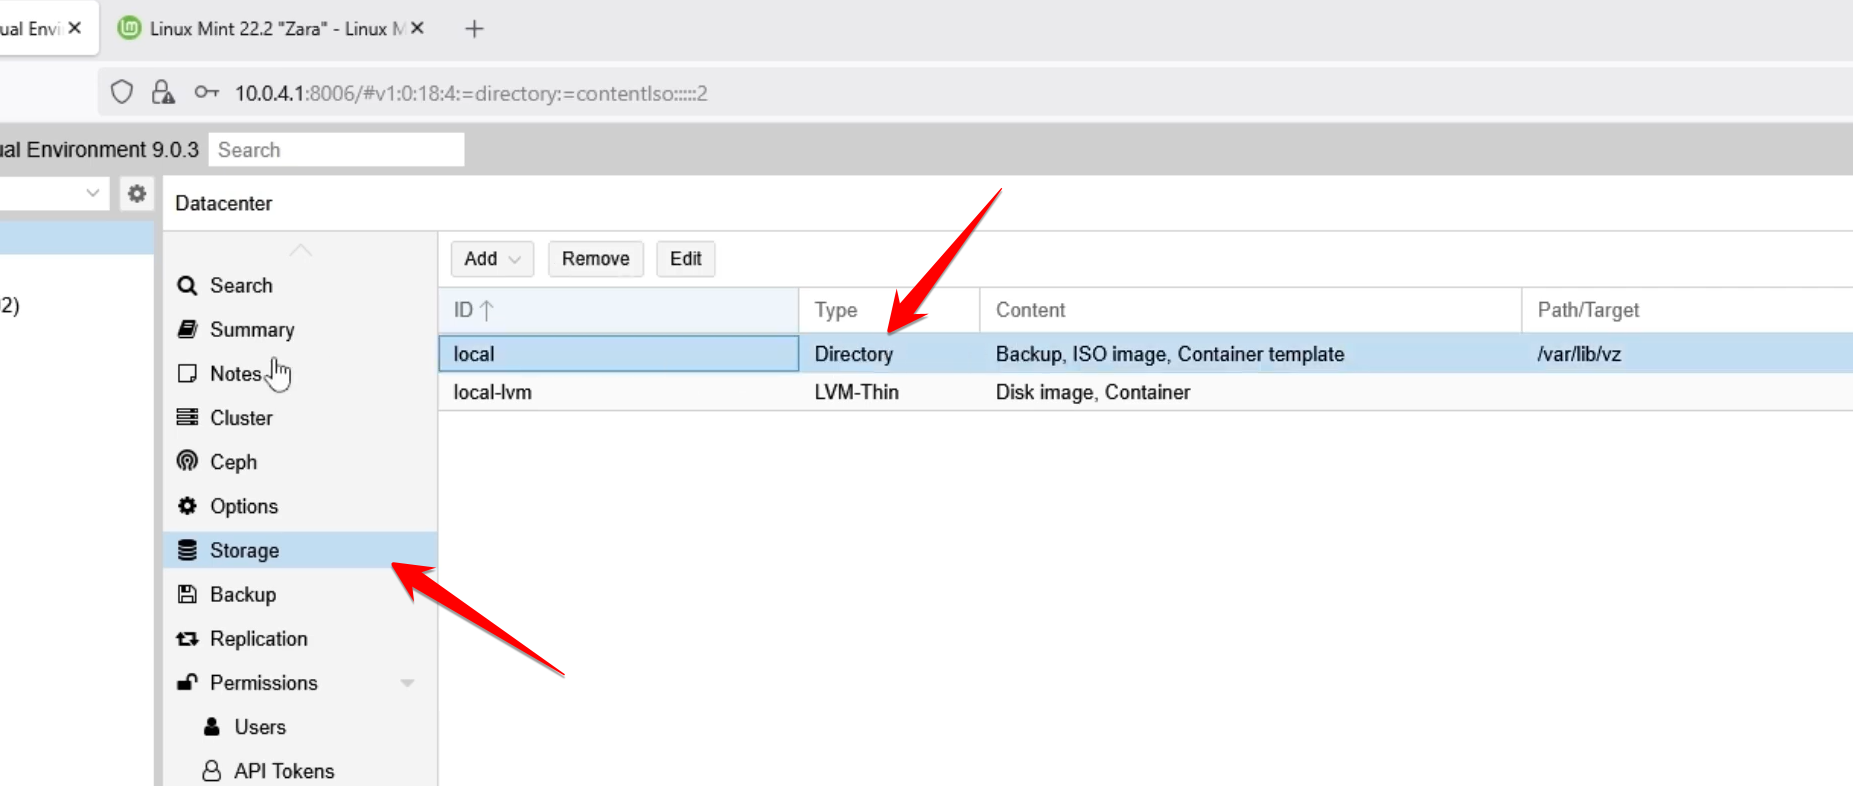
Disks/Storage: Under Node > Disks, you can view and manage the physical drives on your server.

-
Under Data Center > Storage, you can configure how Proxmox uses these disks, such as defining directories for backups, VM disks, or container files.
3. Network Configuration and Virtual Switches
Proper network setup is vital for both accessing Proxmox and networking your VMs.
-
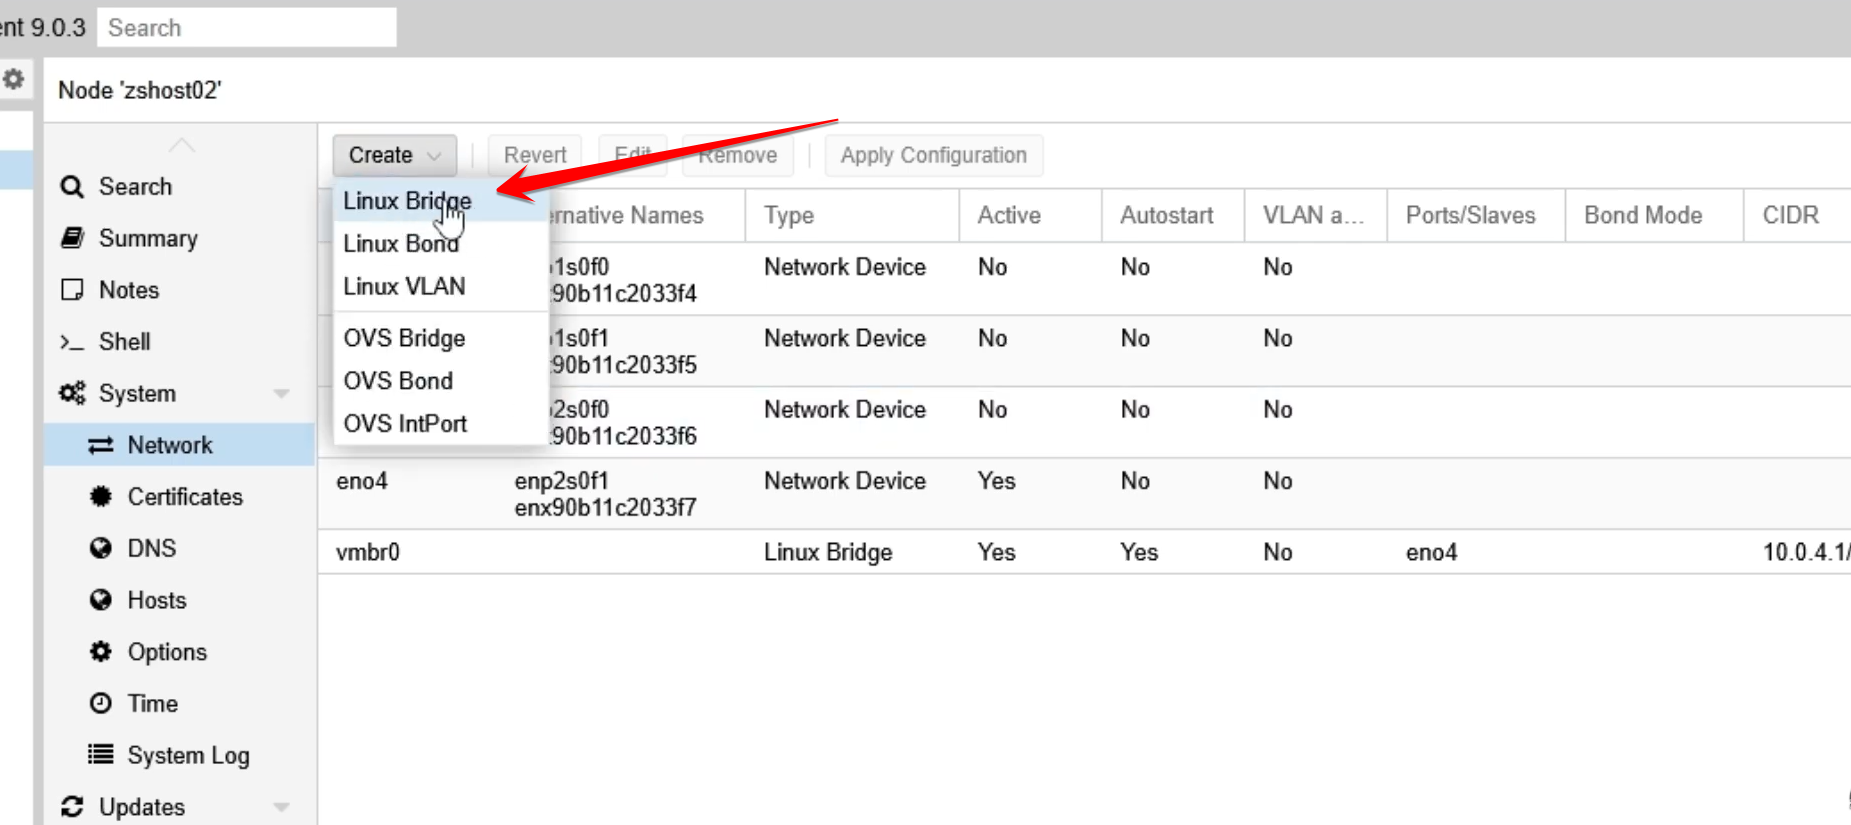
Network Interface (IP Address Change): Under Node > System > Network, you can view and change the IP address of your Proxmox server. Caution: Entering the wrong details here will lock you out of the web interface.

-
Virtual Switches (Linux Bridge): To create separate networks for VMs (e.g., a dedicated LAN for a firewall VM), you create a Linux Bridge (
vmbrX). This acts as a virtual switch to which you can attach your VMs.
4. Essential Security and Maintenance
Two features are non-negotiable for a secure and stable server environment:
-
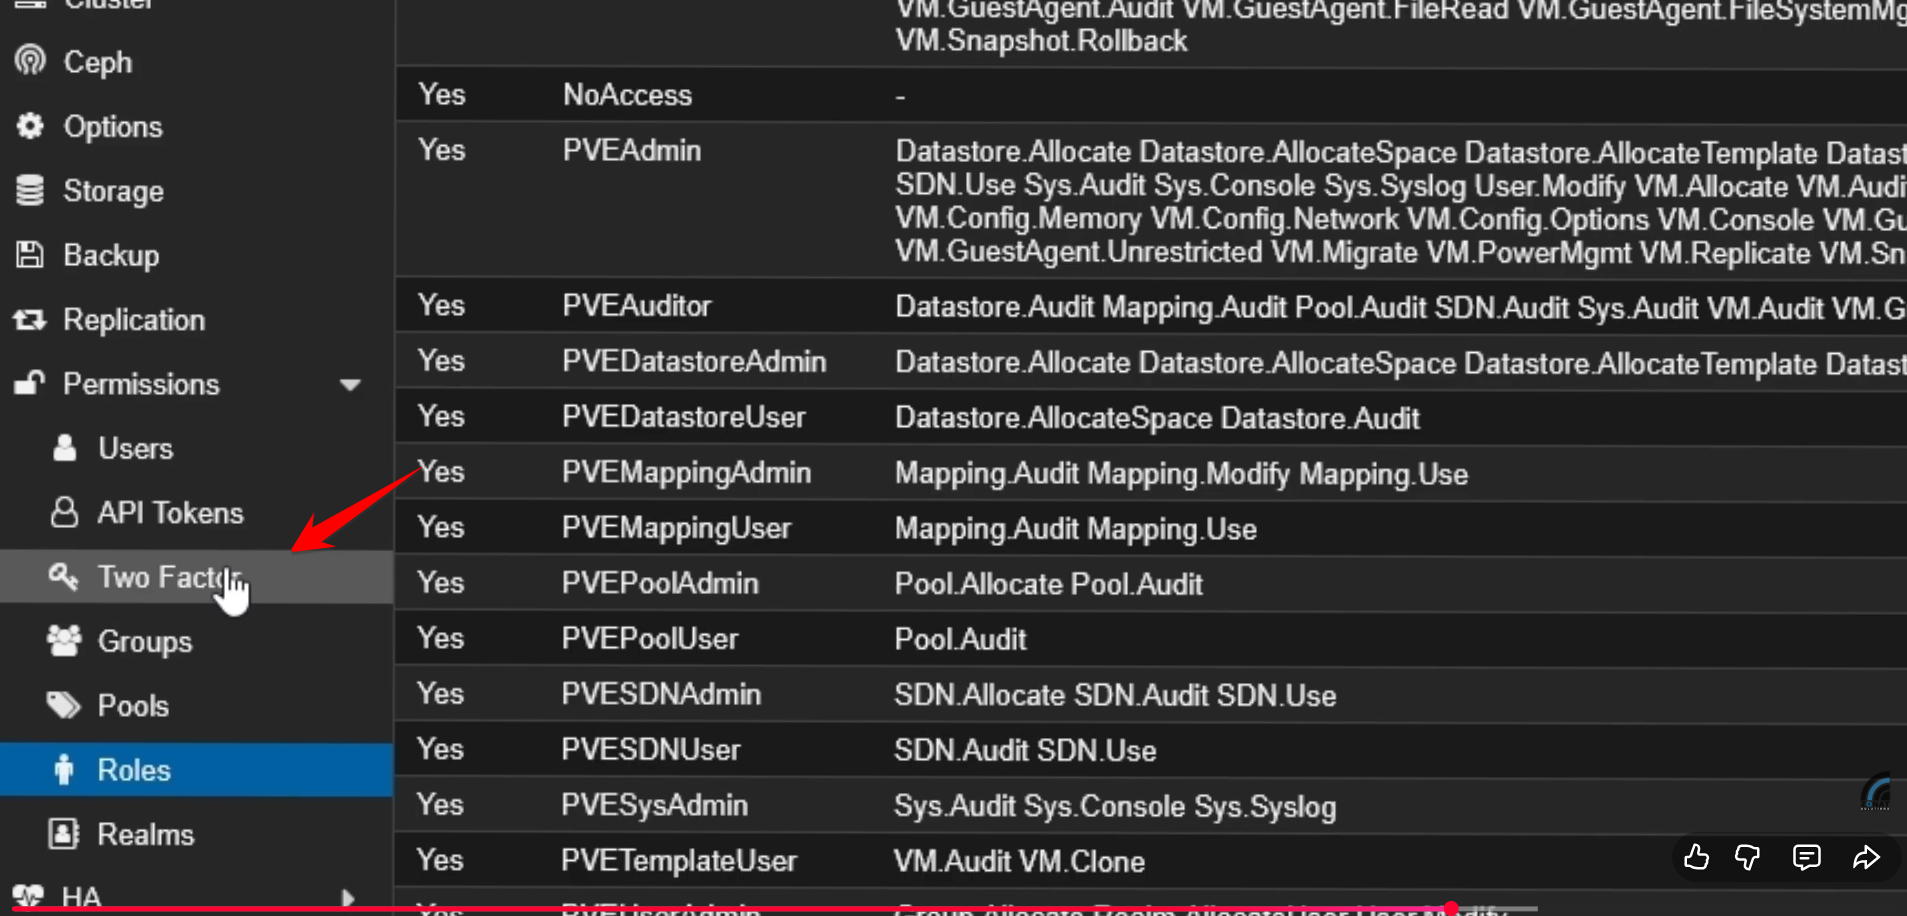
Two-Factor Authentication (2FA): Under Data Center > Permissions > Users, you can enable Two-Factor Authentication (TFA) for a more secure login. This prevents unauthorized access even if your password is stolen.
-
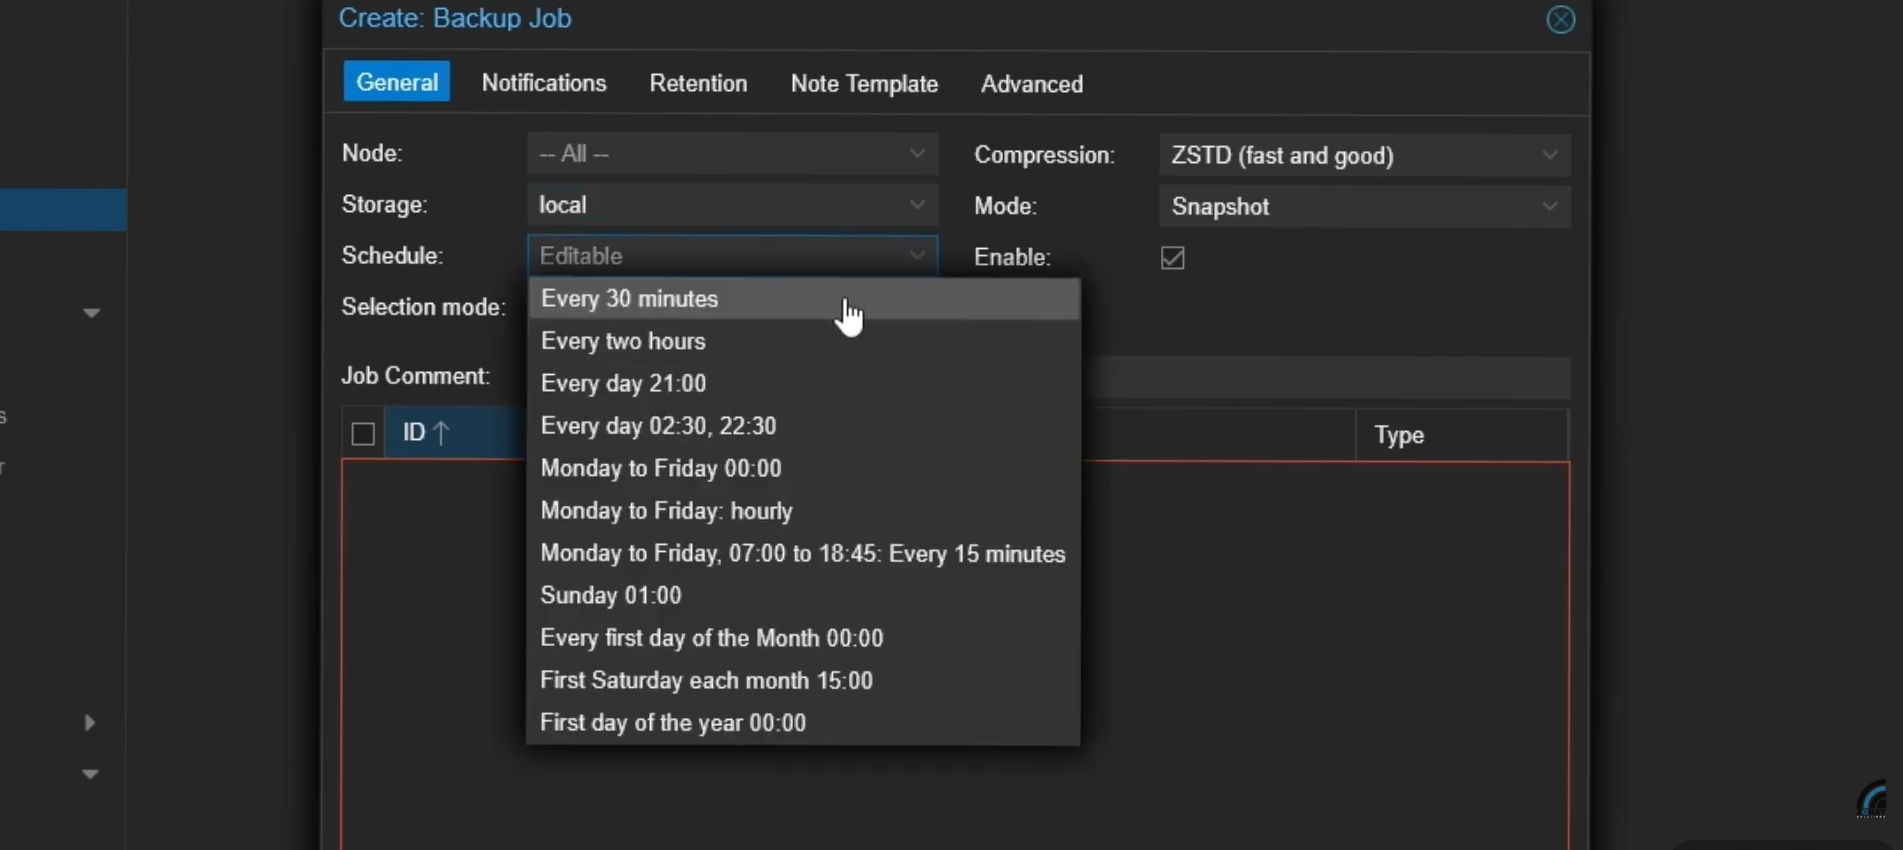
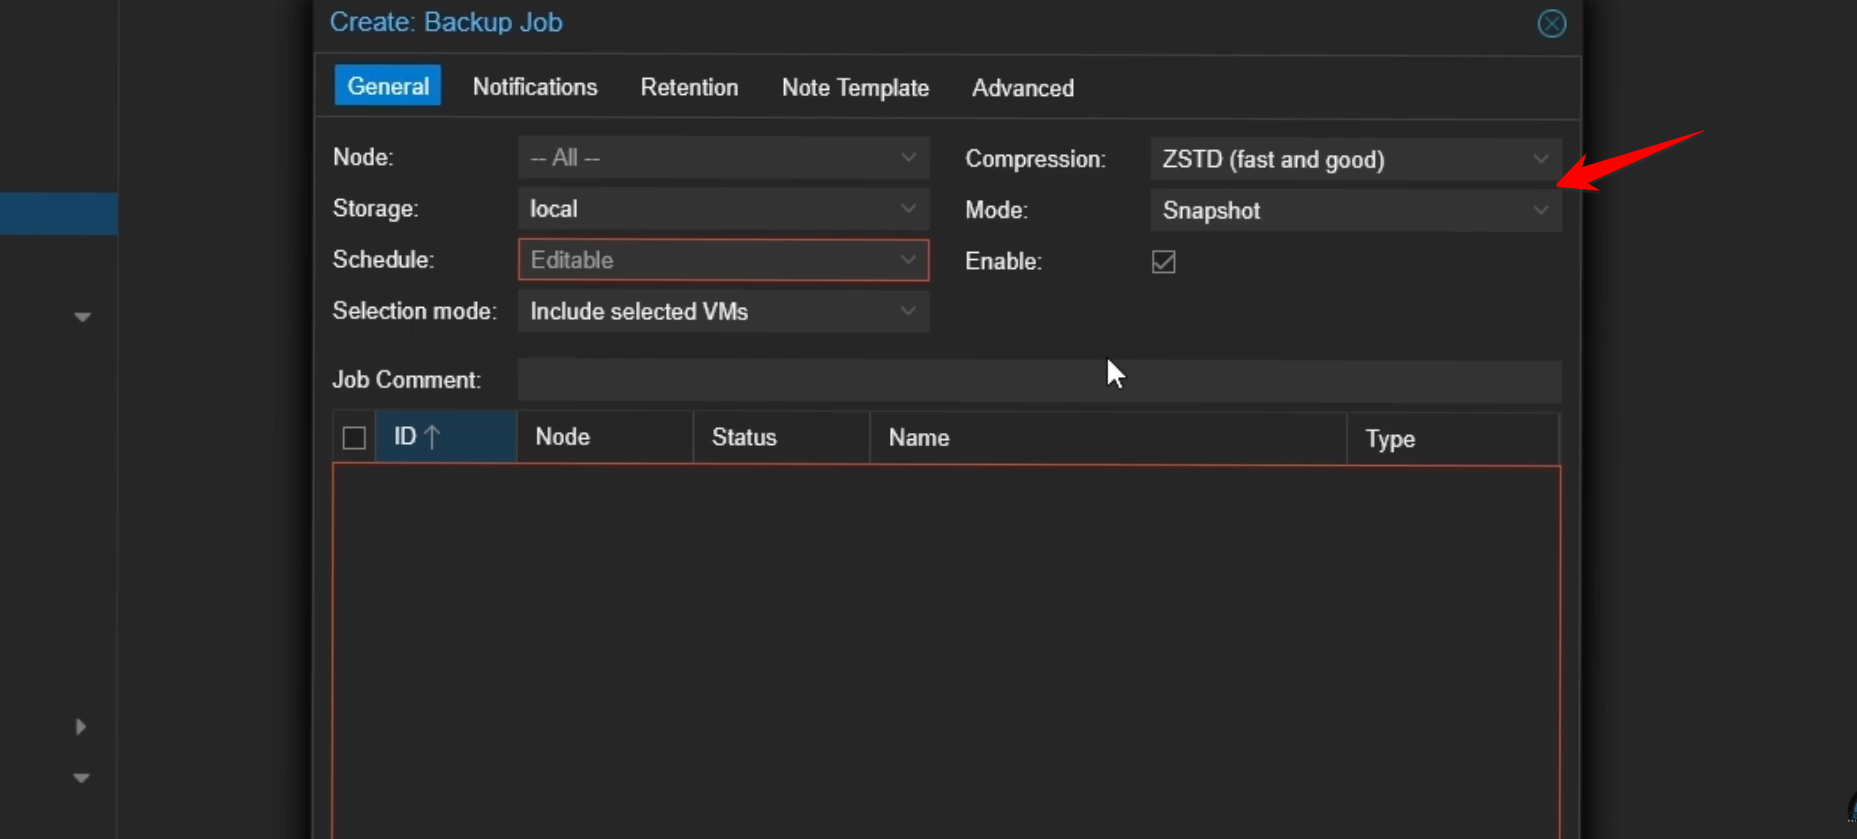
Backup Scheduling: Set up automatic backups for your VMs. Navigate to Data Center > Backup to define:
-
Schedule: How often the backup runs (e.g., every day, every hour).
-
-
-
Storage: Where the backup files are stored.
-
Mode: Use Snapshot mode to capture the current running state of the VM.
-
-
-
Retention: Set rules (e.g., keep the latest daily, one monthly, one yearly) to manage disk space.
-



