Step-by-step tutorial on how to install Windows 11 on a Proxmox Virtual Machine, highlighting the specific security and driver requirements like TPM, UEFI, and VirtIO.
Step :01 (Preparation)
-
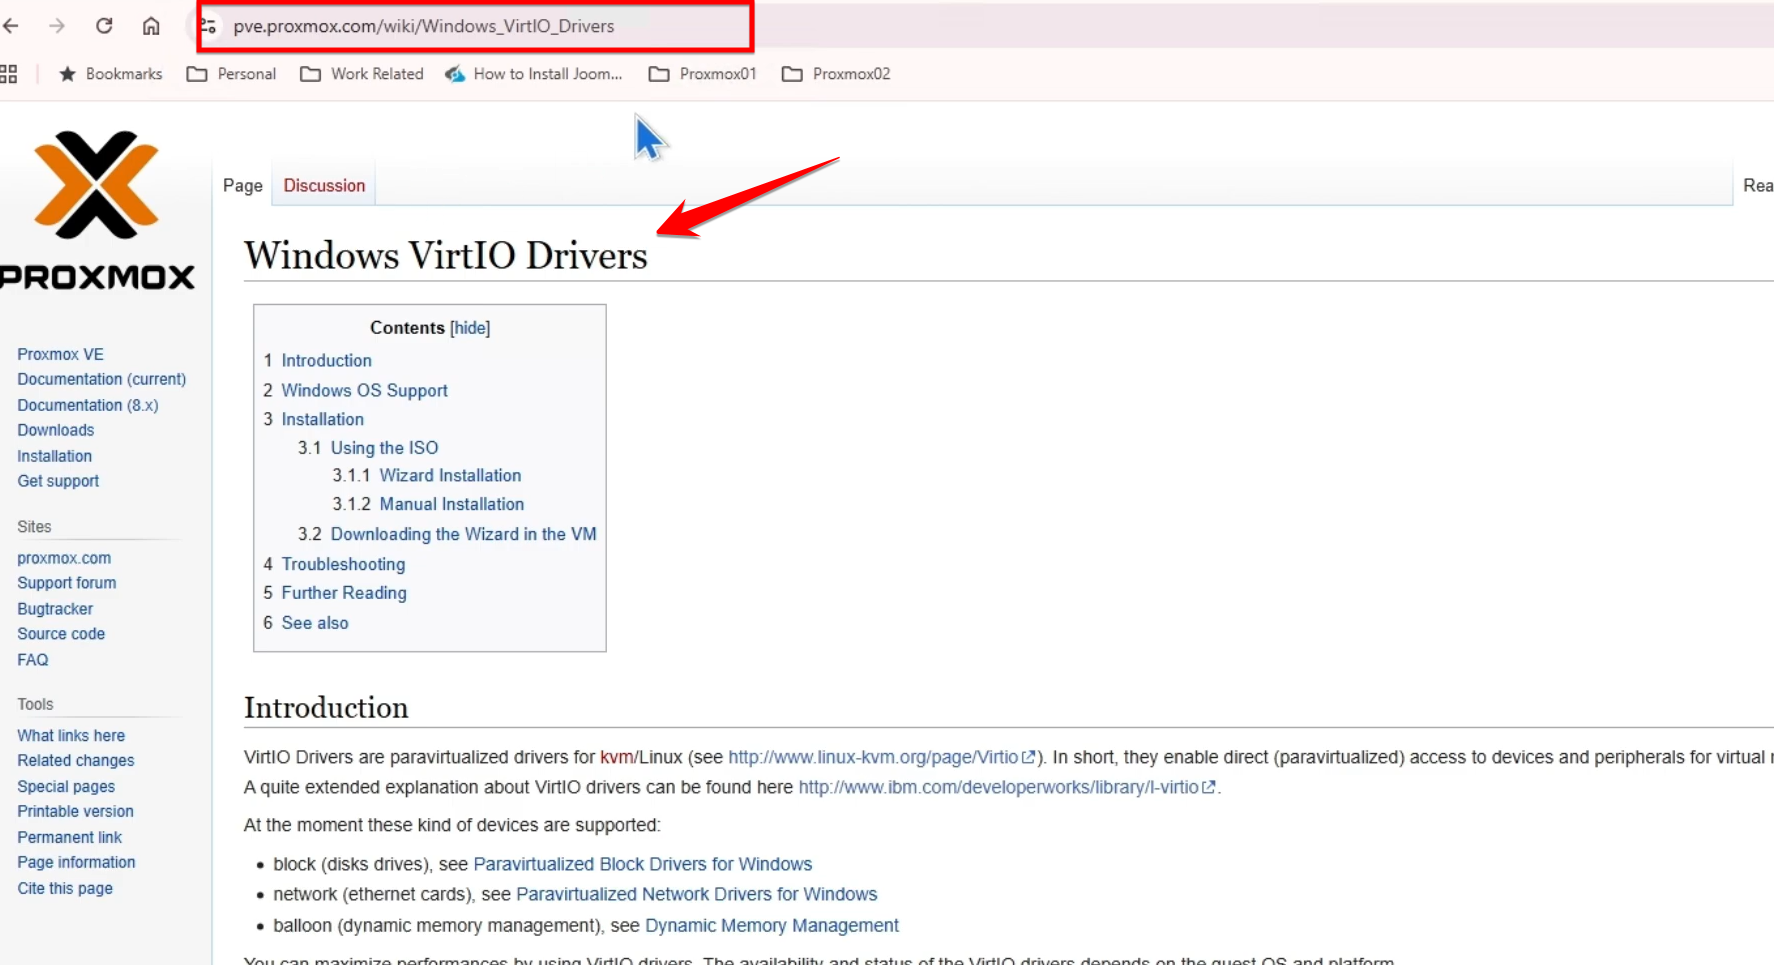
You need the Windows 11 ISO from Microsoft and the VirtIO drivers ISO.
-
Upload both ISO images to your Proxmox local storage before starting the VM creation.

Step : 02 (VM Configuration Steps)
-
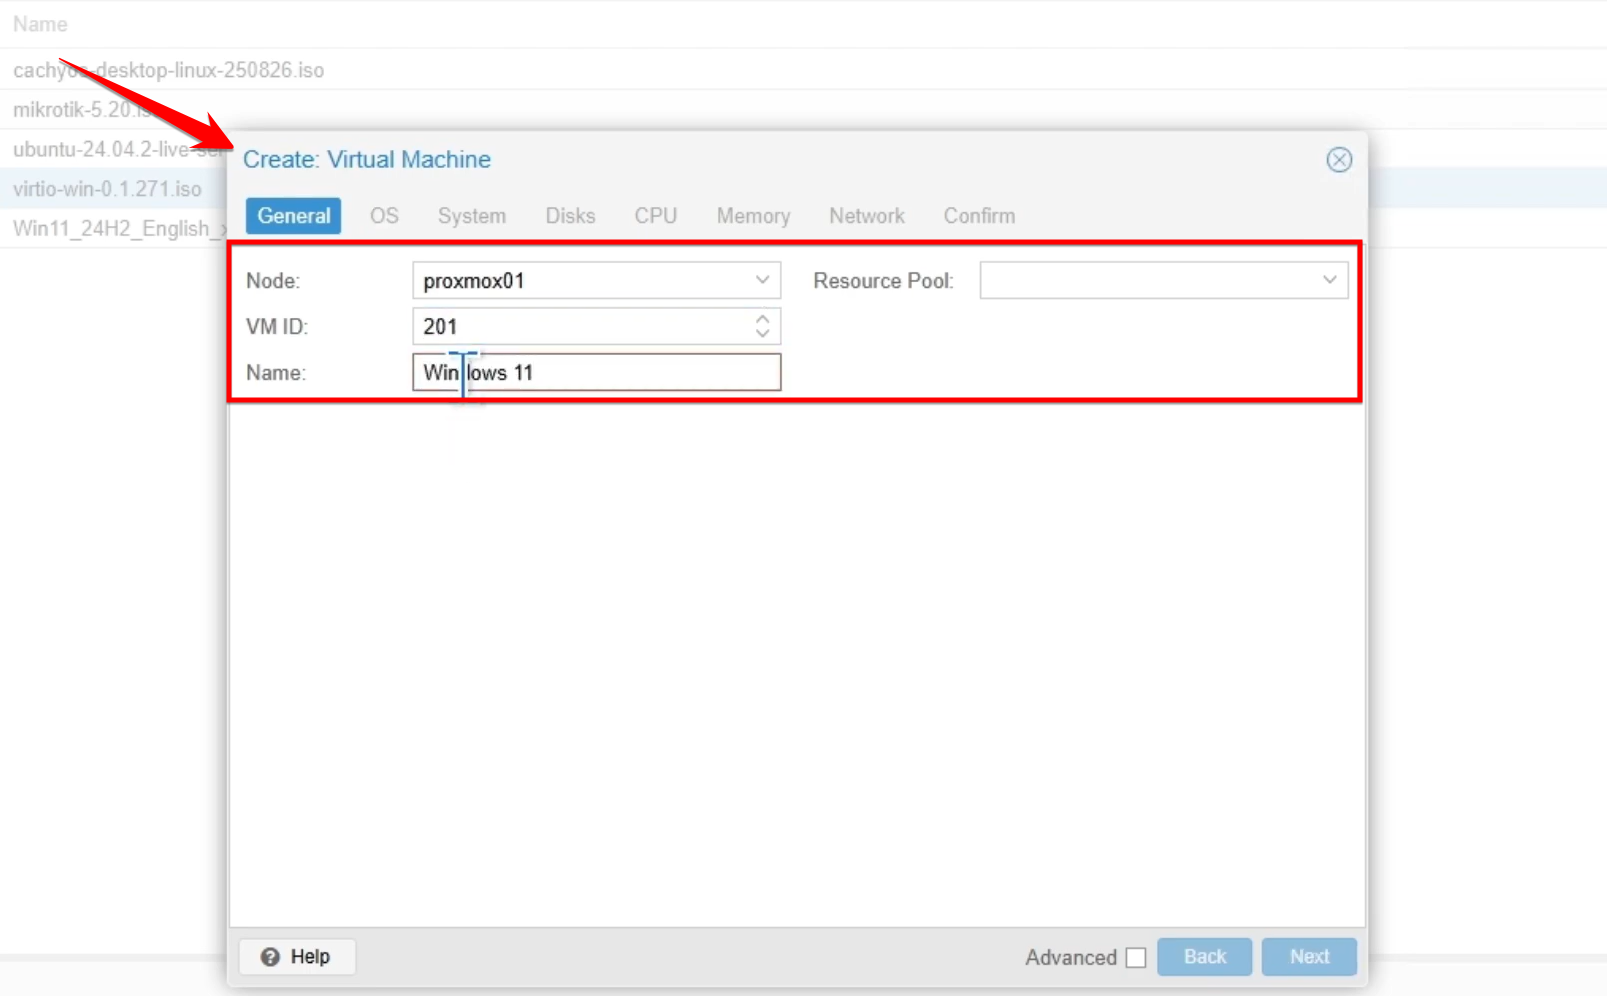
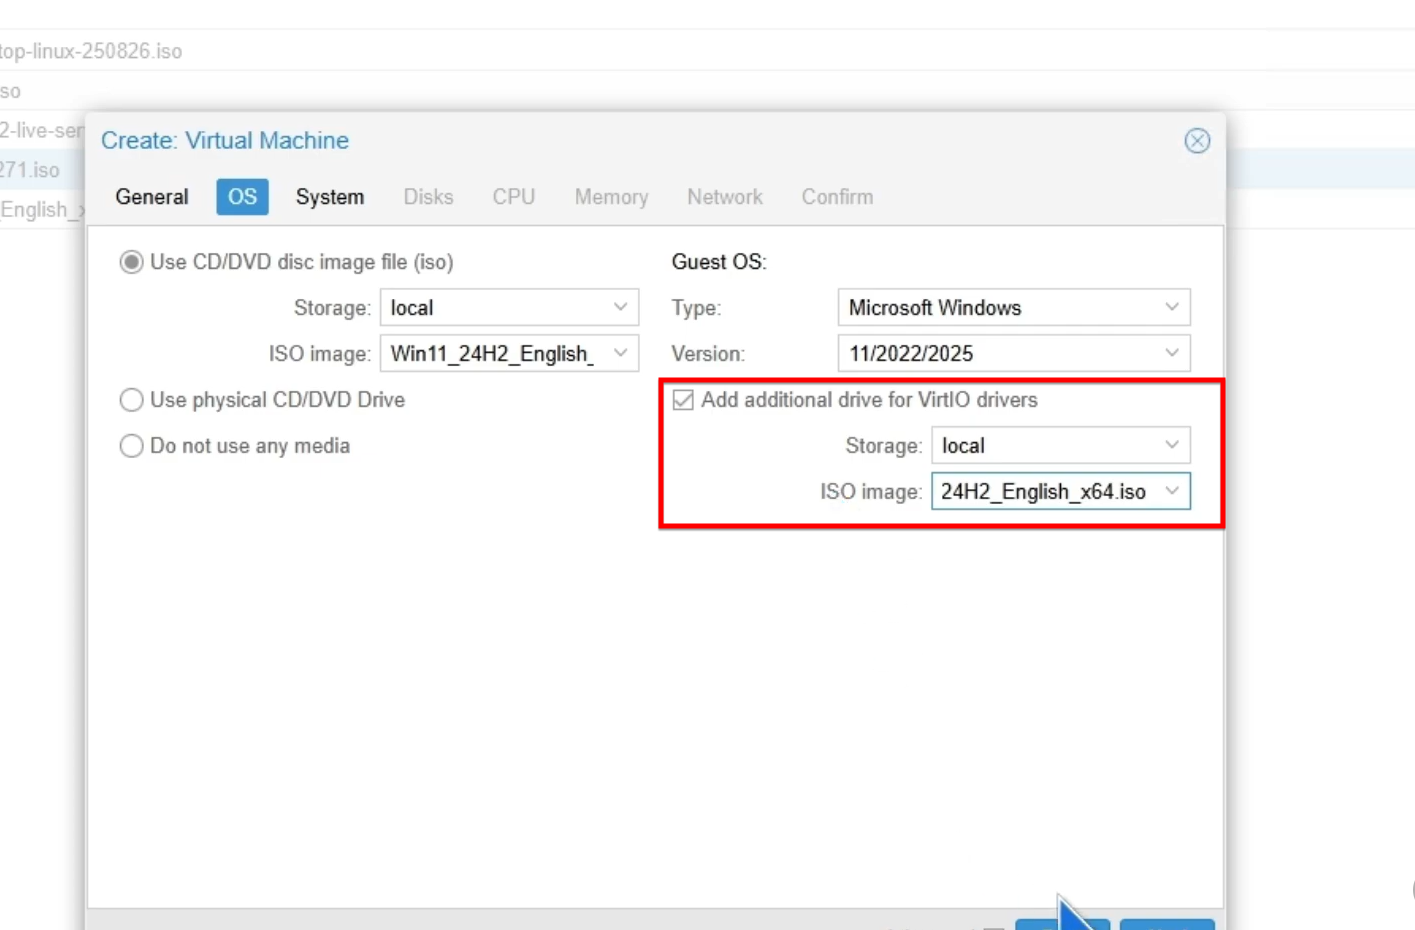
Create a new VM, name it, and select the Windows 11 ISO. Set the Type to “Microsoft Windows” and version to the latest (Windows 11/Server 2022-2025).
-
Add an additional drive and select the VirtIO ISO image.
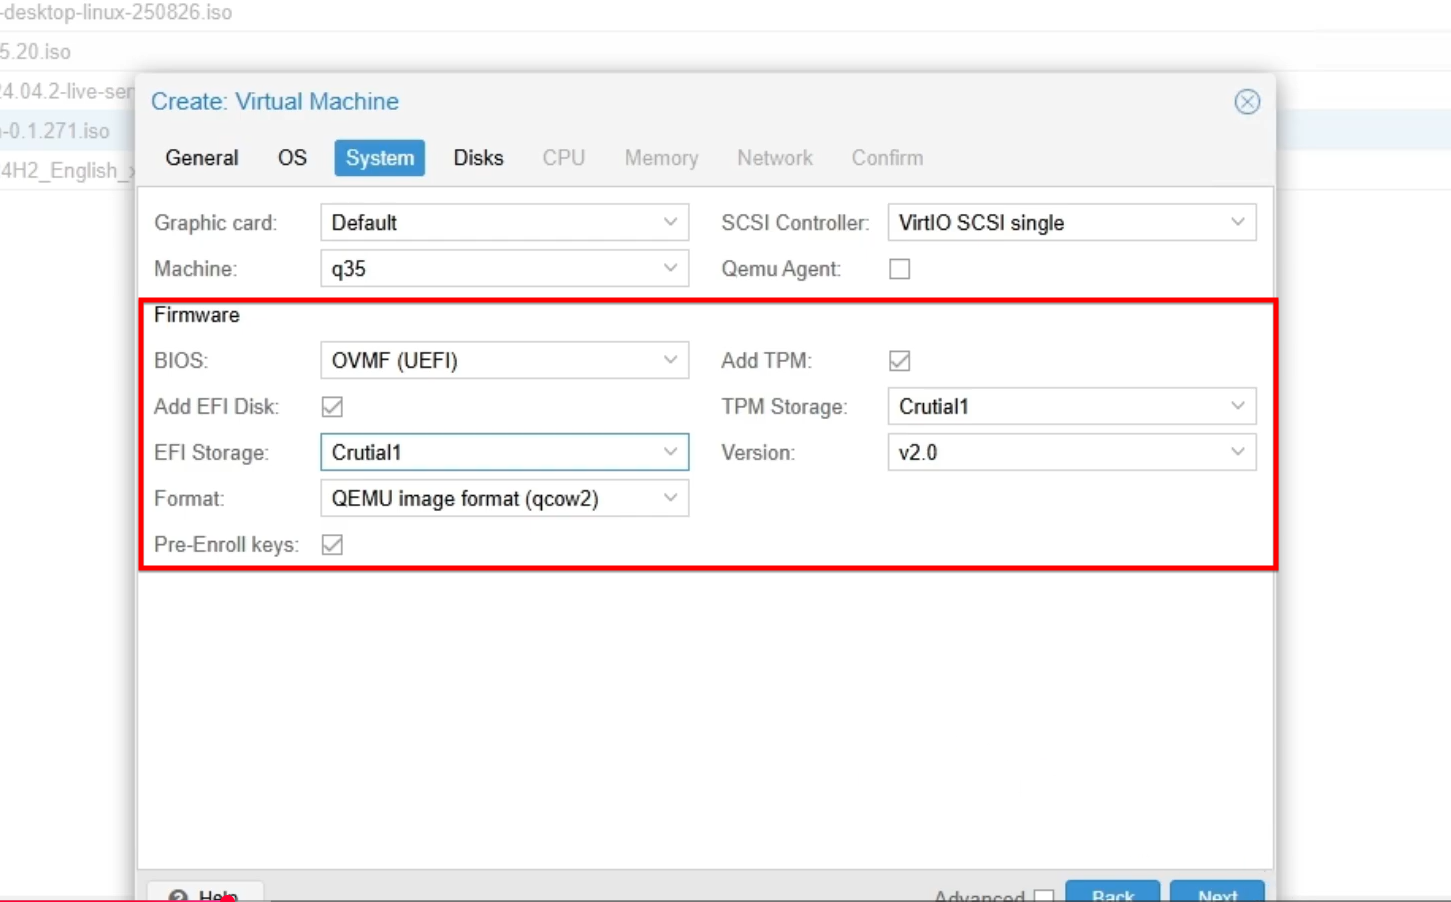
- Set the Machine to Q35 and BIOS to UEFI (OVMF).
- Add TPM storage and ensure the version is set to 2.0, as required by Windows 11
 .
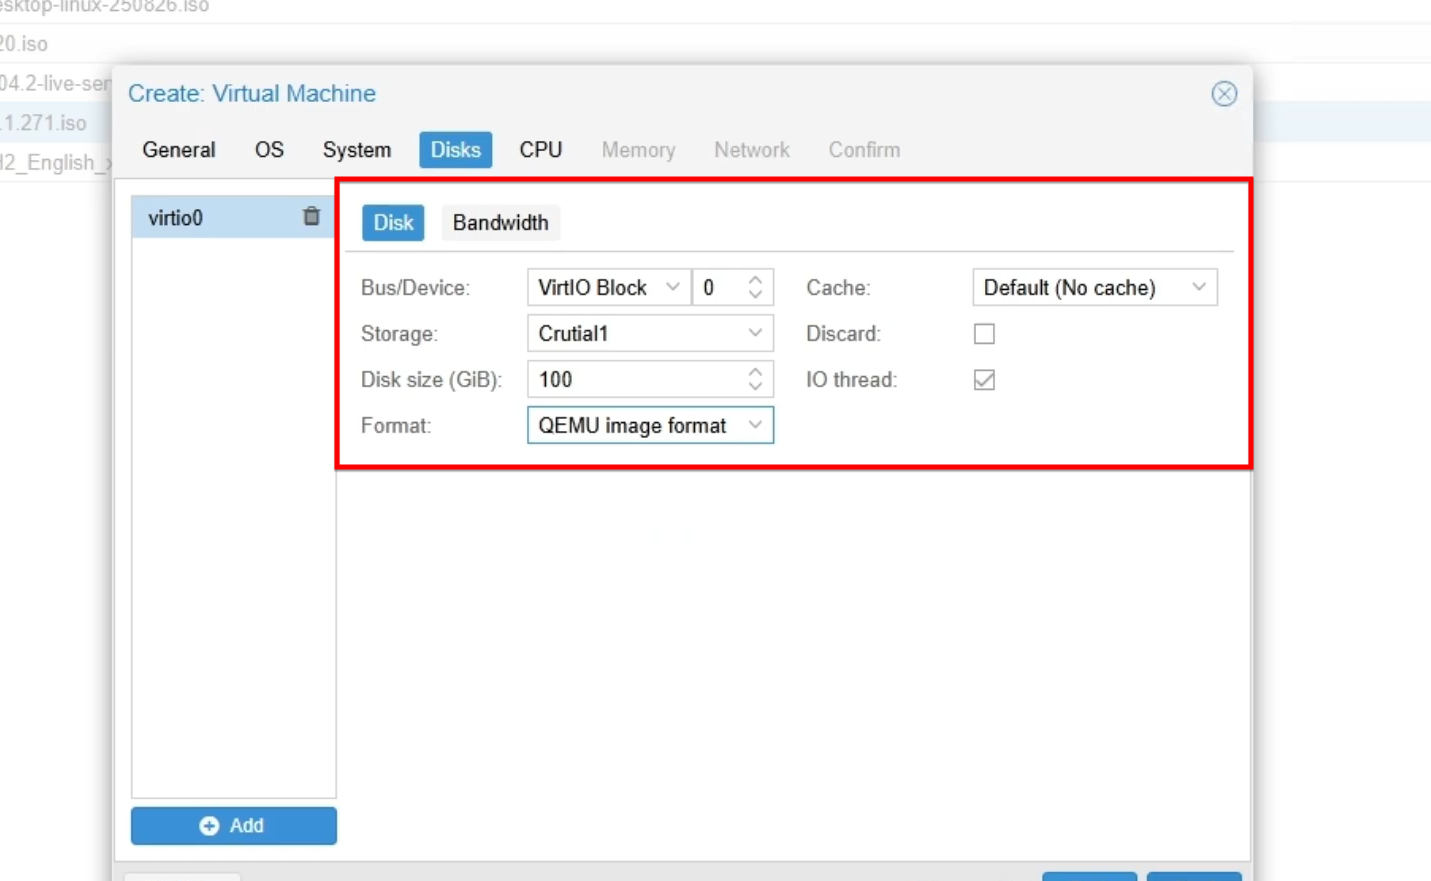
. - Use at least 64GB of storage and set the Bus/Device to VirtIO Block. For the CPU,
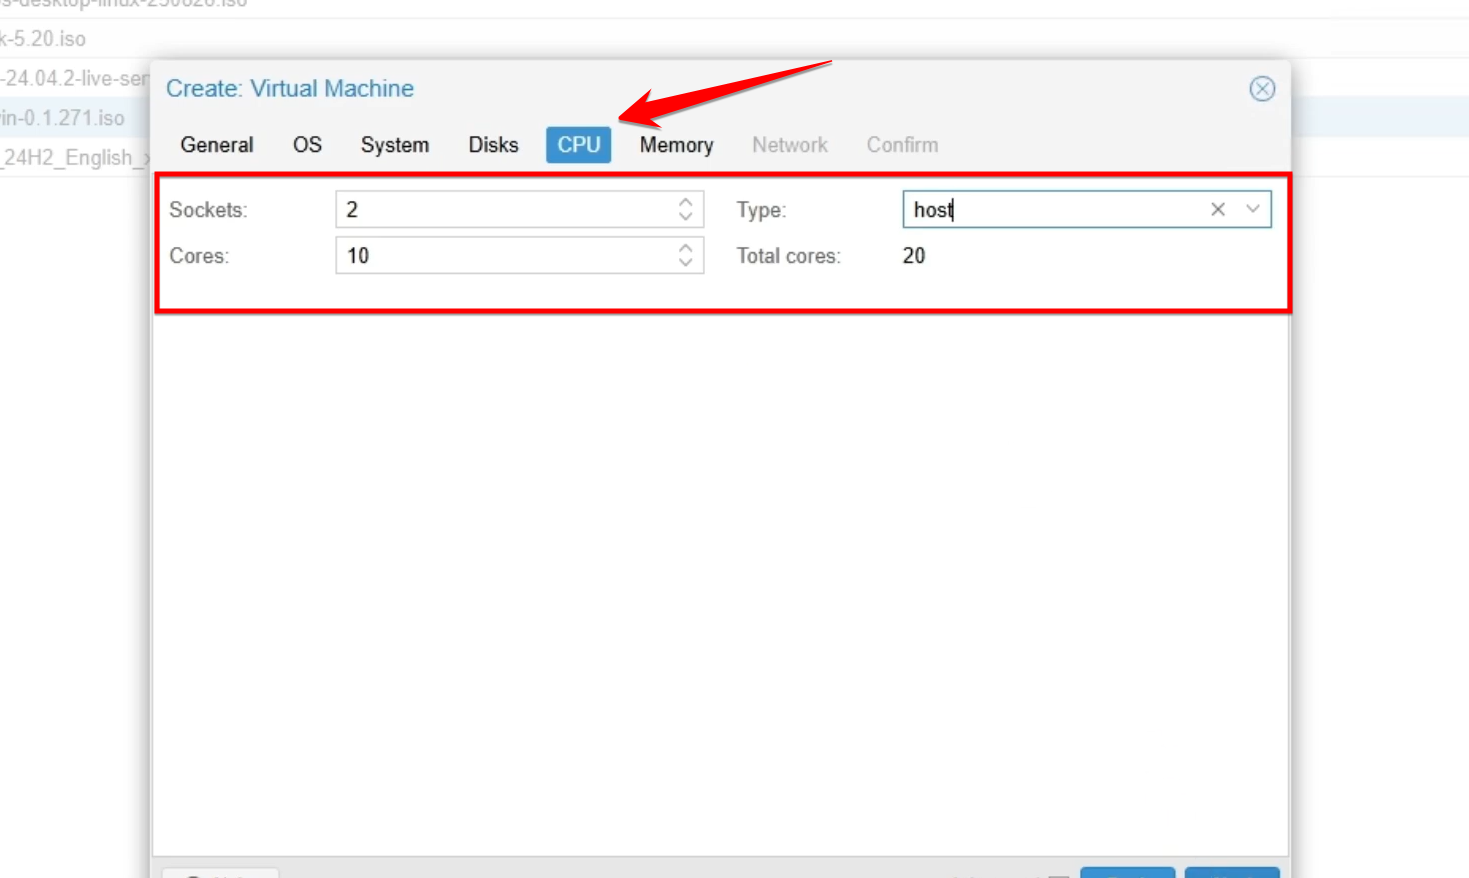
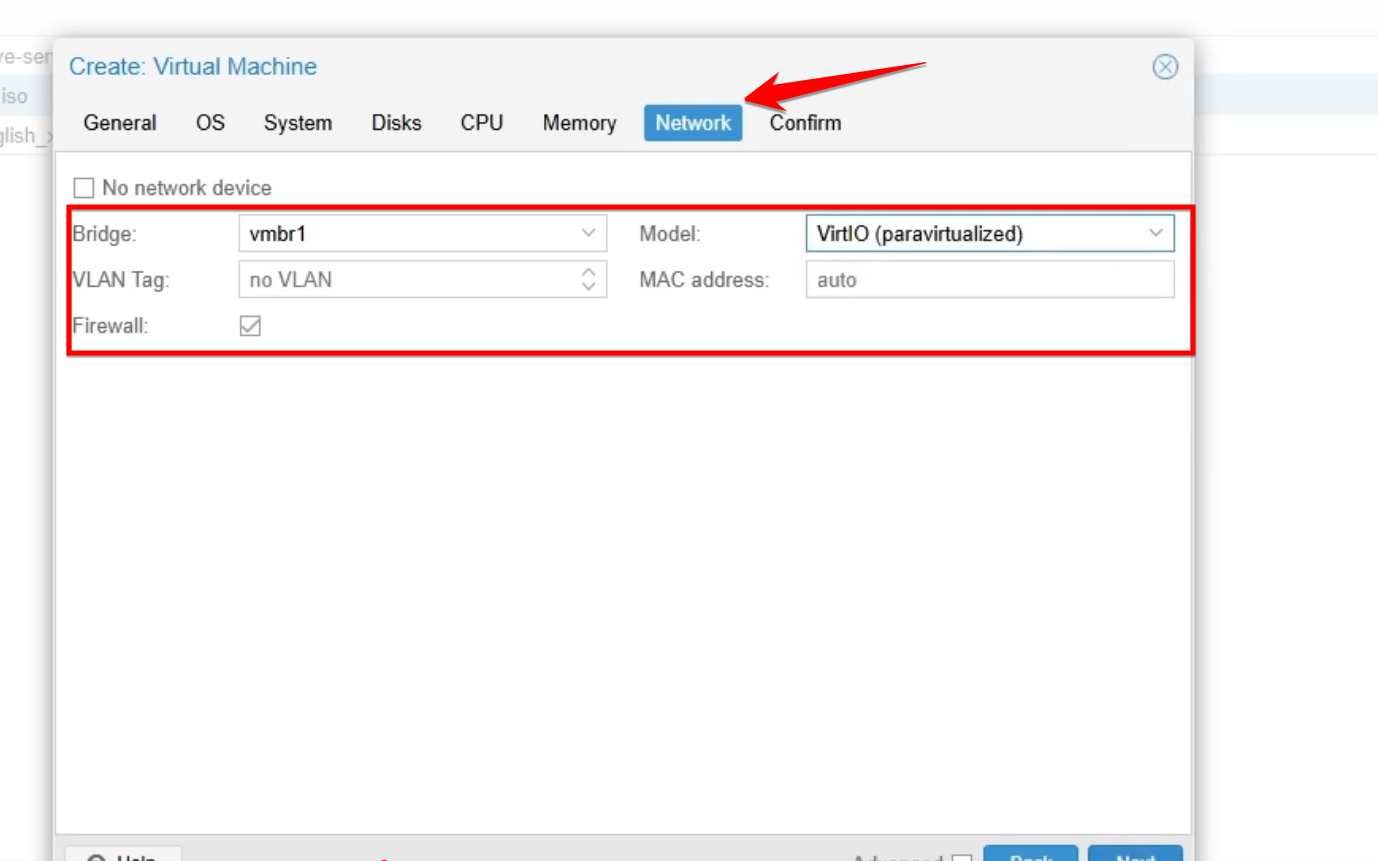
- Set the network model to VirtIO.choosing “Host” is recommended.
Step : 03 (Installation & Loading Drivers)
- Boot the VM and follow the Windows 11 installation prompts until you reach the disk selection screen.
- Because Windows 11 doesn’t natively include VirtIO drivers, the disk won’t appear initially. Click “Load Drivers”, browse the VirtIO disk, and select the AMD64\Win11 folder to reveal the drive.
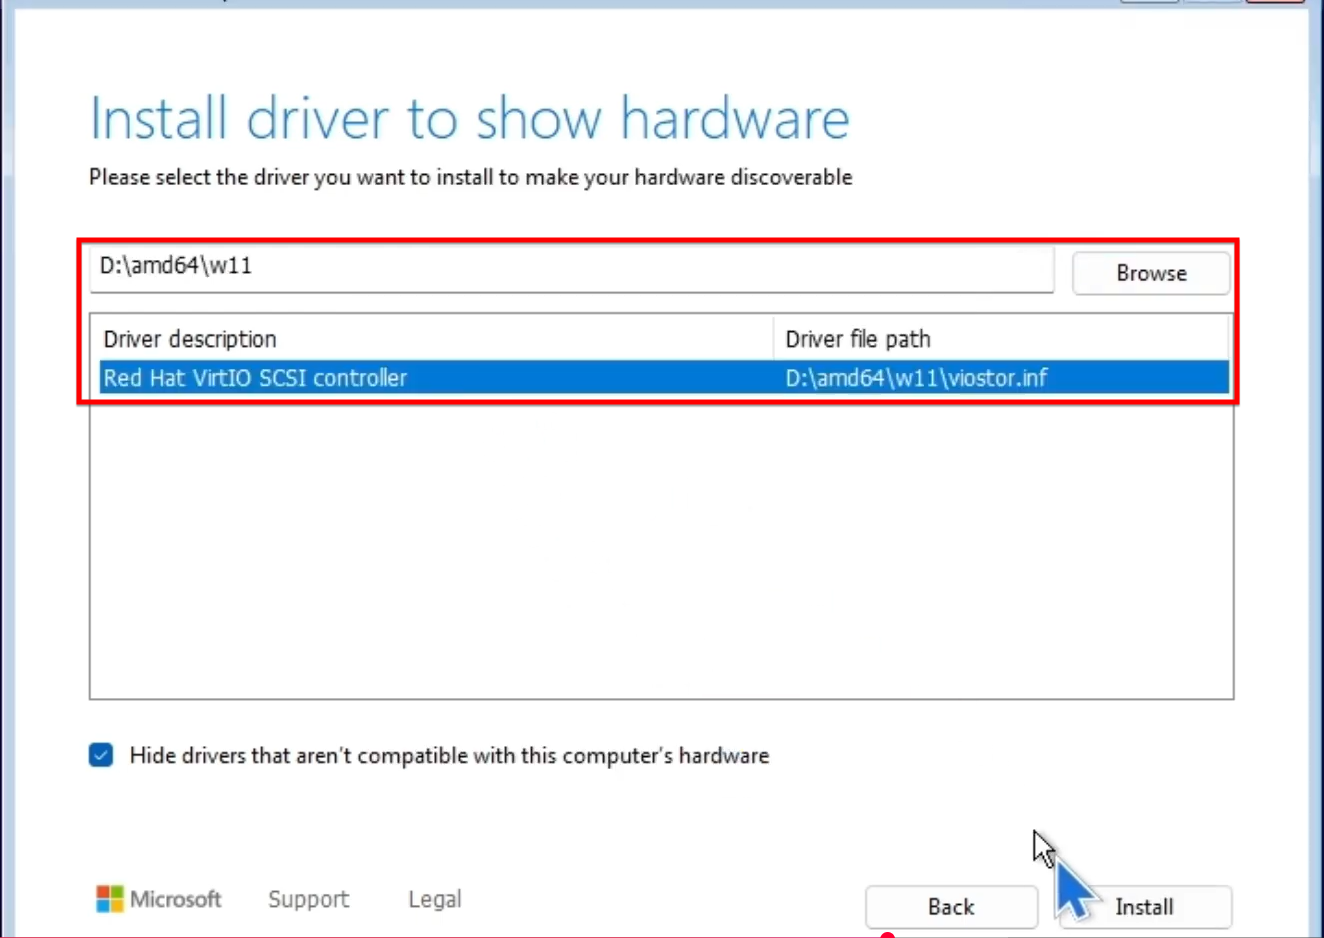
- Load the network drivers from the NetKVM \Win11\AMD64 folder to ensure internet connectivity during and after setup.

Step 04: (Finalizing Setup)
-
After the drivers are loaded, proceed with the installation. The system will reboot multiple times and may take up to 30 minutes to complete updates.

-
Once finished, you will be greeted by the Windows 11 desktop with working network and storage drivers.